ADS-RR(SR)-FOC1-AS
FoRd Focus with 4.3" myFoRd scReen 2015-2018
Automotive Data Solutions Inc. © 2018
4
Fig. 2.3
Fig. 2.5
Fig. 2.4
Fig. 2.1
Fig. 2.2
INSTALLATION INSTRUCTIONS
2
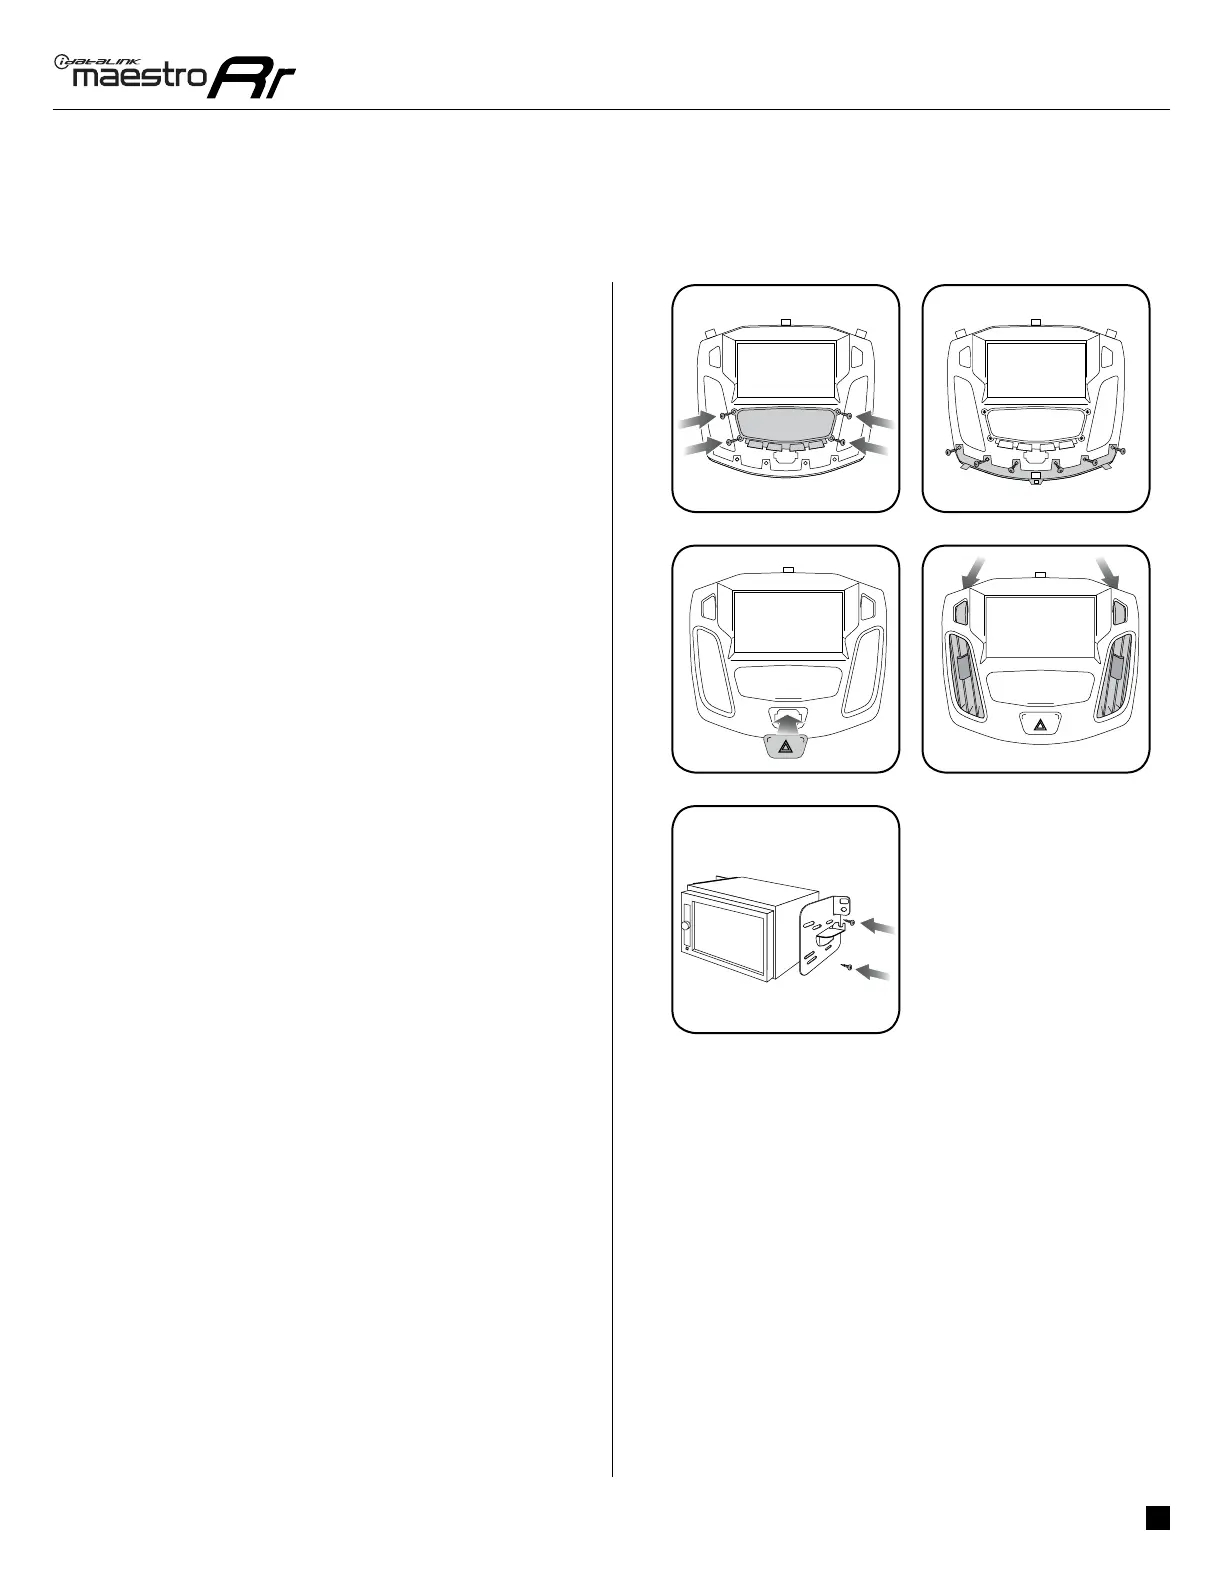
DASh KIT ASSEMBLy
1. Attach the pocket of the FOC1 to the bezel using the four (4)
provided screws. (Fig. 2.1)
NOTE: If the pocket sticks when opening or closing, you
can adjust the fi t by loosening the screws that secure the
pocket by 1/4 turn until the pocket no longer sticks.
2. Remove the bezel that is attached to the bottom of the
FOC1. Using the screws provided, attach the bottom bezel
trim that matches the factory bezel. (Fig. 2.2)
3. Install the hazard switch into the FOC1 bezel (the other
hazard/lock switch is not used). (Fig. 2.3)
NOTE: If the hazard button squeaks when you press it, pop
the hazard switch out of the kit and then re-install it. This
should eliminate the noise.
4. Install the factory vents on the FOC1 kit. (Fig. 2.4)
5. Install the metal brackets on to the aftermarket radio. (Fig.
2.5)

 Loading...