iDirect Evolution X1 Outdoor Satellite Router Installation and Safety Manual 21
Unpacking iDirect Evolution X1 Outdoor Satellite Router Equipment
5.2 Unpacking iDirect Evolution X1 Outdoor Satellite
Router Equipment
The X1 Outdoor Satellite Router may be shipped in one or more shipping containers,
depending on the type of bundle purchased. Once all of the boxes have been received,
perform the following tasks:
• Ensure the boxes are facing upward. (Refer to the box orientation arrows on the shipping
container.)
• Inspect all shipping containers. If any damage or other signs of mishandling are evident,
inform the carrier and either iDirect or the reseller.
• Remove the tape and any exterior covering from the box lid.
Note: Save the iDirect Evolution X1 Outdoor Satellite Router shipping boxes after
unpacking the system. These boxes will be needed in the event of moving or
shipping the system in the future.
Remove items from the box only as needed. Verify all of the proper X1 Outdoor Satellite
Router components and accessory items listed in the order have been received, including the
optional equipment ordered. See Section 5.3, Packing List, page 21 for the packing list.
5.3 Packing List
Prior to installation, ensure that all of the necessary components for a complete VSAT
installation have been received. If any items are missing or damaged, contact the Network
Operator/Distributor for replacement.
A typical installation includes the following items and some items are denoted with
alphabetic characters in Figure 7 on page 22:
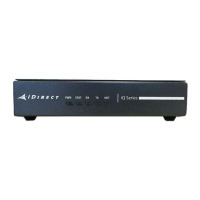
1. iDirect Evolution X1 Outdoor Satellite Router, see Figure 2 on page 14.
2. Power Module, see Figure 4 on page 16.
1 RG-6 or RG-11 solid copper conductor coax outdoor rated cable
1 3M Temflex™ 2155 Rubber Splicing Tape covered with Scotch® Super 33+, recommended
to weatherproof connectors, if connectors are not weatherproof certified or according to
manufacturer’s recommendations
1 RJ-45 connector
1 DB-9 to RJ-45 Adapter
1 Length of outdoor rated Ethernet LAN cable
1 (Optional) Wrench for securing/un-securing the plastic sealing nut designated as part A in
Table 12 on page 30.
Table 11. Recommended Installation Tools and Equipment (continued)
Quantity Tool