30 iDirect Evolution X1 Outdoor Satellite Router Installation and Safety Manual
Connecting the Ethernet LAN Cable
5.8 Connecting the Ethernet LAN Cable
This section describes the installation of the Ethernet LAN cable. Table 9 on page 17 lists the
pinout details and Figure 5 on page 17 shows the pin order, and Table 12 shows the Ethernet
cable installation steps.
CAUTION
Failure to follow the steps in Table 12, in
the order they are listed, can cause
damage to the Ethernet LAN cable.
After tightening the power connectors, wrap
with weatherproofing tape, if necessary,
following manufacturer’s guidelines.
All cables should be installed with a drip
loop.
Table 12. RJ 45 LAN Ethernet Cable Installation Steps
Step Instructions Diagram
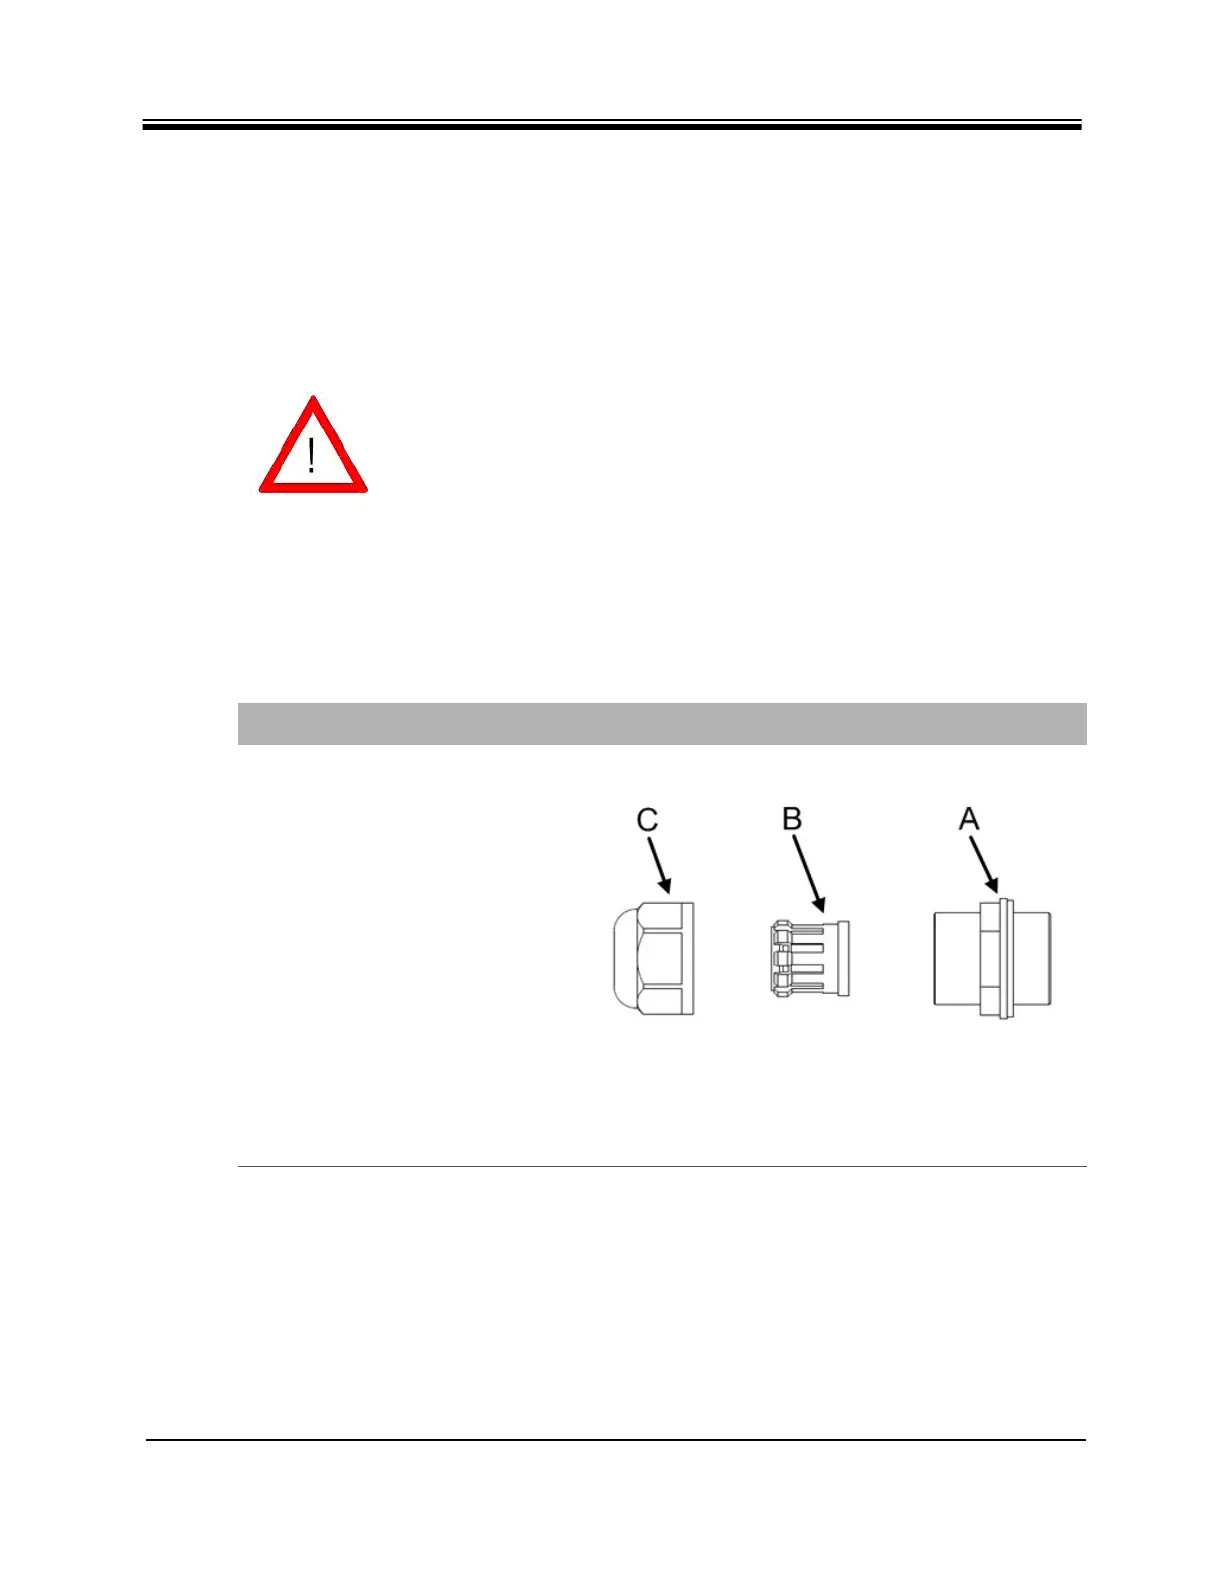
1.
Take the gland out of the
package and disassemble. Parts
are labeled on the right.
A - Sealing nut
B - “Compression nut” -
Clamping claw (black, plastic)
and sealing/compression ring
(gray, rubber) - part B of the
gland is split, so that, if the
RJ45 clip is already on the
cable, the gasket can be easily
opened and placed around the
cable.
C - Lock nut body