38
Operating
PbyP (Picture by Picture)
<Only for IN5135 and IN5145>
(continued)
Press any button to select an input port on the remote control or press the
INPUT button on the control panel. A dialog box to select the input signal for
the main area will be displayed. Choose a signal using the ▲/▼ buttons. To
change the signal in the sub area, use the ◄/► buttons to temporarily switch
to the sub area.
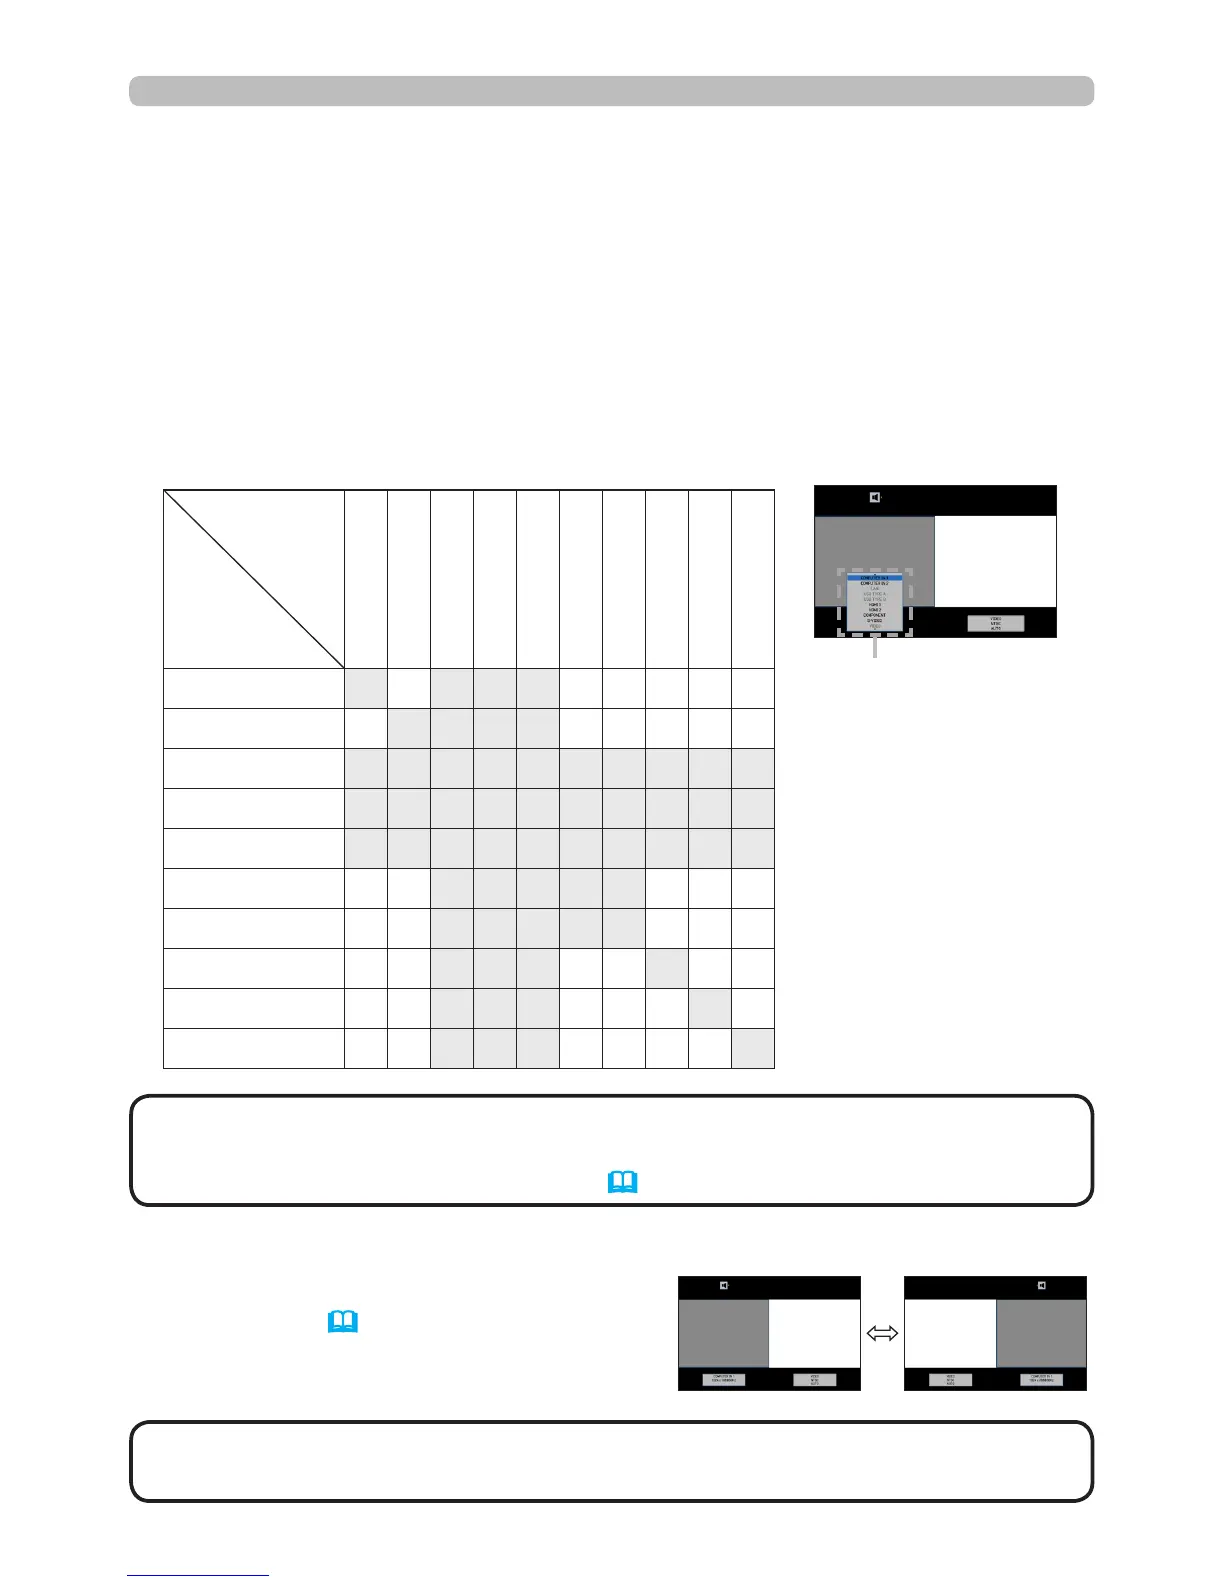
You cannot display the same signal on both areas. The table below provides
details on available input signal combinations. Any combinations marked with
"X" cannot be selected.
• Some signals may not display correctly in PbyP mode, even if they
normally can.
NOTE
Changing the picture input signal
Press the MY BUTTON assigned to
PbyP SWAP (68). The position of both
areas is exchanged without any setting
changes.
PbyP SWAP function
Sub area
Main area
COMPUTER IN1
COMPUTER IN2
LAN
USB TYPE A
USB TYPE B
HDMI 1
HDMI 2
COMPONENT
S-VIDEO
VIDEO
COMPUTER IN1
X O X X X O O O O O
COMPUTER IN2
O X X X X O O O O O
LAN
X X X X X X X X X X
USB TYPE A
X X X X X X X X X X
USB TYPE B
X X X X X X X X X X
HDMI 1
O O X X X X X O O O
HDMI 2
O O X X X X X O O O
COMPONENT
O O X X X O O X O O
S-VIDEO
O O X X X O O O X O
VIDEO
O O X X X O O O O X
main area sub area
main
area
sub
area
main
area
sub
area
• The combined input signals marked with an "O" can be selected
and displayed in the PbyP mode even when the port is set to SKIP with the
SOURCE SKIP on the OPTION menu (65).
NOTE
Input signal