110
Maintenance
Check and clean the air lter periodically. When the indicators or a message
prompts you to clean the air lter, please clean the air lter as soon as possible.
The lter unit, which contains 2 sheets of lters, is inside the lter cover. In
addition, an extra air lter is attached to inside of the
IN5142
,
IN5144
,
IN5144a
and
IN5145
. lter cover. If one of the lters is damaged or heavily soiled, replace
the entire lter unit with a new one.
When purchasing a new lter from your dealer, request a lter unit with the
following part number:
Part number <IN5132, IN5134, IN5134a, IN5135>: SP-FILTER-02
Part number <IN5142, IN5144, IN5144a, IN5145>: SP-FILTER-03
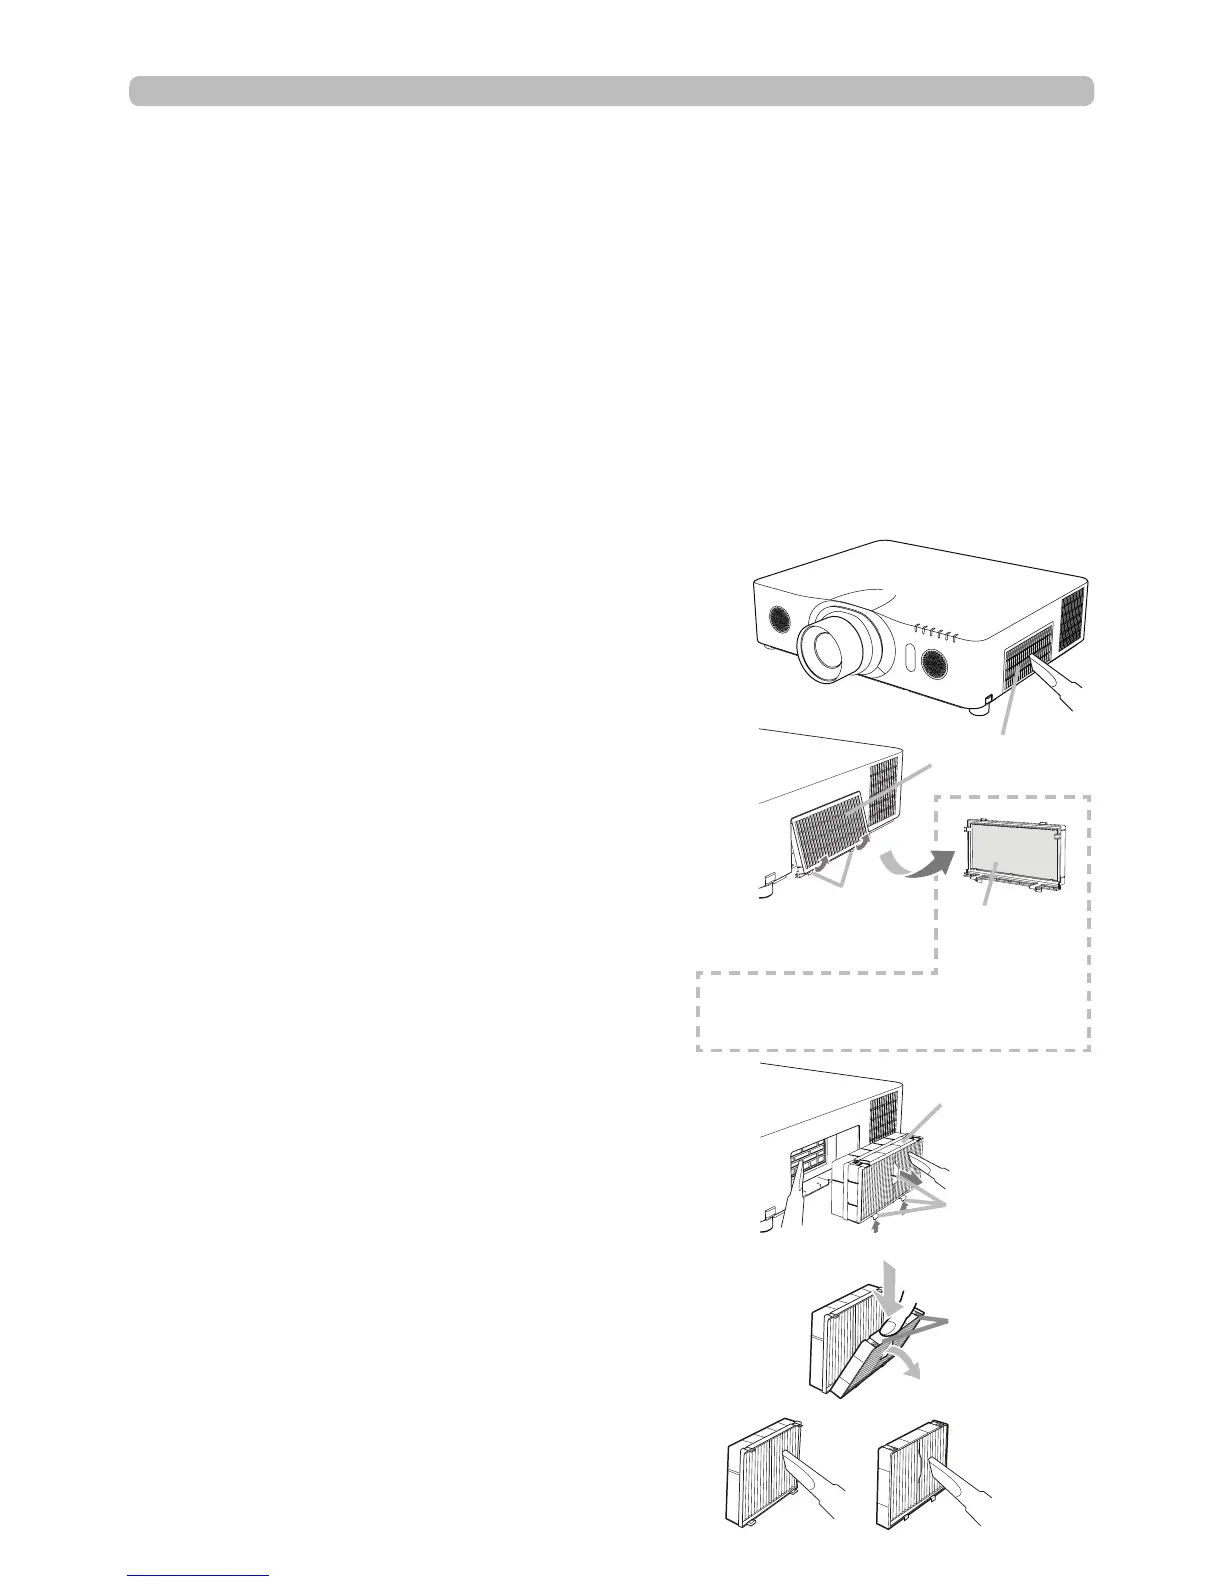
1.
Turn the projector off, and unplug the power
cord. Allow the projector to sufciently cool
down.
2.
Use a vacuum cleaner on and around the
lter cover.
3.
Pick and pull up on the lter cover knobs
to take it off.
4.
Press up slightly the bottom side knobs
to unlock the bottom side of the lter unit.
Pull the center knob to take the lter unit
off.
5.
Use a vacuum cleaner for the projector
lter vent and the outside of the lter unit.
6.
The lter unit consists of two parts. Press
down around the interlocking parts to
unlock it and separate the two parts.
7.
Use a vacuum cleaner to clean the inside
of each part of the lter unit. If the lters
are damaged or heavily soiled, replace
them with new ones.
8.
Combine the two parts to reassemble the
lter unit.
9.
Put the lter unit back into the projector.
(continued on next page)
Filter cover
Filter cover
knobs
Filter unit
Filter unit
knobs
Interlocking
parts
2
3
4, 5
6
7
Extra
air lter
< Only for IN5142,
IN5144, IN5144a and IN5145>
Cleaning and replacing the air lter