14BChapter 15: Storage management
TruVision DVR 44HD User Manual 109
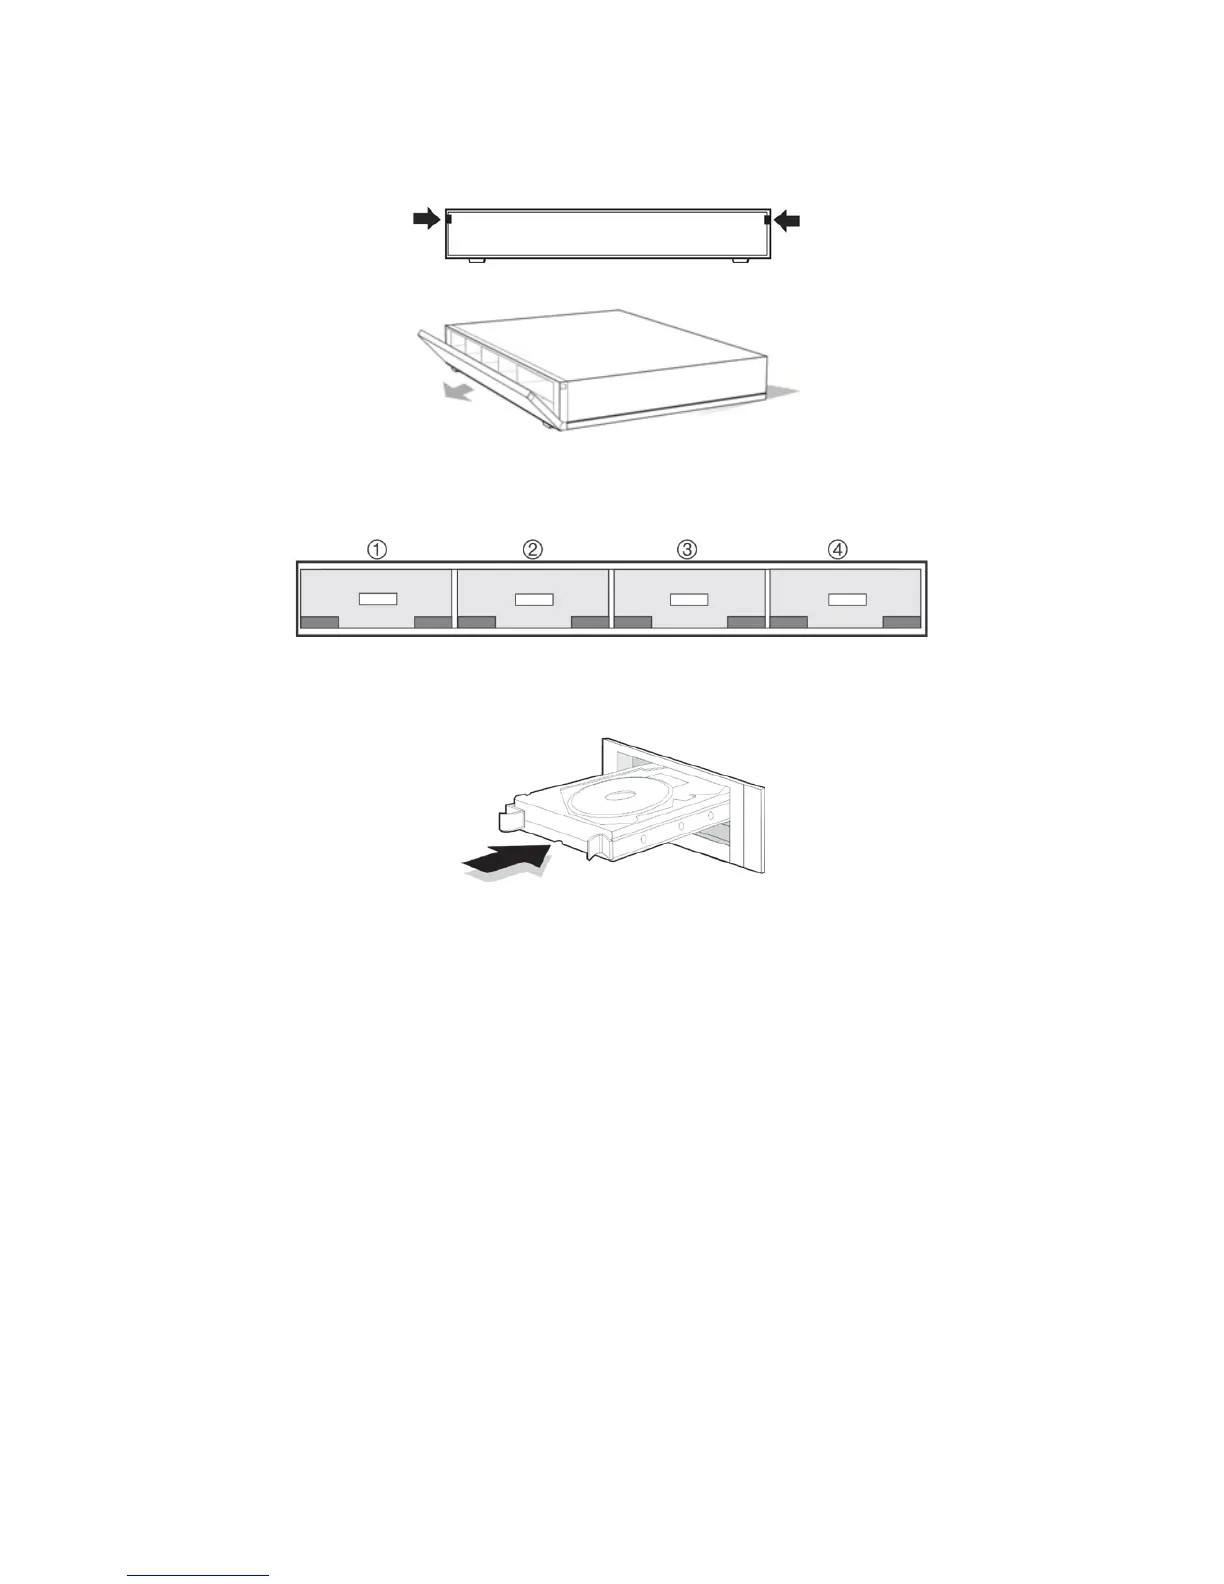
3. Use the key provided in the accessories box to unlock the recorder front panel.
4. Press the latches on both sides of the front panel to open it.
5. Install the HDDs as shown below. The first drive in position number 1, the second drive in
position number 2, etc. Continue to install all the hard drives in numerical order.
6. Insert a HDD into one of the HDD bays until it has fully seated into position. Repeat with the
rest of the HDDs.
7. Close and re-lock the front panel.
Note: The HDDs must be installed BEFORE powering up the unit. The drives are defaulted
to a single HDD group that is automatically ready to record once cameras are added and
configured with recording schedules.
8. Apply the supplied label to the recorder chassis. Place it next to the original label without
covering it.
Note: Failure to install the label will affect the warranty of the recorder.
9. Initialize the new HDDs. See “Initialize a HDD” on page 103.
Add a network storage system
You can install a network storage system (NAS) to remotely store recordings.
To install a network storage system (NAS):
1. From the menu toolbar, click Storage Management > HDD Information.