SXG
46
c. Remove the wing bolt. Draw the element out of the
air-cleaner.
d. Dust it off by patting lightly while holding it with the
other hand.
e. When the element does not become clean only by
patting, blow dust off the element with compressed
air. Apply compressed air from inside to outside of the
element.
f. When the element does not become sufficiently clean
only by blowing, dip it in neutral detergent solution
for about 30 minutes and then rinse it in fresh water.
Then dry it in the atmospheric temperature.
g. After cleaning, install the element in reverse order of
disassembly.
Important:
・ Never hit the element against a hard object like a
concrete wall.
・ An element which has already been washed five times
or is damaged should be replaced with a new one.
・ Never attempt to start the engine without the
aircleaner element. Such operation will cause engine
trouble.
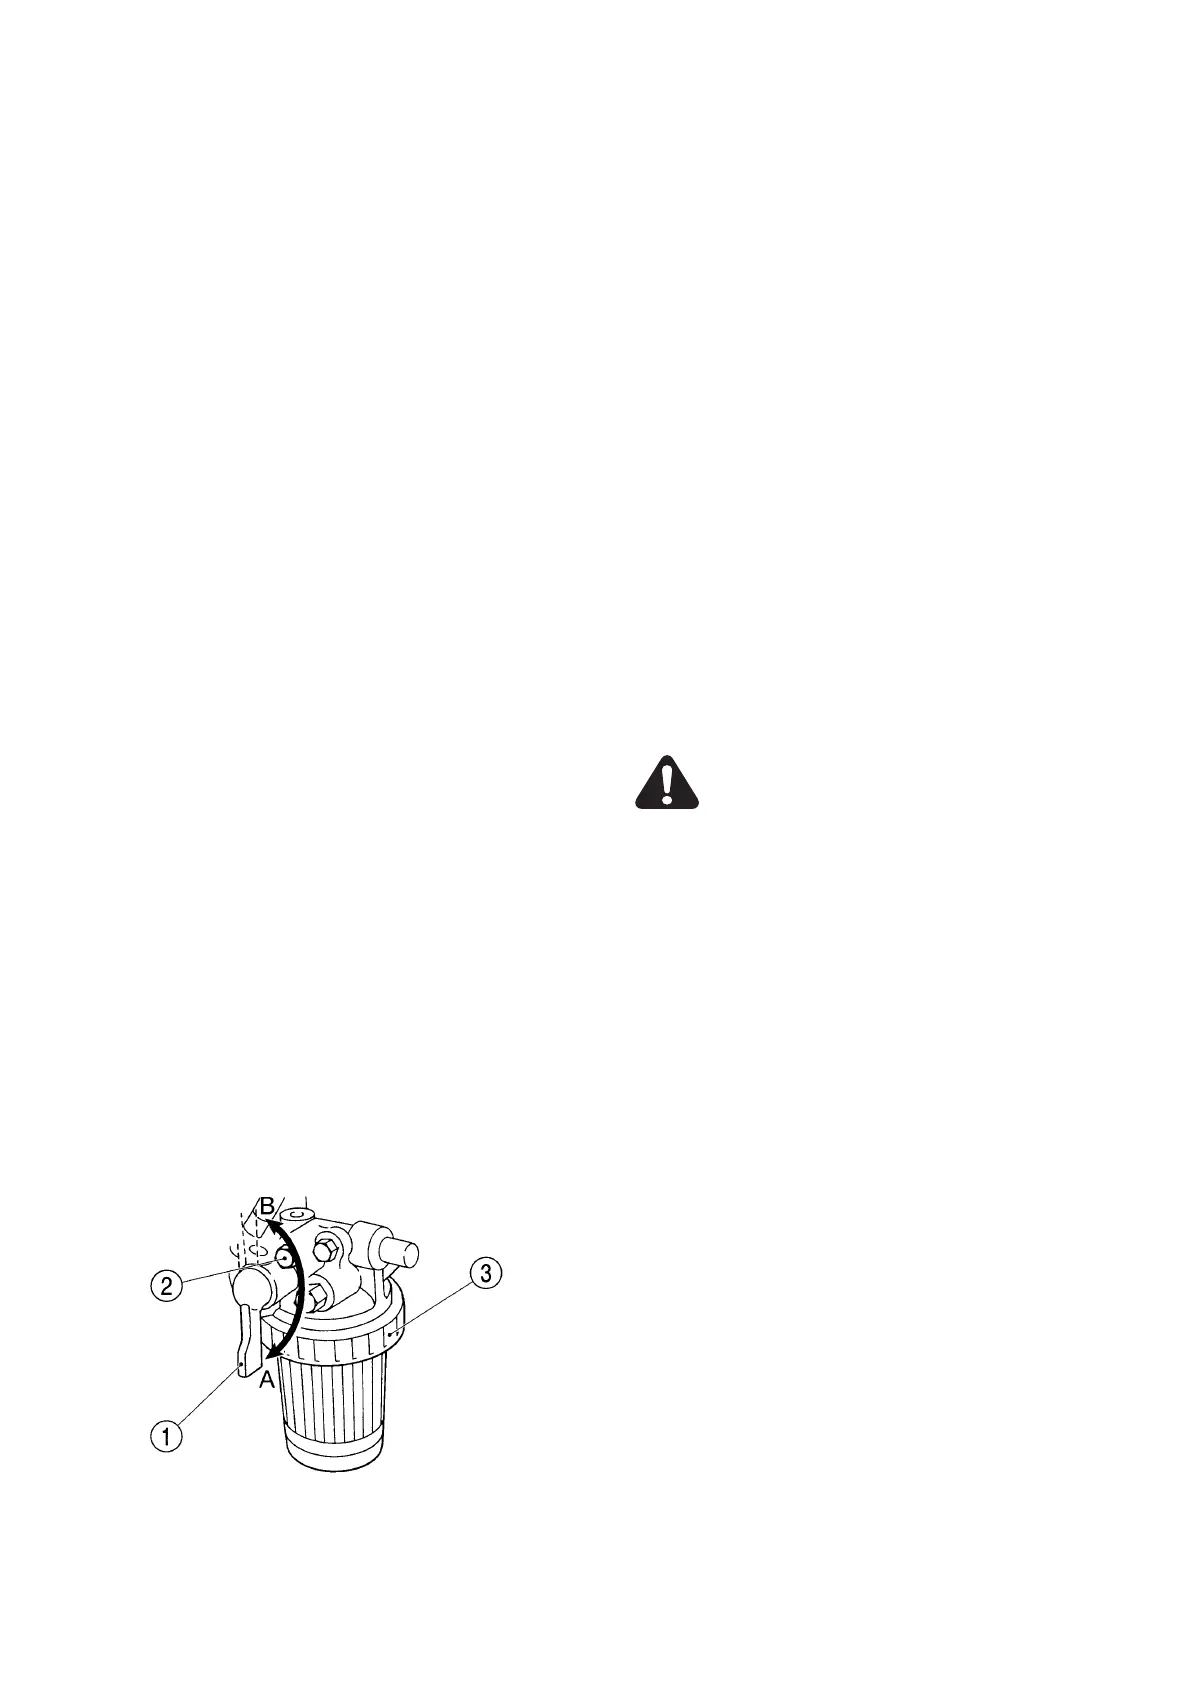
6. FUEL STRAINER
The fuel strainer is located under the floor step of
the left side of the lawn mower. Check the strainer
for accumulated dust or water in the bottom of the
strainer cup.
a. When dust or water is found accumulated in the
bottom, turn the fuel cock lever by 180 degrees
towards the bolt to stop fuel flowing.
b. Remove the ring nut to remove the strainer cup and
element.
c. Wash the inside of the strainer cup and element in
diesel fuel.
(1) Fuel cock lever (3) Ring nut
(2) Air-bleeding screw (A) Open (B) Close
Danger:
・ Smoking is prohibited when the fuel strainer is being
cleaned or inspected.
・ Keep away sparks and open flames from the strainer.
・ Spilt fuel should be wiped away immediately.
Important:
・ Be sure to install the O-ring when re-installing the
strainer.
・ When the fuel tank is emptied and air is trapped in the
fuel system, bleed the air as follows:
1. Fill the fuel tank.
2. Turn the fuel cock to "Open" position.
3. Loosen the air-bleeding screw and let air bubbles
out.
4. Loosen the air-bleeding screw of the fuel injection
pump and let air bubbles out of the pump.
7. INSPECTION OF FUEL HOSES
Check the fuel hoses for cracks and fuel leak after
every 100 hours of operation. A damged hose should
be replaced with a new one.
8. FAN BELT
Warning:
・ Before checking the fan belt, stop the engine and
remove the starter key without fail.
・ Wait until the engine and accessories cool down
completely to prevent burns.
The fan belt is accessible from the right rear of the
engine room by opening the engine hood. Check the
belt for tension and damage.
Push down the belt with a finger at the intermediate
point between the alternator and crankshaft pulley
with a force of 10 kgf (22 lb) and see its deflection.
If it deflects by about 13.8 mm (0.54 in.) ~ 14.8 mm
(0.58 in.), the tension is proper.