(Main Parts)
MAINTENANCE
SM-18006
4-73
2
Testing Inverter Parts (208/230V Type)
● Testing the Inverter PCB (INV: PV151)
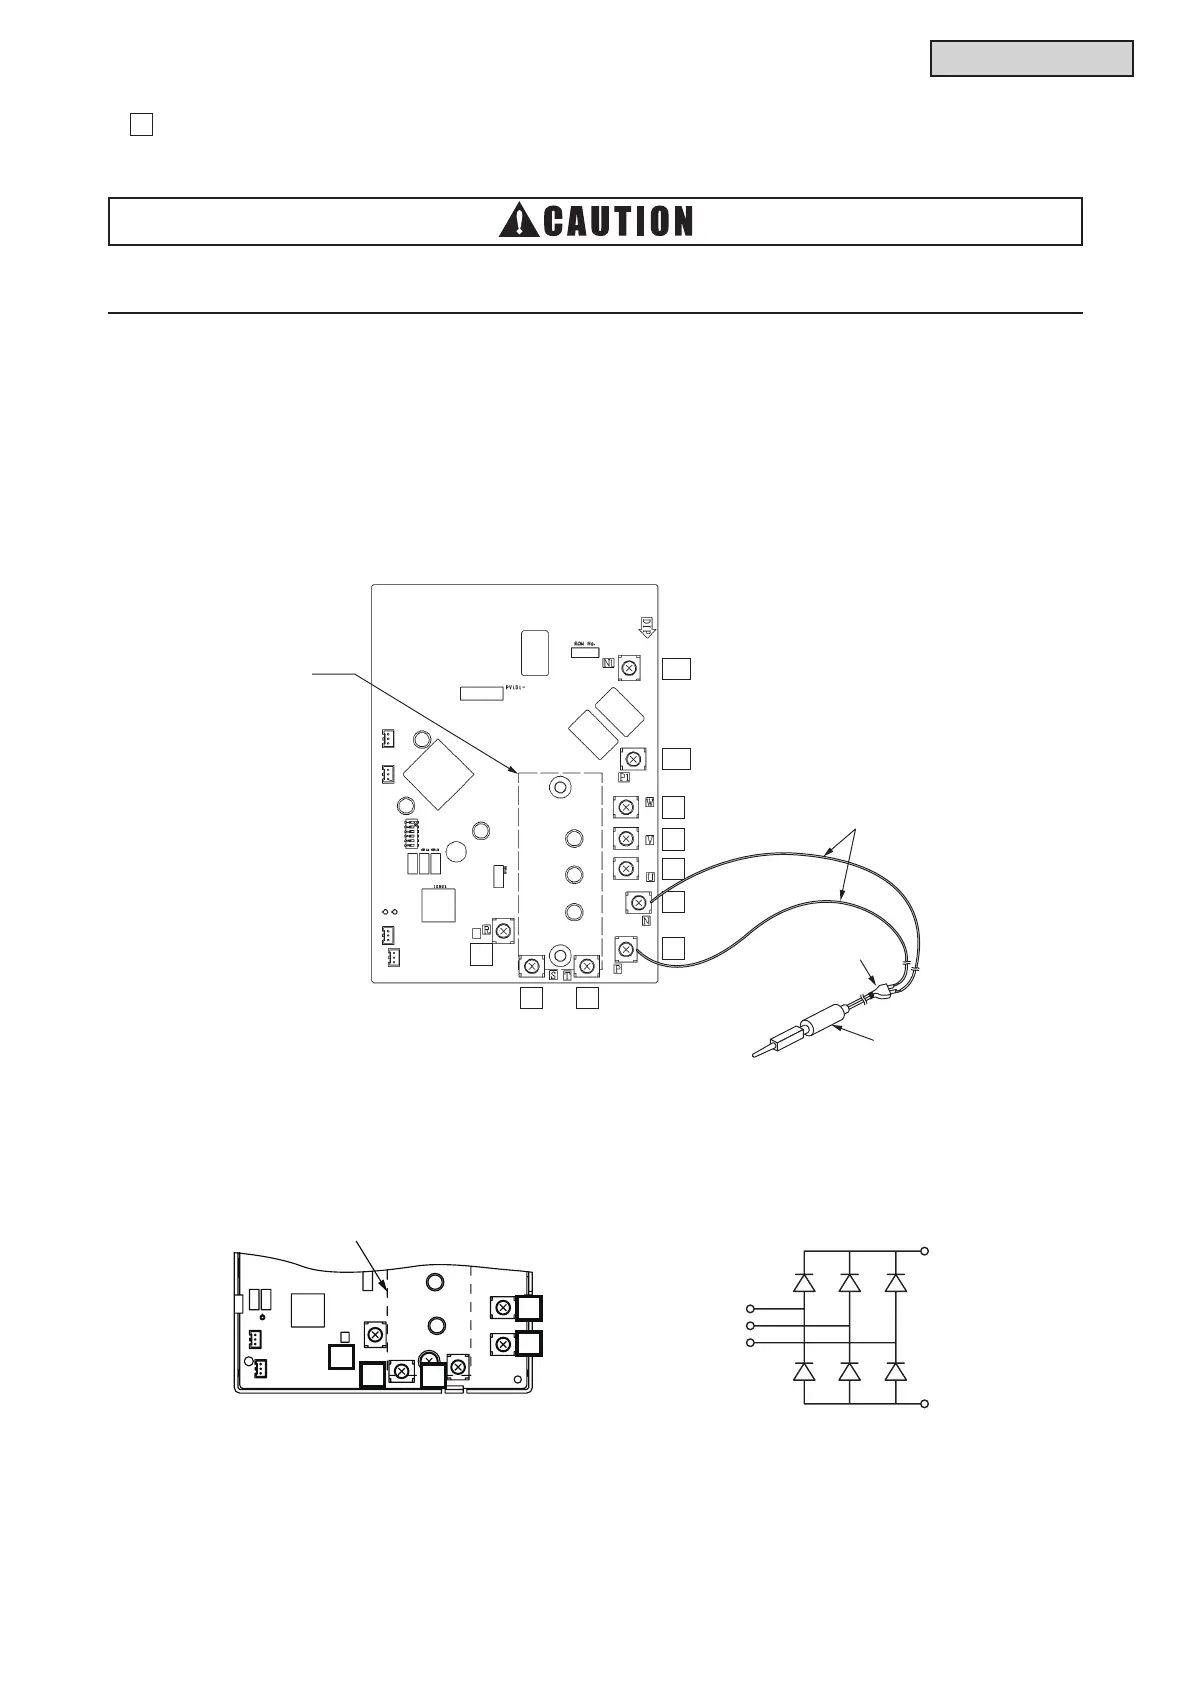
(1) Outer Appearance and Rectier Circuit of CIB
< Procedures >
(a) Turn OFF the main switches and wait for three minutes. Check to ensure that no high voltage exists.
If LED501 on the main power PCB (MPB) is ON after start-up and LED501 on MPB is OFF after
turning OFF power supply, the voltage will decrease to DC50V or less.
(b) Attach connecting wires to a plug of electrical solder bit.
(c) Attach the wires to terminals, P and N on the inverter PCB (INV). => Discharge is started, resulting
in hot solder bit.
(d) Wait for two or three minutes and measure the voltage again. Check to ensure that no voltage is
charged.
Perform this high voltage discharge work to avoid an electric shock.
Take special care to avoid a short circuit between terminal P and N.
● High Voltage Discharge Work for Replacing Parts
N
W
V
U
P
R
S T
CIB
N1
P1
Solder Bi
Plug
T
S
R
N
P
S
T



 To Next Page