13
3 Installation
3.3 Edge-to-edge mounting
3.4 Fitting into position
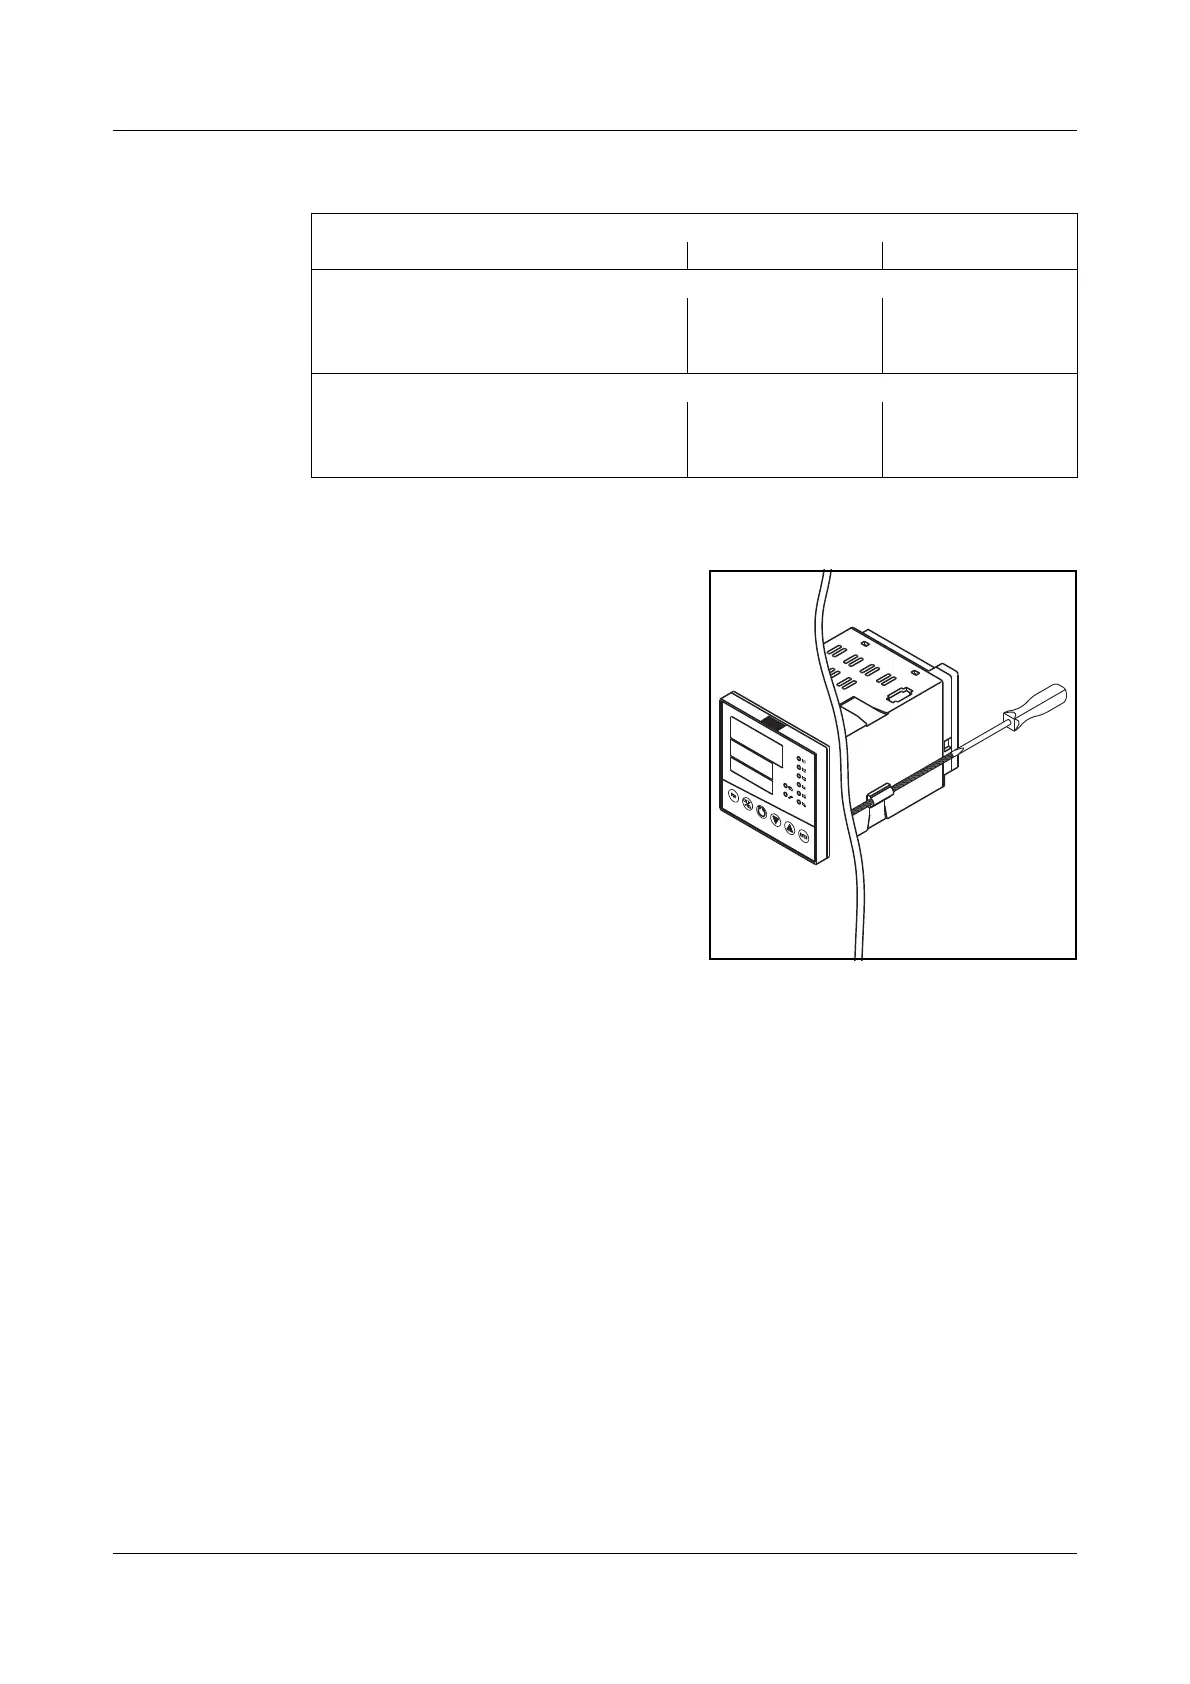
h Fit the seal provided onto the
instrument body.
h Insert the controller from the front
into the panel cut-out.
h Insert the mounting brackets from
the rear of the panel into the guides
at the sides of the housing.
The flat sides of the brackets must
be against the housing.
h Place the brackets against the rear
of the panel and tighten them evenly
with a screwdriver.
3.5 Cleaning the front panel
The front panel can be cleaned with the usual rinsing and cleaning agents. It
has a limited resistance to organic solvents (e. g. methylated spirits, white spir-
it, P1, xylol, etc.). Do not use high-pressure cleaning equipment.
Minimum spacing of the panel cut-outs
Type horizontal vertical
without setup plug:
703580/0...
703585/1... (portrait format)
703585/2... (landscape format)
11mm
11mm
30mm
30mm
30mm
11mm
with setup plug:
703580/0...
703585/1... (portrait format)
703585/2... (landscape format)
11mm
11mm
65mm
65mm
65mm
11mm


 To Next Page