Original User Manual | Xion Pedelec 9
4 Quick start
1. Charge the battery completely before riding for the
rst time. Charge temperature: 0°C to 45°C.
2. Remove the cover om the charging socket.
3. Connect the plug of the charger to the battery. When
positioned correctly, the plug is held in the socket by
magnets.
4. Insert the mains plug for the charger into the socket.
› You must charge the battery completely before
using it for the rst time. Depending on the
manufacturer of the cells, the batteries will have
a charge state of between 30 and 50%.
› You can also remove the battery om your
Pedelec and charge it elsewhere. For more
information on this subject, refer to ➠
Chapter 5
“Battery”.
5. The charge state of the battery is indicated by ve
LEDs. The battery LEDs light up or ash during charg-
ing. Once all of the LEDs have gone out, the battery is
lly charged.
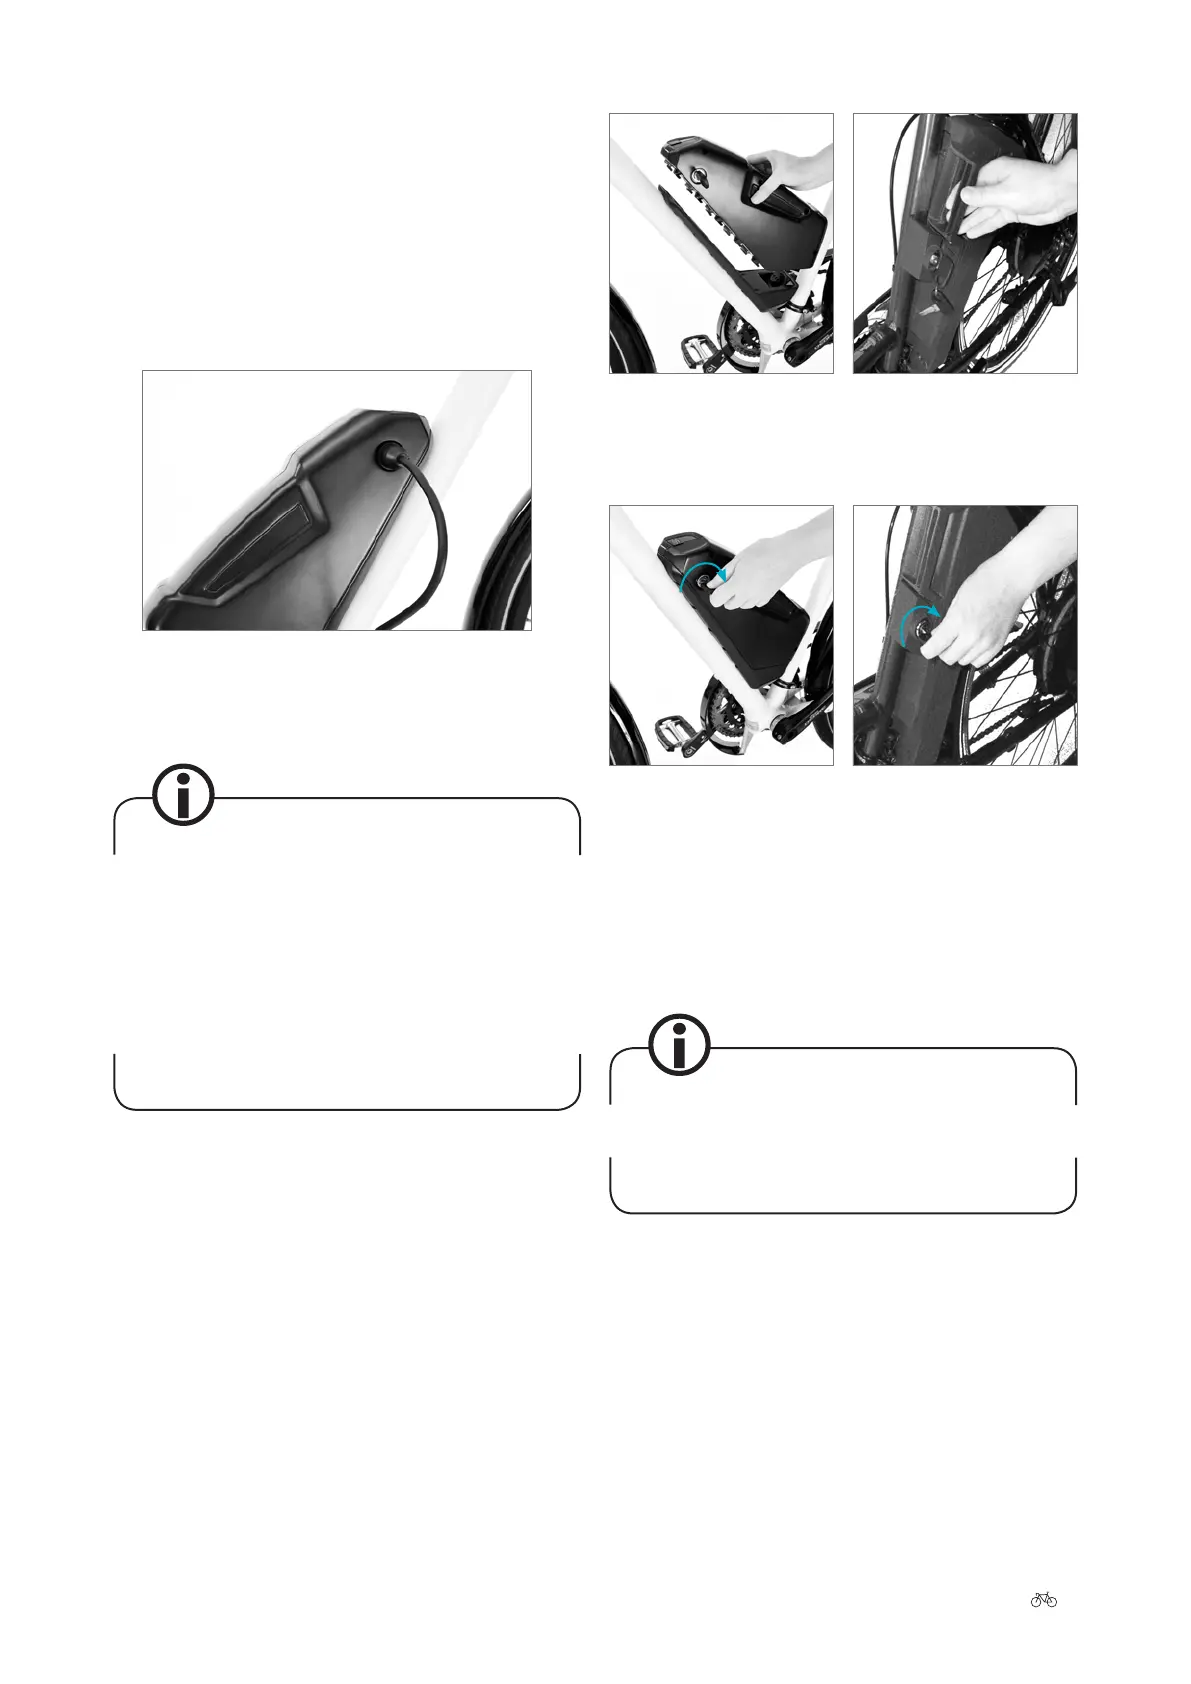
6. a) Down tube battery: If you removed the battery for
charging, replace it in the holder om the ont/above.
At the same time, the key must be in the lock and must
be turned anticlockwise. Press the battery down into
the holder until the locking mechanism engages.
Charging the battery
Installing the battery
Now turn the key clockwise and remove it. The battery is
now locked in place.
Locking the battery
6. b) Seat tube battery: If you removed the battery for
charging, reinsert the battery into the holder on the
Pedelec om the le-hand side. Tilt the battery out-
wards at an angle of roughly 45° as you do so. Move
the battery into the upright position until the locking
mechanism engages. Now turn the key clockwise and
remove it. The battery is now locked in place.
Be sure to make a note of the number engraved on
your key. In case you lose both keys, you have an
opportunity to obtain an appropriate replacement key
by quoting the correct number.
7. Make sure that the battery is securely positioned and
that the key is no longer in the lock.
8. Press the diamond button on the control panel to
switch on the drive system.
9. The display panel now displays the medium power-
assist mode. The assist level is represented by a bar
with a maximum of ve light elements on the far le
of the display panel. By pressing one of the two arrow
buttons on the control panel, you can select the level
of assistance. Pressing once changes the level of assis-
 Loading...