DC volts calibration
After the front panel short and open procedure, the unit will prompt you for the first
DC voltage: +10V. Perform the following:
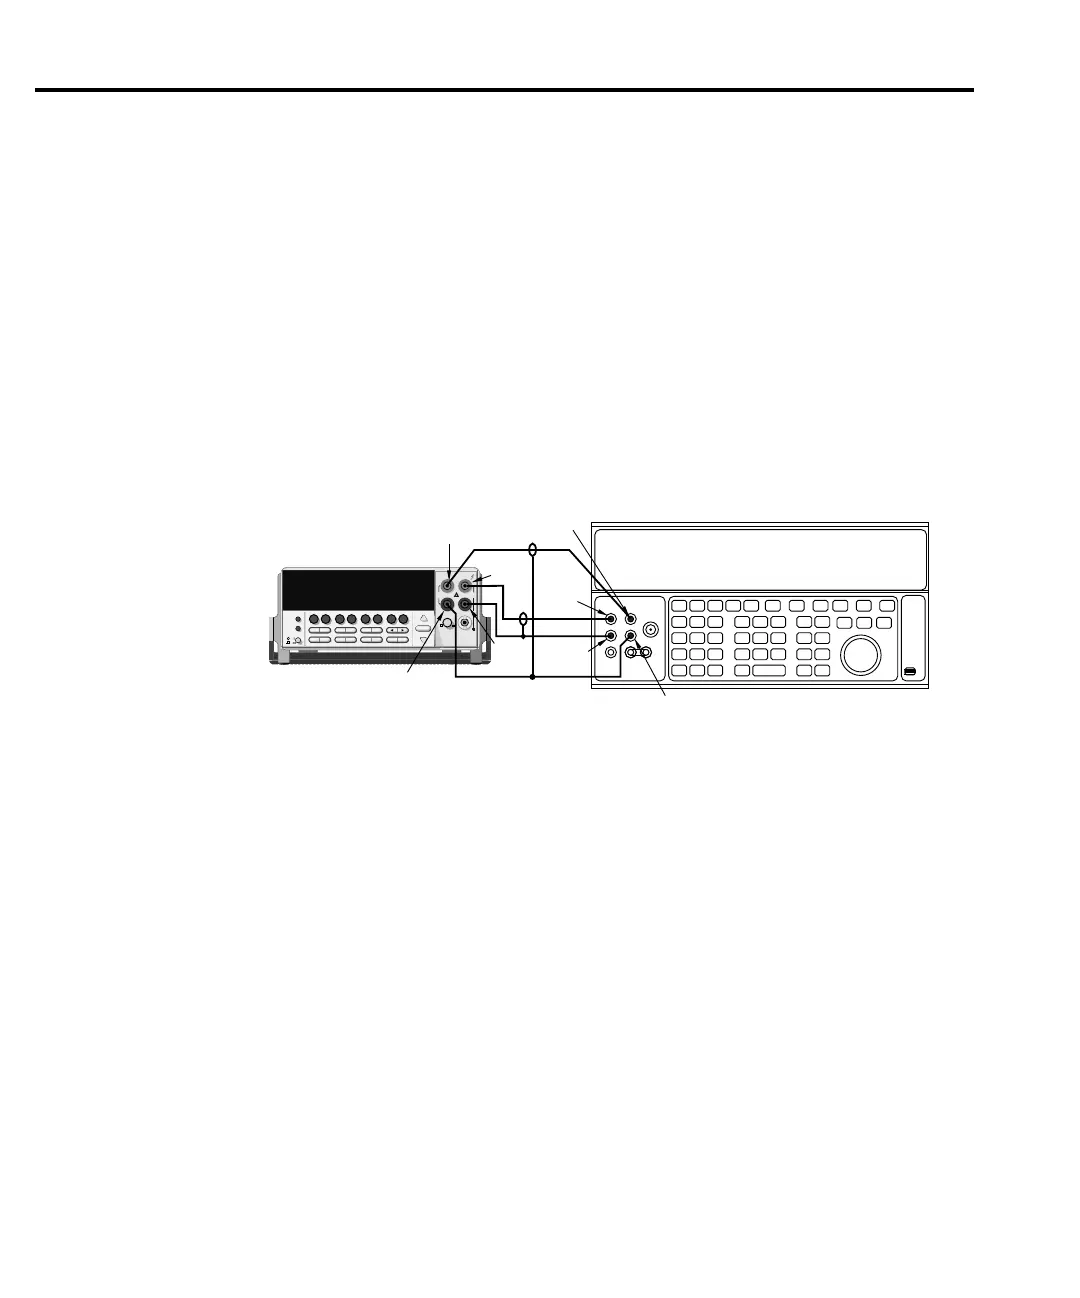
1. Connect the calibrator to the Model 2010 as shown in Figure 2-2. Wait three minutes to
allow for thermal equilibrium before proceeding.
NOTE Although 4-wire connections are shown, the sense leads are connected and
disconnected at various points in this procedure by turning calibrator external sense
on or off as appropriate. If your calibrator does not have provisions for turning
external sense on and off, disconnect the sense leads when external sensing is to be
turned off, and connect the sense leads when external sensing is to be turned on. Do
not exceed ±15V peak on sense LO to LO. This will cause erroneous readings to be
stored during calibration.
2. Set the calibrator to output DC volts, and turn external sense off.
3. Perform the steps listed in Table 2-3 to complete DC volts calibration. For each
calibration step:
• Set the calibrator to the indicated value, and make sure it is in operate.
• Press the ENTER key to calibrate that step.
• Wait until the Model 2010 finishes each step. The unit will display the
CALIBRATING message while calibrating.
2000
MULTIMETER
!
R
Model 2010
5700A Calibrator
Output
HI
Input
LO
Output
LO
Note : Use shielded low-thermal cables to
minimize noise. Enable or disable
calibrator external sense as indicated
in procedure.
Sense HI
Sense LO
Sense HI
Sense LO
Input
HI
gure
-
alibrator connections
or DC volts and ohms
ortion of
comprehensive
calibration
2-8 Calibration