DOCUMENT 301900, REVISION D
EPISENSOR USER GUIDE 5
Use the EpiSensor mounting kit to attach the sensor to the mounting
surface. The kit includes a heavy-duty wedge-type expansion anchor stud
with 1/4-20 thread and a nut/washer unit.
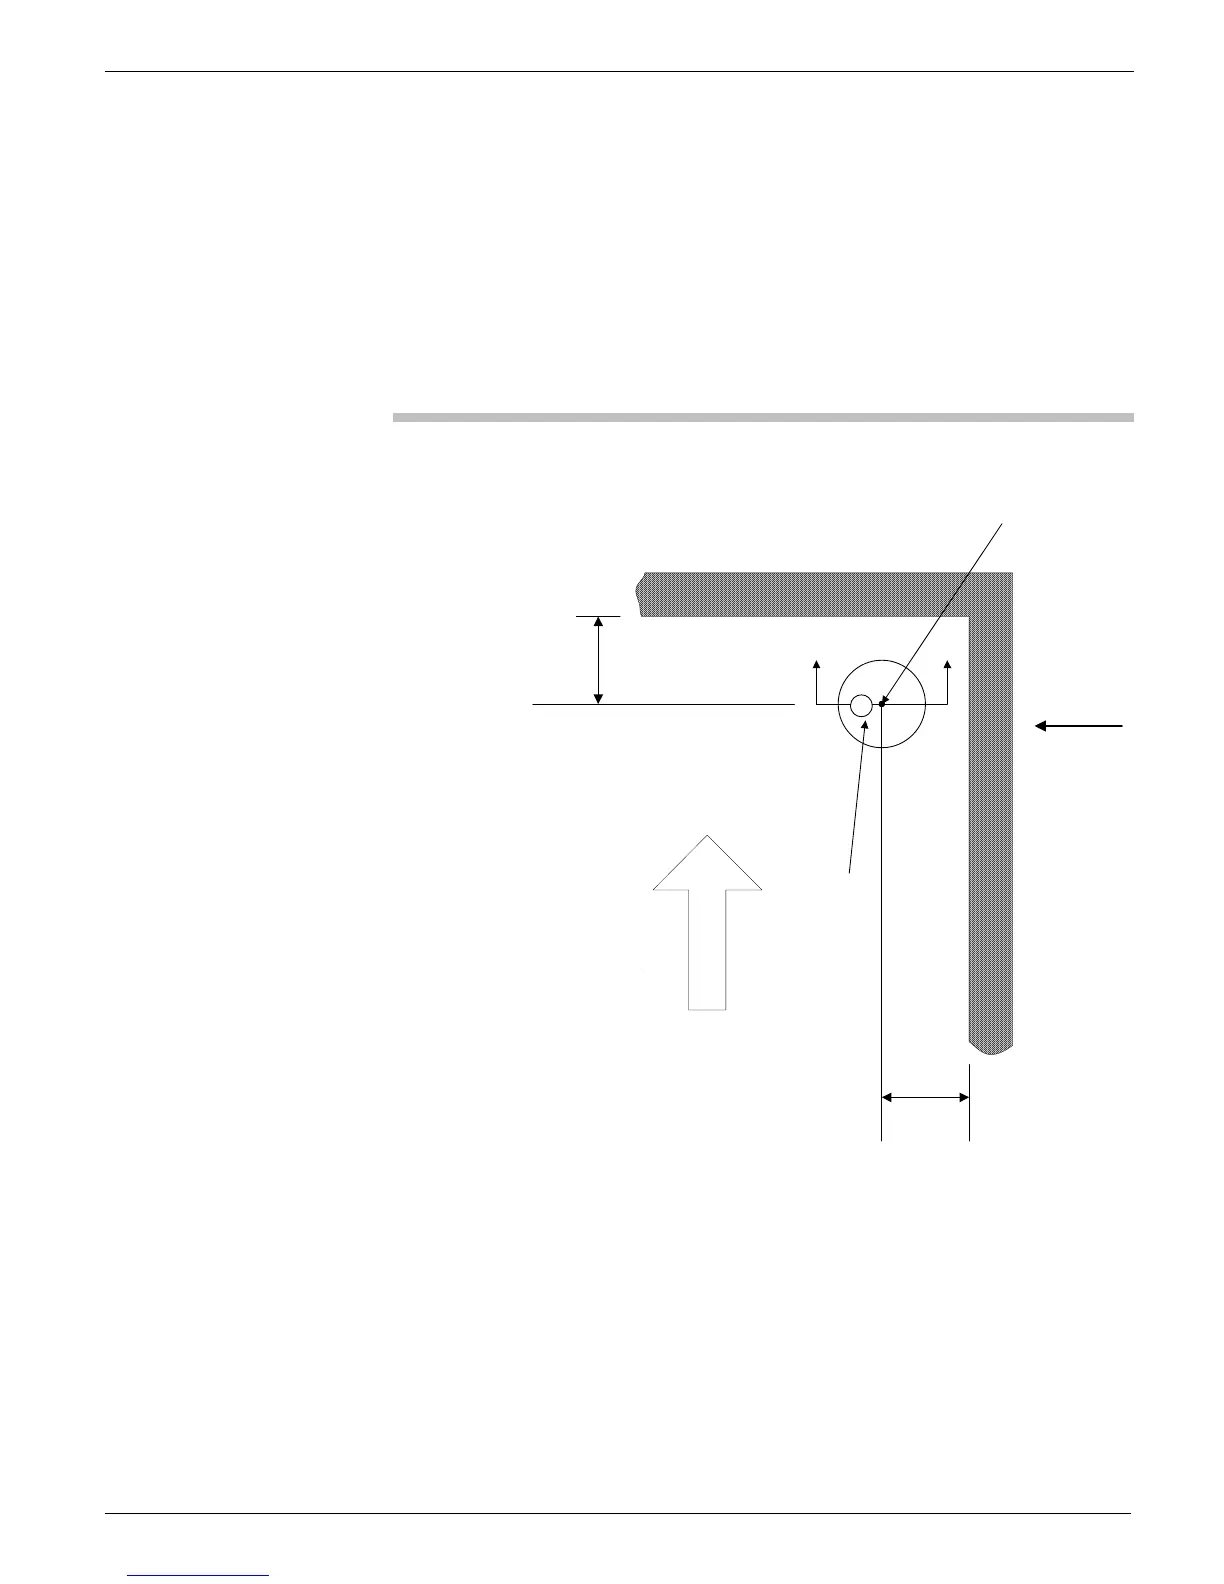
Decide on the location of the EpiSensor, keeping in mind the working space
dimensions in Figure 2.
Remember:
The anchor stud is 2-1/4" long and 3/8" to 1/2" must remain above the slab.
Use the following instructions and figures below to install the anchor stud.
Figure 2: Episensor mounting dimensions
8" minimum
8" minimum
Wall
Electrical
connector
EpiSensor
orientation
EpiSensor
mounting hole
EpiSensor
orientation
Note: Follow all recommended safety precautions when using power tools.
We recommend wearing safety glasses while drilling.
1. Use a 1/4" (6.4mm) masonry bit and drill to a depth of at least
1-3/4" with a percussion or hammer drill (if possible).
Note: You may want to wrap a little masking tape 1-3/4" up from the
point of the drill bit to mark how deeply to drill. The depth of the
hole can be checked with a nail or narrow screwdriver. The hole
should be vertical – take care not to drill at an angle!
 Loading...