DOCUMENT 301900, REVISION D
66 EPISENSOR USER GUIDE
Table 15: Slide parts over cable jacket in this order:
Part Name KMI P/N
Thermofit tubing 851186
Connector strain relief grommet Part of 851370
Connector back shell Part of 851370
Shrink-n-Shield tubing 851366
Final Assembly of the EpiSensor End
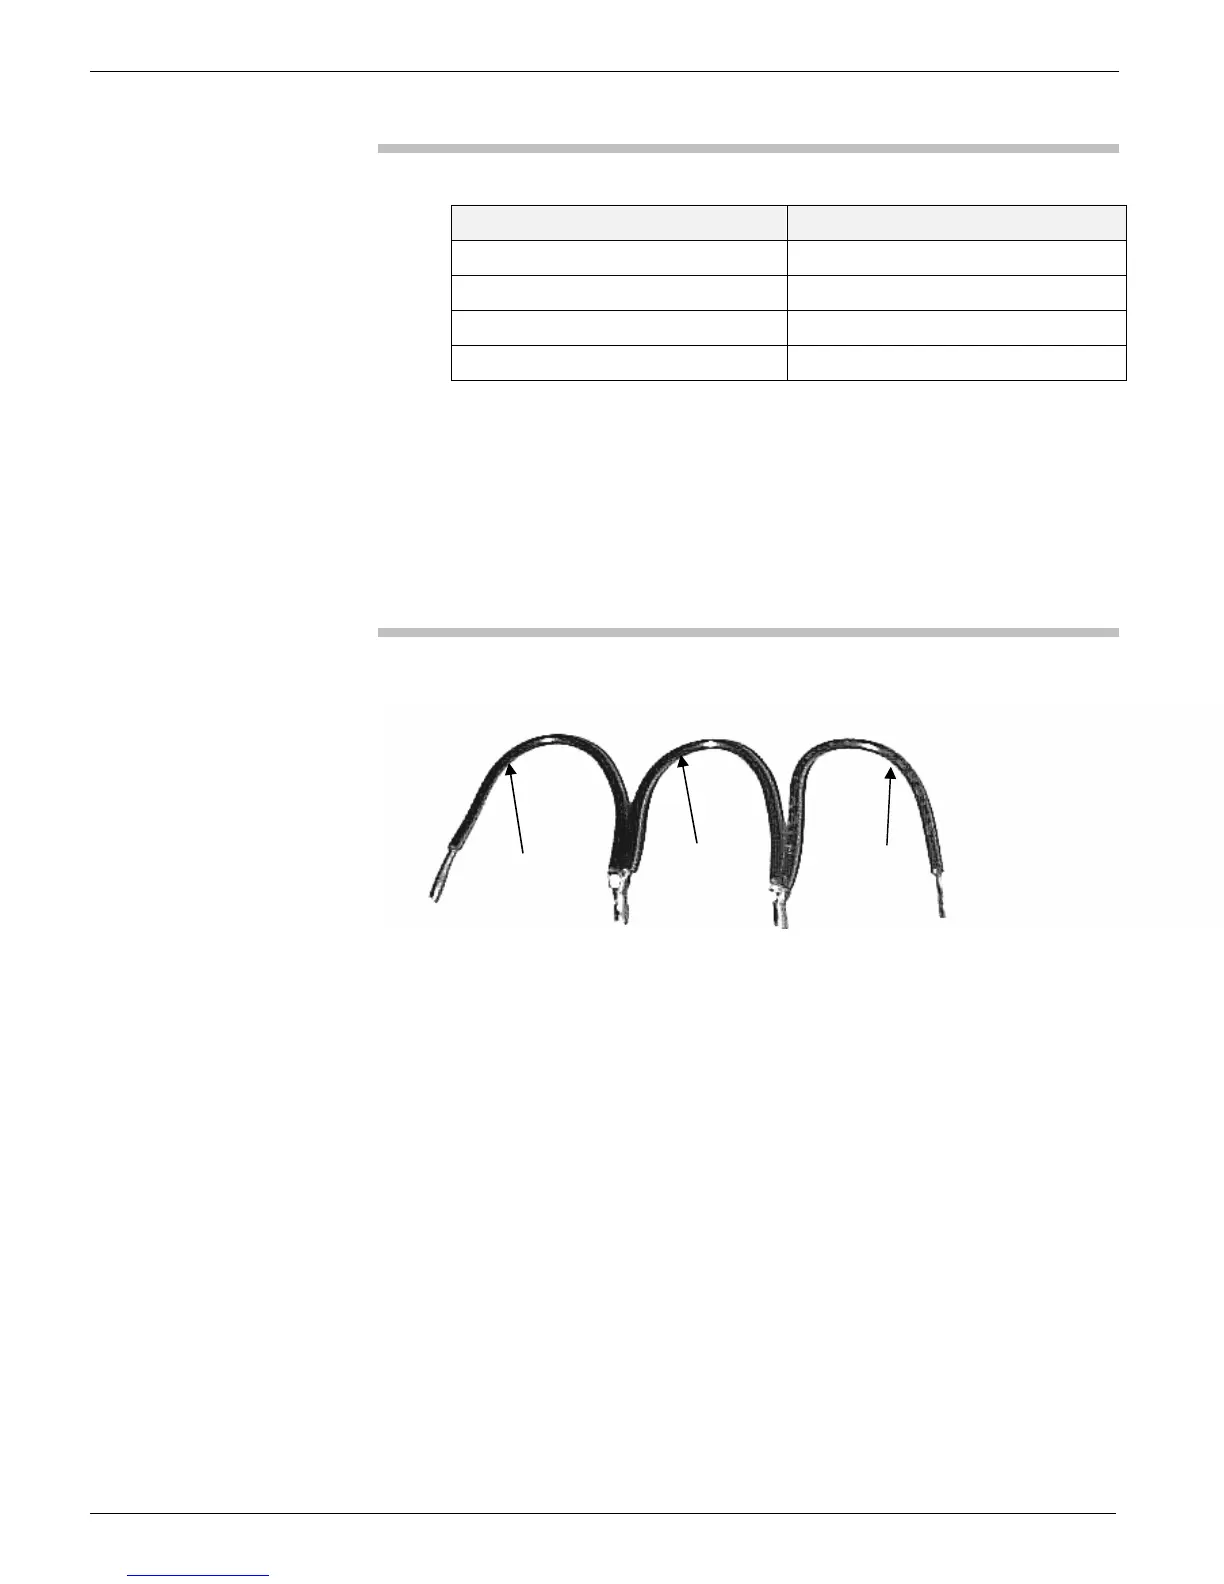
The wires in the "daisy chain" below are designated as #1, #2 and #3 for
the purpose of these instructions.
Figure 39: Example of a daisychain
Wire 1 Wire 2 Wire 3
1. Insert wires through grommet in appropriate letter location using
the EpiSensor end of the schematic in Figure 30.
2. Cut 3 2" lengths of the 22-gauge stranded wire and strip about 1/4"
of insulation off each end.
3. Carefully tin one end of each wire
4. Wrap the untinned end of wire #1 around the tinned end of wire #2.
Now wrap the untinned end of wire #2 around the tinned end of
wire #3.
5. Lightly tin the joined ends of wires #1/#2 and wires #2/#3, just
enough so that they will not fray, and insert them all through the
grommet.
(The tinned end of wire #1 will eventually be inserted into pin R.)
6. Lightly tin the one remaining untinned end of wire #3.
 Loading...