2-12
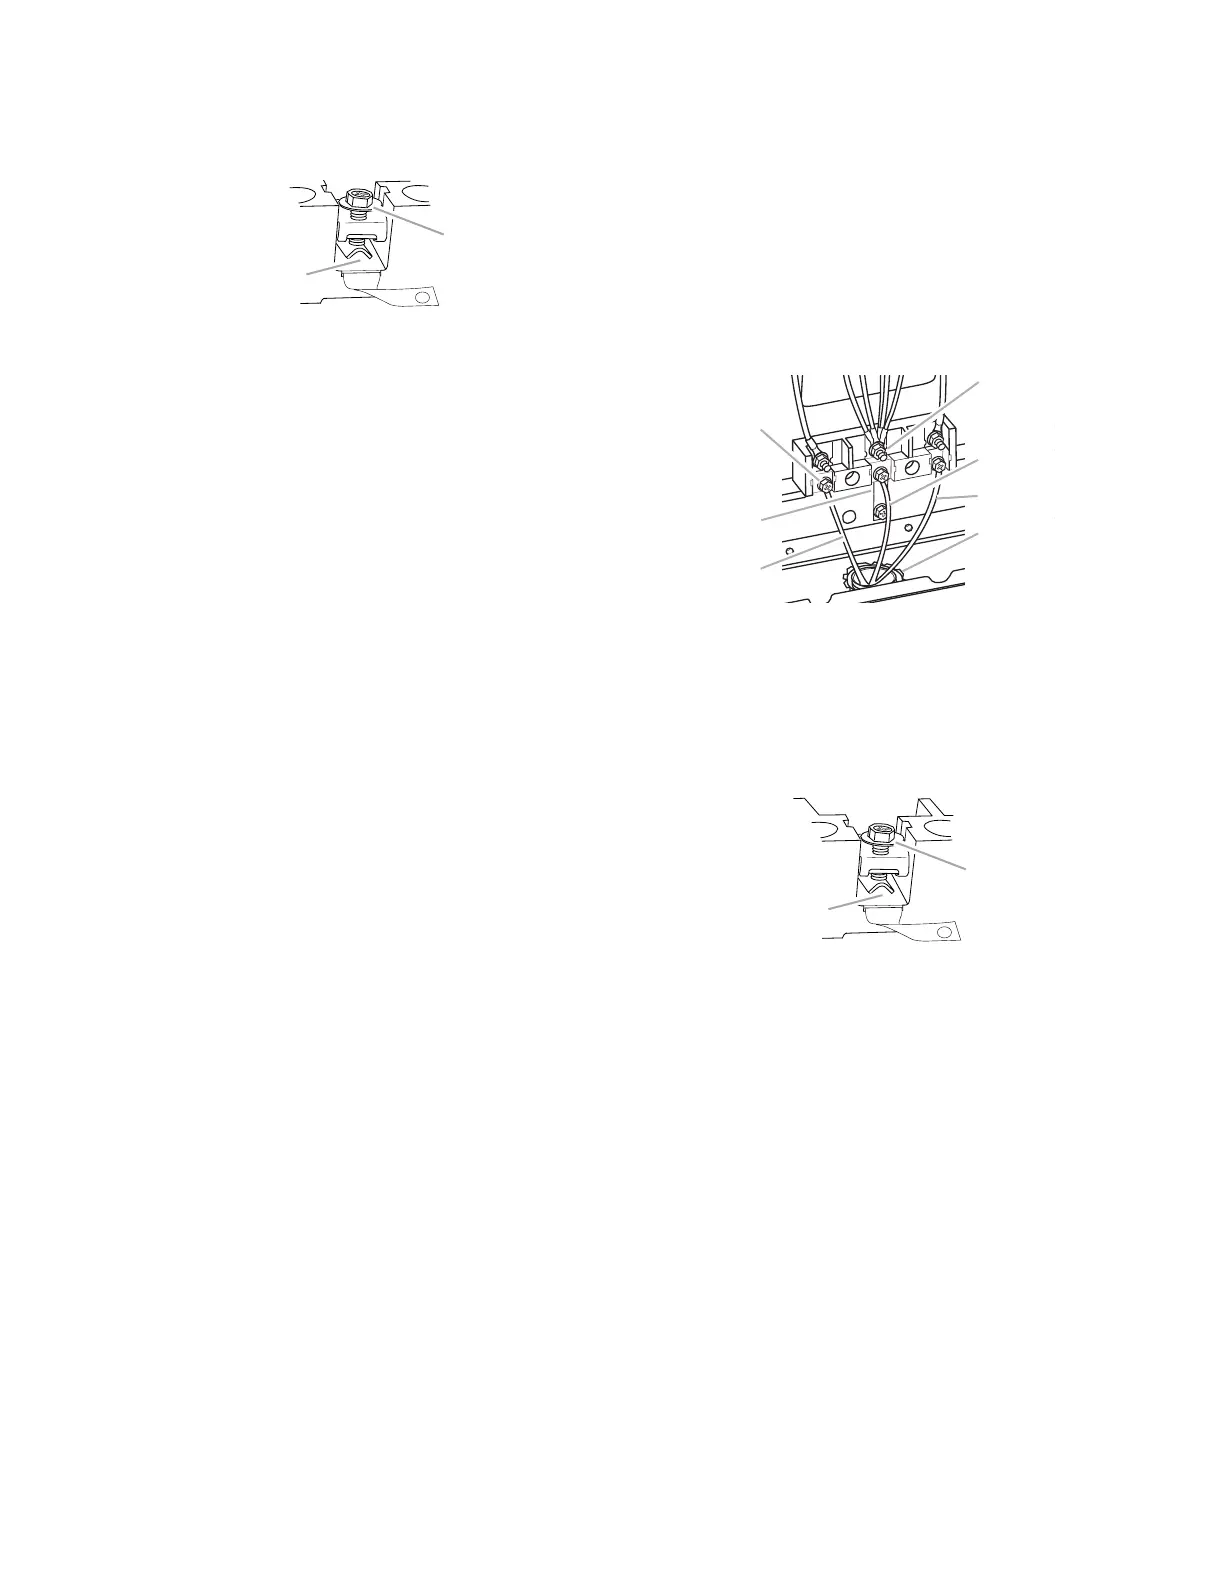
3. Securely tighten the hex washer head
screws to 90 in.
2
/lbs minimum torque to
make a proper electrical connection.
4. Tighten the locking ring of the conduit
connector.
5. Replace the terminal block cover.
4. Insert the other 2 wires (lines 1 and 2)
under the other 2 screw clamps.
A. Insert wire under screw clamp
B. Hex washer head screw
A
B
A. Line 1
B. Ground-link
C. Hex washer head screw
D. Silver-colored terminal
block screw
E. Neutral (white) wire
F. Line 2
G. UL listed conduit
connector and power
supply cable
A
B
C
D
E
F
G
A. Insert wire under screw clamp
B. Hex washer head screw
A
B
5. Securely tighten the hex washer head
screws to 90 in.
2
/lbs minimum torque to
make proper electrical connection.
6. Tighten the locking ring of the conduit
connector.
7. Replace the terminal block cover.
2. Insert the other 2 wires (lines 1 and 2)
under the other 2 screw clamps.
3-wire connection: Direct wire
Use this method only if local codes permit
connecting ground conductor to neutral supply
wire.
1. Loosen (do not remove) the hex washer
head screws and insert the neutral (white)
wire under the screw clamp at the bottom
of the center position terminal connector.