55
Holder A
Holder C
Cable packing
Cable packing
Holder C
Electric chain hoist
Chain retainer
Pan head screw
Protection wire
Holder AHolder B
Connection Box
Pan head screw
Relay cable
for power
Relay cable for
operation
Cable packing
Holder A
Holder B
Power Cable
(to Power or Crain Control Box)
Chain retainer
Split pin
Slotted nutCable holder
Power Cable
Chain hanging pin B
Cable holder arm
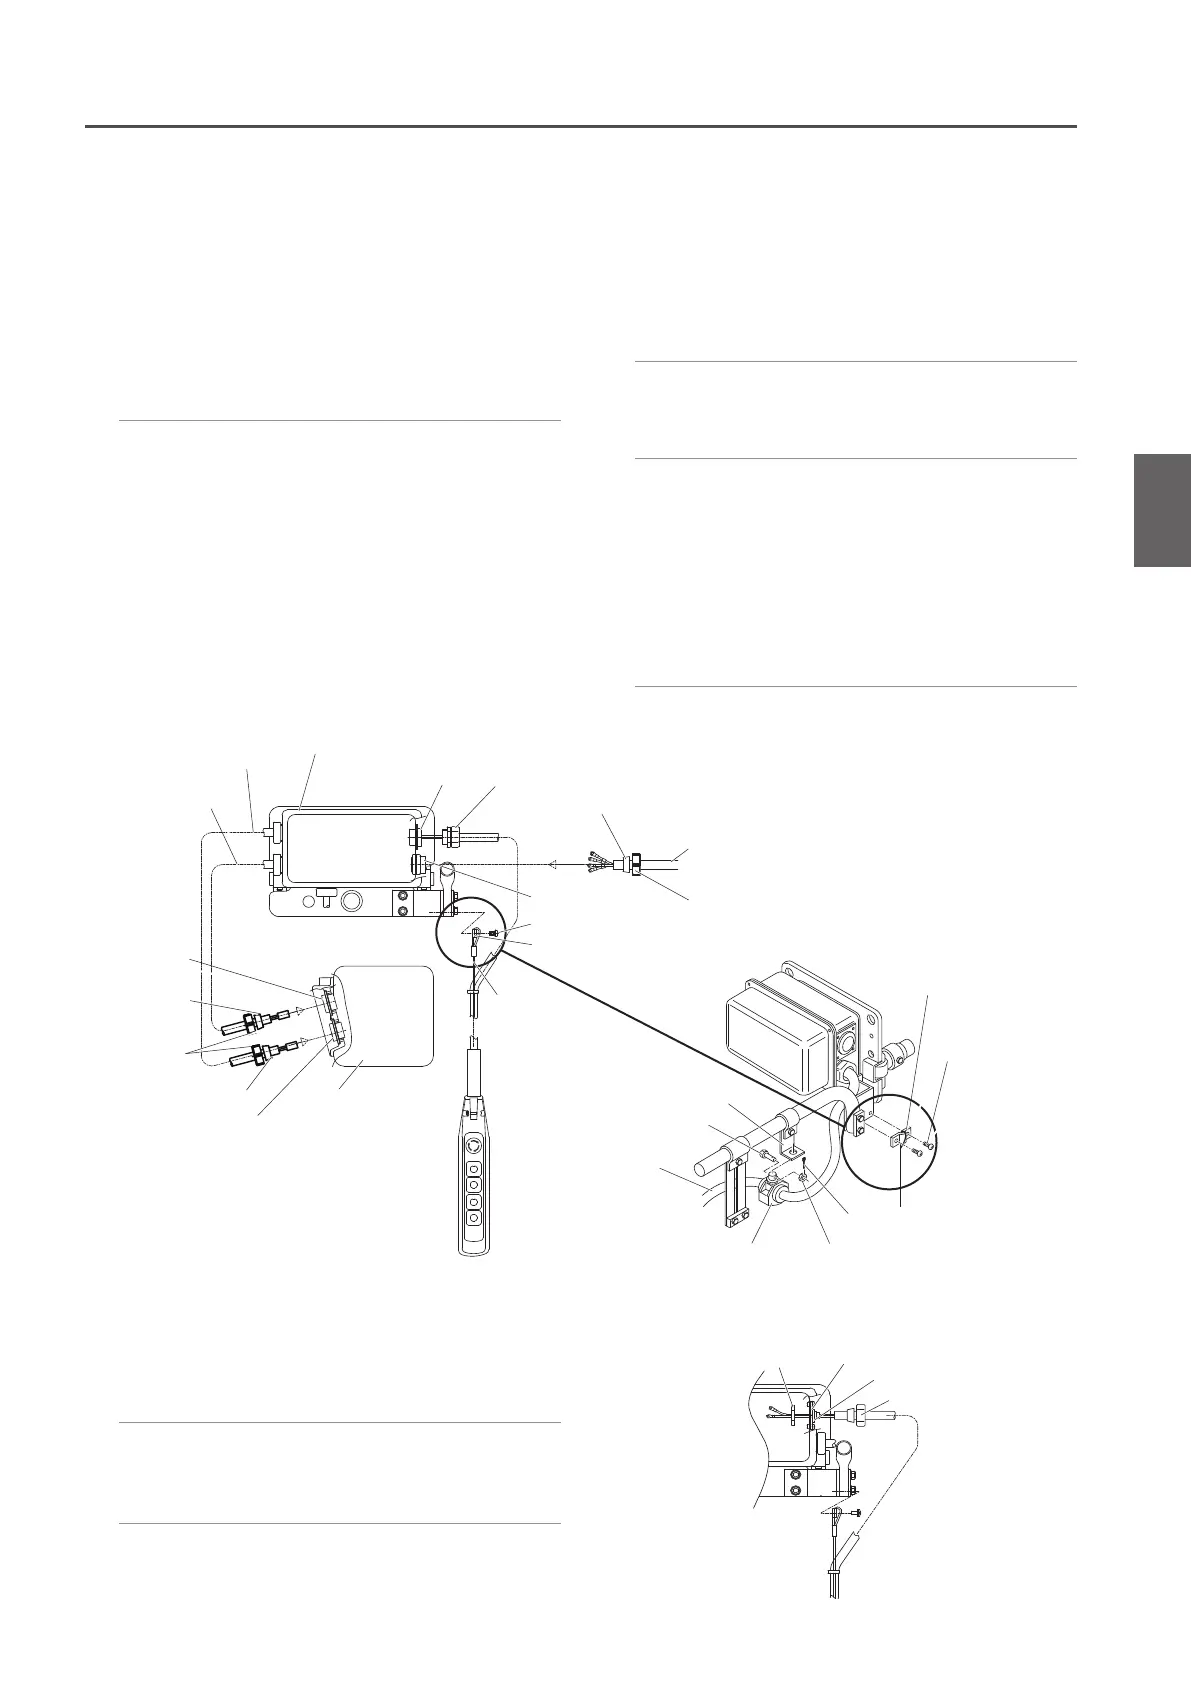
2) Insert the Push Button Cord into the
Holder C (lower side) of the Socket
frame. Turn the Holder A to connect the
cord securely.
1) Insert the Power Cable into the Holder
C (upper side) of the Socket frame.
Turn the Holder A to connect the cable
securely.
●
Connecting the relay cable
2) Pass the Power Cable through the
Holder A supported by the cable holder
and the cable packing.
1) Remove the Holder A mounted to the
Connection Box.
●
Connecting the Power Cable
3) Pass the Chain retainer into the hoop at
the end of the Protection Wire and fix it
to the bar holder with a pan head screw.
●
Direct-mount
1) Mount the Holder B, which the Push
Button Switch Cord is passed, to the
plate D using the holder nut.
2)
Connect the Push Button Switch Cord
to the terminal panel of the Connection
Box.
●
Connecting the Push Button Switch Cord
Holder nut
Plate D
Holder B
Holder A
<Trolley Power Cable Connection>
<Direct-mount Push Button Switch Cord Connection>
3) Insert the Power Cable to the Holder B
of the Connection Box and tighten the
Holder A securely.
● Trolley Type
1) Mount the cable holder, which the Power
Cable is passed, to the cable holder arm
using a chain hanging pin B, a slotted nut
and a split pin.
4) Connect the Power Cable to the terminal
panel of the Connection Box.
• Connect wires correctly according to the wiring
diagram affixed on the Connection Box.
■
Motorized Trolley Type
■
125 kg~5 t
Assembling Connecting Cables
1
(to be continued)

 Loading...