Installing options Installing the options and replacing the calendar battery
205
Quick Start
Introduction
SetupProgram
Combination
Sequencer
SamplingGlobalMediaEffectKARMA
Drum Track
Other
Appendices
6. When you’ve finished the entire procedure, turn
on the power and verify that the EXB-RADIAS
was installed correctly. (See “Verifying
installation” on page 203)
7. Load formant motion data data in Global mode.
Refer to the procedure in “Loading the preloaded
data” on page 201. When you execute this procedure,
change step 3 so that instead of selecting “Kind” All
Preload PCG, you select RADIAS Formant Motion
Data and All. (Alternatively, refer to “Restoring the
formant motion data to the factory-set state” (see
page 18) in “EXB-RADIAS for M3 Owner’s manual.”)
Installing the EXB-FW
Before you proceed with installation, please read the
preceding “Safety cautions” and “Cautions when
installing option boards or memory.”
You must leave the AC power cable disconnected
until you’ve finished the entire process of option
board installation.
Be careful not to cut your hand on any metal parts
of the sound module or option board.
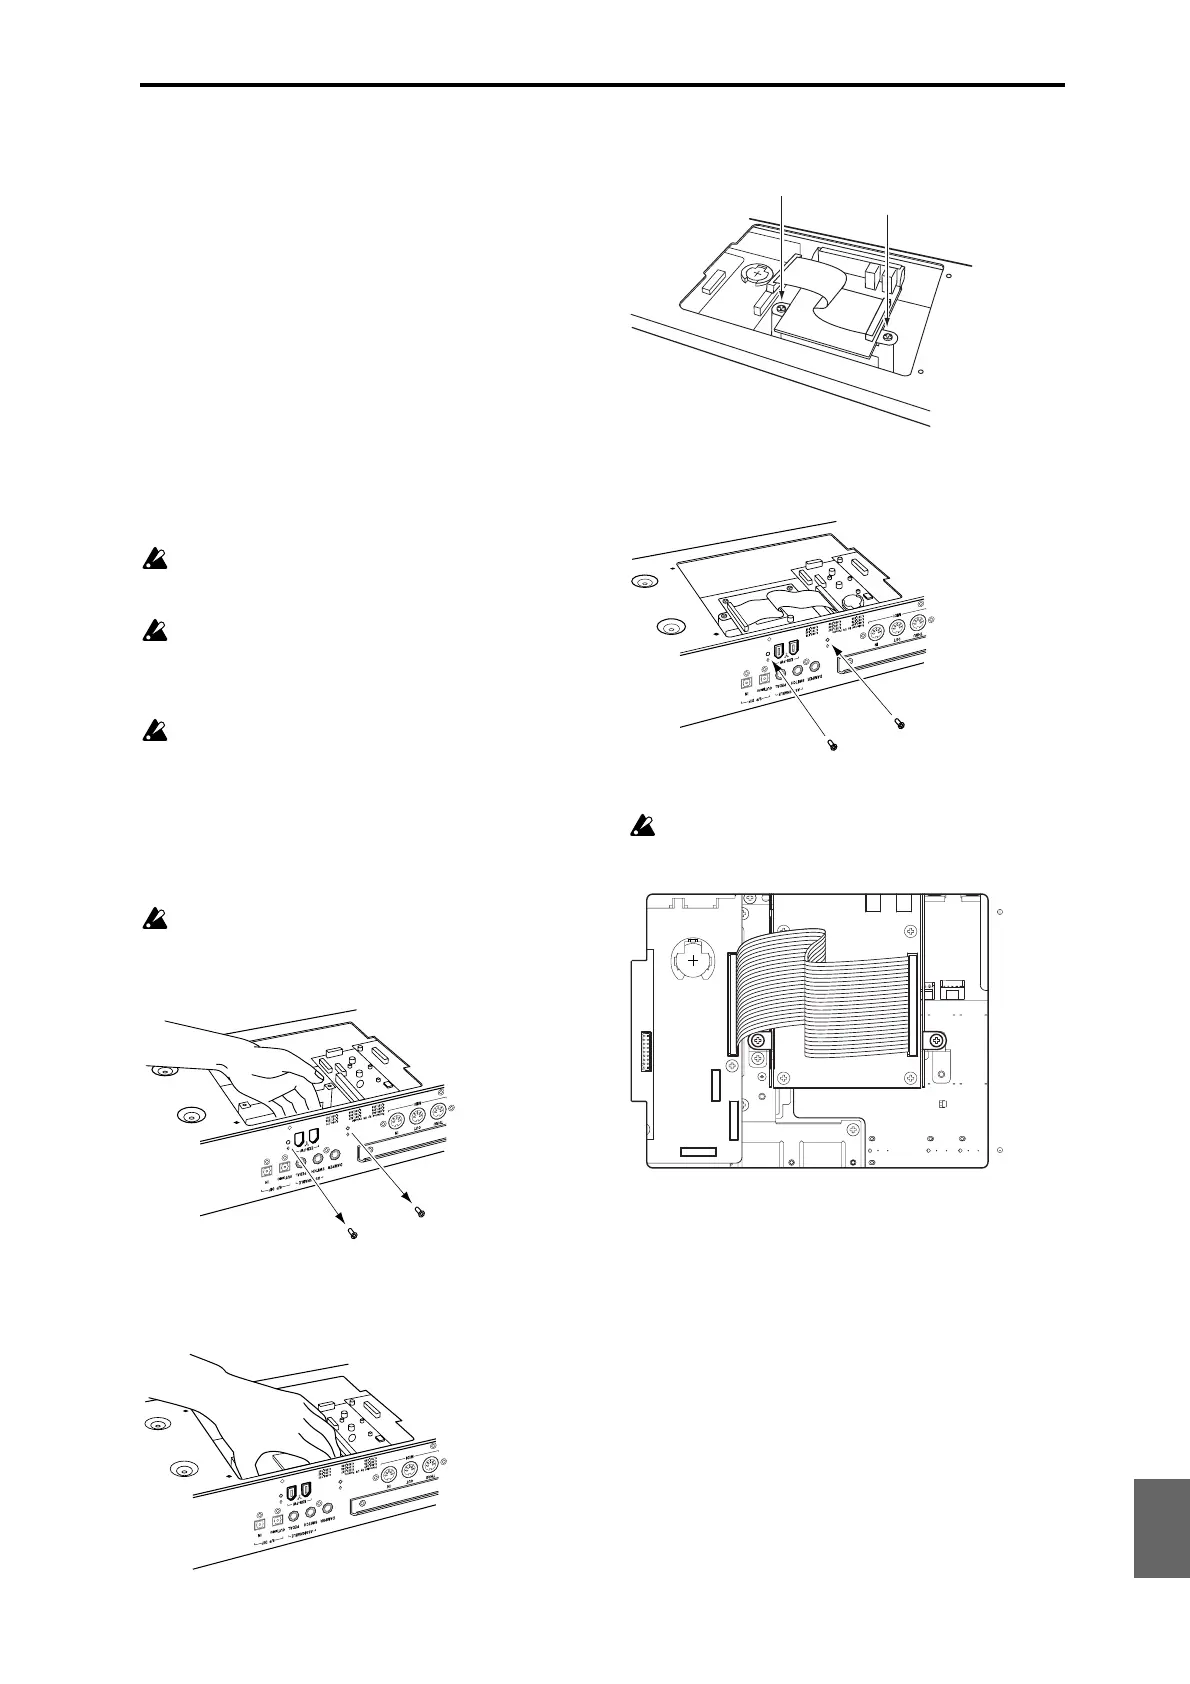
1. Remove cover “A” as described in step 1 of
“Installing the EXB-RADIAS.”
If the EXB-RADIAS is already installed, carefully
lift up cover “A” and temporarily disconnect the
EXB-RADIAS connector cable.
2. Using your Philips (+) screwdriver, remove the
two screws from the FW cover that blocks the
sound module’s rear panel openings for the EXB-
FW, and remove the FW cover. The two screws you
removed will later be used to fasten the EXB-FW.
Be sure to remove the FW cover from the sound
module; don’t leave it inside. Keep the FW cover
in a safe place in case you need to remove the EXB-
FW.
3. Verify the location in which you’ll be installing
the EXB-FW, and align it so that the connector
section of the EXB-FW protrudes from the rear
panel of the sound module.
4. Tighten the two screws attached to the EXB-FW to
firmly fasten it to the sound module.
5. Tighten the two screws you removed in step (2) to
fasten the EXB-FW to the rear panel of the sound
module.
6. Attach the cable as shown in the illustration.
Firmly insert the cable as far as it will go.
Be careful not to touch anything other than the
connector of the circuit board to which you’re
connecting the cable.
7. Attach cover “A” to the sound module as
described in steps 4–5 of “Installing the EXB-
RADIAS.”
8. When you’ve finished the entire procedure, turn
on the power and verify that the EXB-FW was
installed correctly. (See “Verifying installation” on
page 203)