Changing the settings Part 1: Operation
12
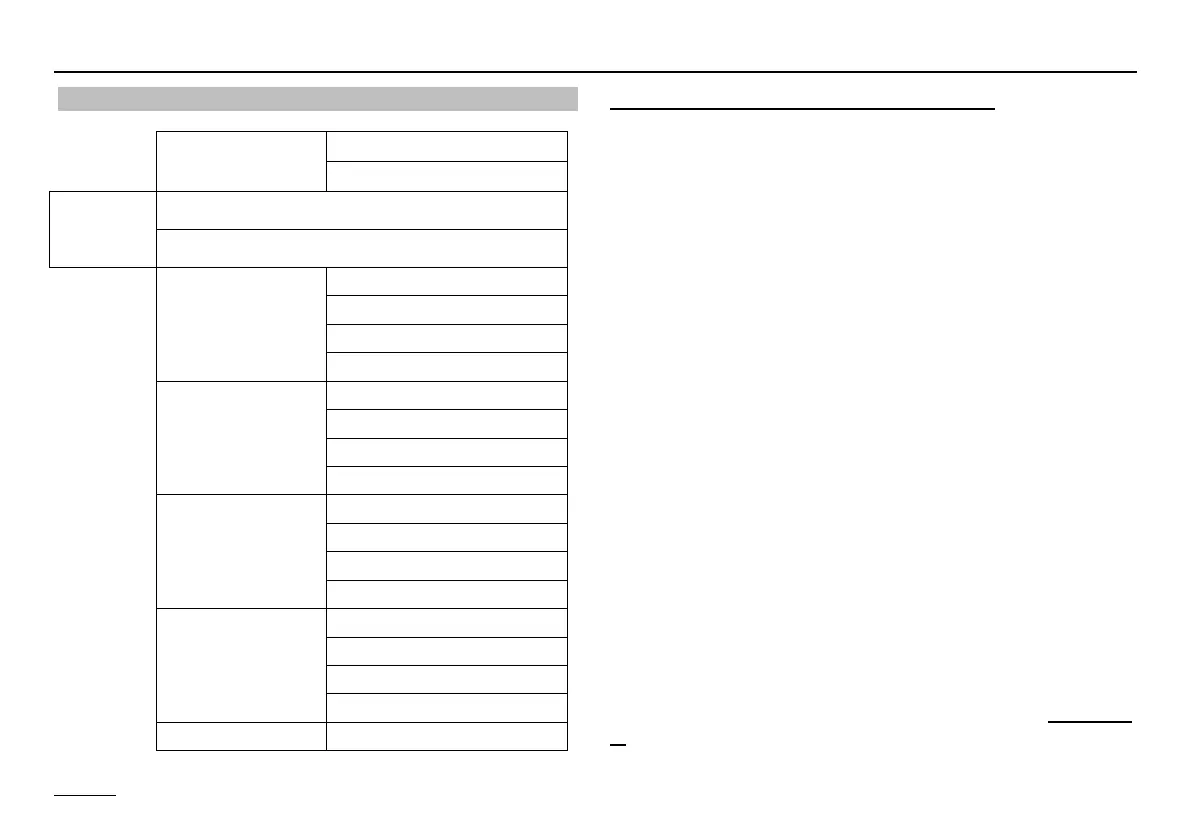
Operating level
General SERVICE
DATE/TIME/HOLIDAY
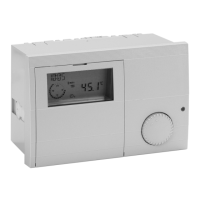
Open
operating
flap
Ç Turn anticlocwise
Ç Turn clockwise
Display
INSTALLATION
HOT-WATER
HTG CIRCUIT I
HTG CIRCUIT II
User
INSTALLATION
HOT WATER
HEAT CIRCUIT I
HEAT CIRCUIT II
Time programs
CIRCL TIME
HOTW-PROG
HTG-PROG ID 1
etc...
Expert
INSTALLATION
HOT-WATER
HTG CIRCUIT I
HTG CIRCUIT II
Expert HS INSTALLATION
Operation is divided into different areas:
General - Display - Users - Time Programs - Expert -
Expert HS
Opening the hinged control panel cover automatically
takes you to the display and indicator area.
The current area "DISPLAY" appears in the display for
a short time (1 clock circuit).
After the clock circuit the display switches to the cur-
rent operating level "INSTALLATION".
This is displayed for a short time (1 clock circuit) when
you switch to a new area.
Ç Select the level in which the value to be adjusted or
displayed can be found using the rotary knob.
Ä Press Prog button! =>
Open / select level
Ç Search for value using rotary knob
Ä Press Prog button! => Select value
LED lights up => adjustment can now be made
Ç Modify value using rotary knob
Ä Press Prog button! => Store value - LED goes off
When the operating flap is first opened after voltage is
applied, the level INSTALLATION is displayed once on-
ly. Once the values grouped here have been set the
controller is operable.