198 Lifting Arm
2. Make sure that the parking brake is applied.
3. Slide out the arm about half way (gripper in the lower position and blades fully open).
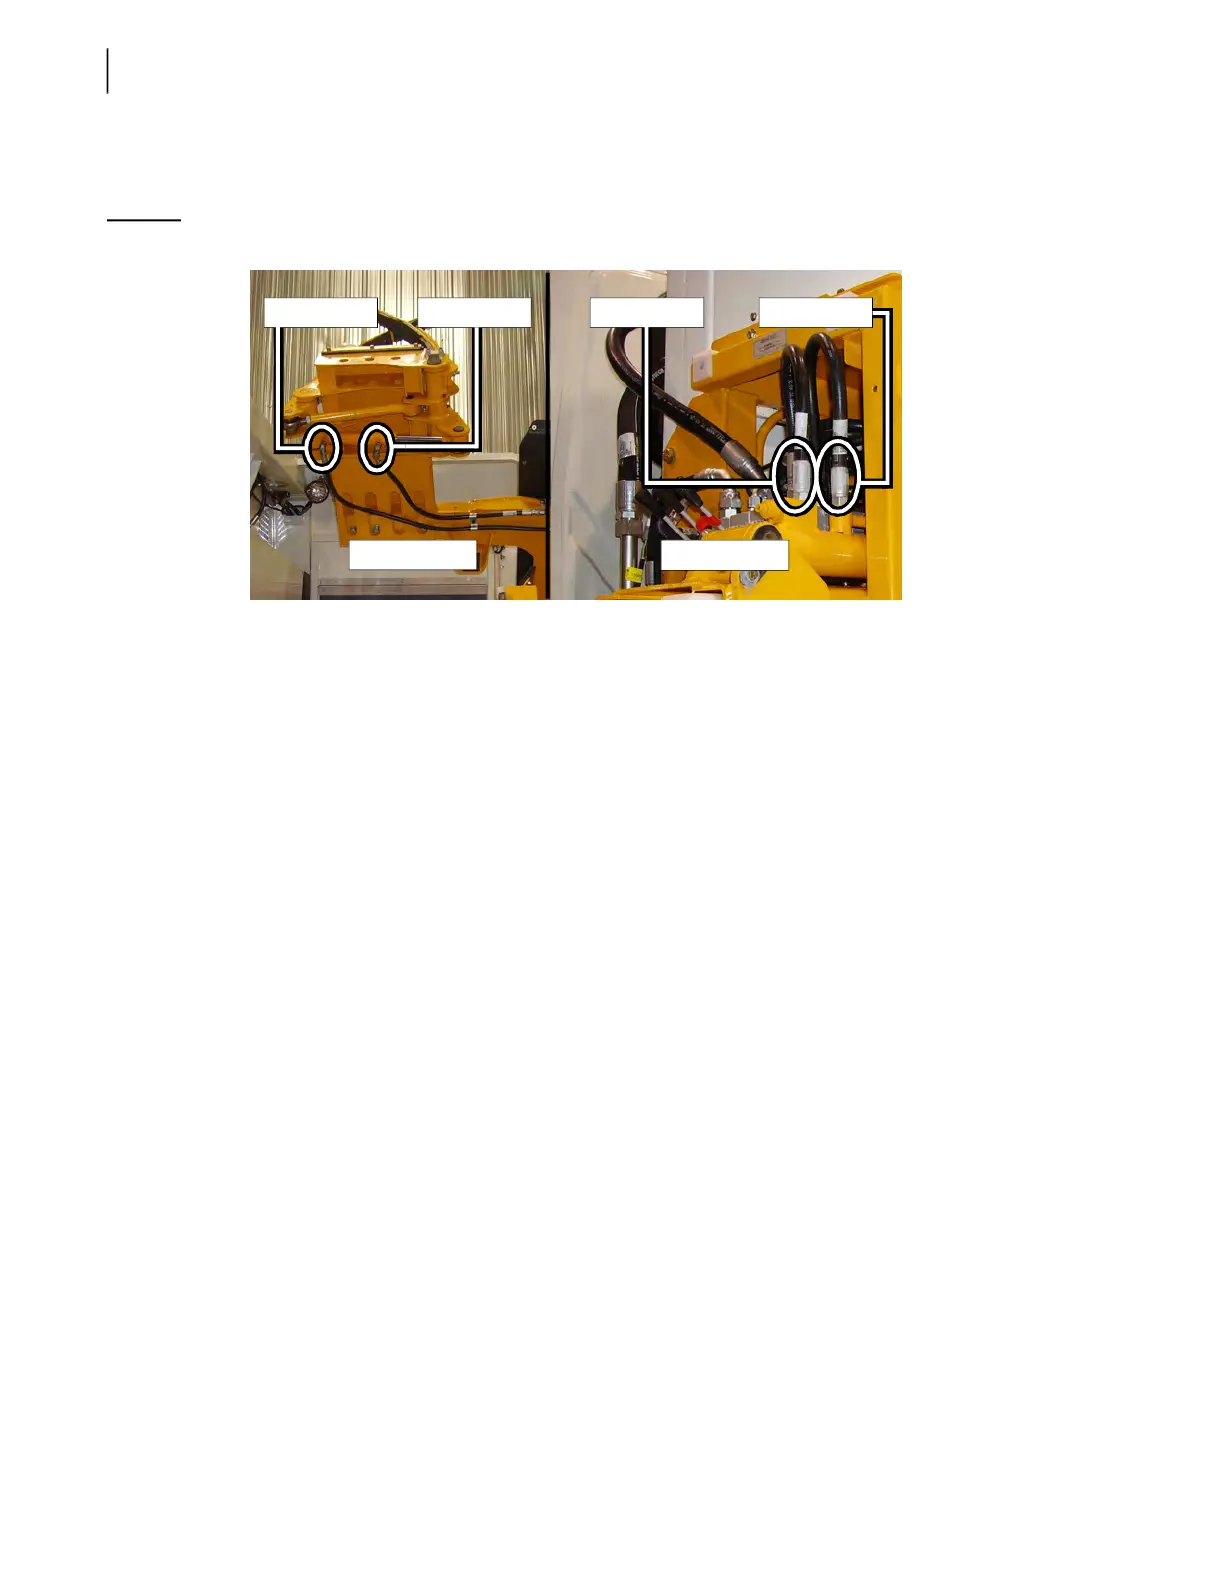
Figure 10-12
Fittings to loosen
4. Using the lever on the arm control valve, fully extend the gripper cylinder in order to close the
blades.
5. Loosen (do not disconnect) the piston side cylinder fitting and let the air out of the circuit
(see Figure 10-12, Fitting A).
6. As soon as a constant and uniform oil flow (without the appearance of air bubbles) is leaking out,
tighten the fitting. Keep the hydraulic function engaged until the fitting is tightened.
7. Loosen (do not disconnect) the rod side cylinder fitting and let the air out of the circuit (see Figure
10-12, Fitting B).
8. Fully retract the gripper cylinder in order to open the blades.
9. Repeat step #6.
To bleed the In/Out circuit:
1. Repeat steps 1 through 3 of the gripper circuit bleeding procedure on page 197.
2. Using the lever on the arm control valve, fully extend the rail cylinder of the arm.
3. Loosen (do not disconnect) the piston side cylinder fitting and let the air out of the circuit
(see Figure 10-12, Fitting C).
4. As soon as a constant and uniform oil flow (without the appearance of air bubbles) is leaking out,
tighten the fitting. Keep the hydraulic function engaged until the fitting is tightened.
5. Loosen (do not disconnect) the rod side cylinder fitting and let the air out of the circuit (see Figure
10-12, Fitting D).
6. Fully retract the rail cylinder of the arm.
7. Repeat step number #4.
Fitting A
In/Out circuitGripper circuit
Fitting B Fitting C Fitting D
 Loading...