General Maintenance 43
8 b. Remove the roller assembly and replace it with a new one.
8 c. Put back all 4 bolts in their respective holes before tightening them up.
9. Remove the right-hand side roller of the first panel and replace it by repeating Step 8.
Move the woodblock (or jack stand) to the other side under the panel.
10. Place the 2-by-4 woodblock (or jack stand) under the second panel, long enough to hold the
panel in place once the roller is removed.
11. Repeat Steps 8 and 9 to remove both rollers of the second panel.
12. Place the 2-by-4 woodblock (or jack stand) under the third panel, long enough to hold the panel
in place once the roller is removed.
13. Repeat Steps 8 and 9 to remove both rollers of the third panel.
14. Once all worn-out rollers have been replaced, exit the body.
15. Start the engine and engage the hydraulic system.
Wait for the air pressure to reach 70 psi before engaging the hydraulic system.
16. Run a full cycle to check for proper operation.
Replacing Rollers
If the roller itself has to be replaced because of wear, apply the following procedure:
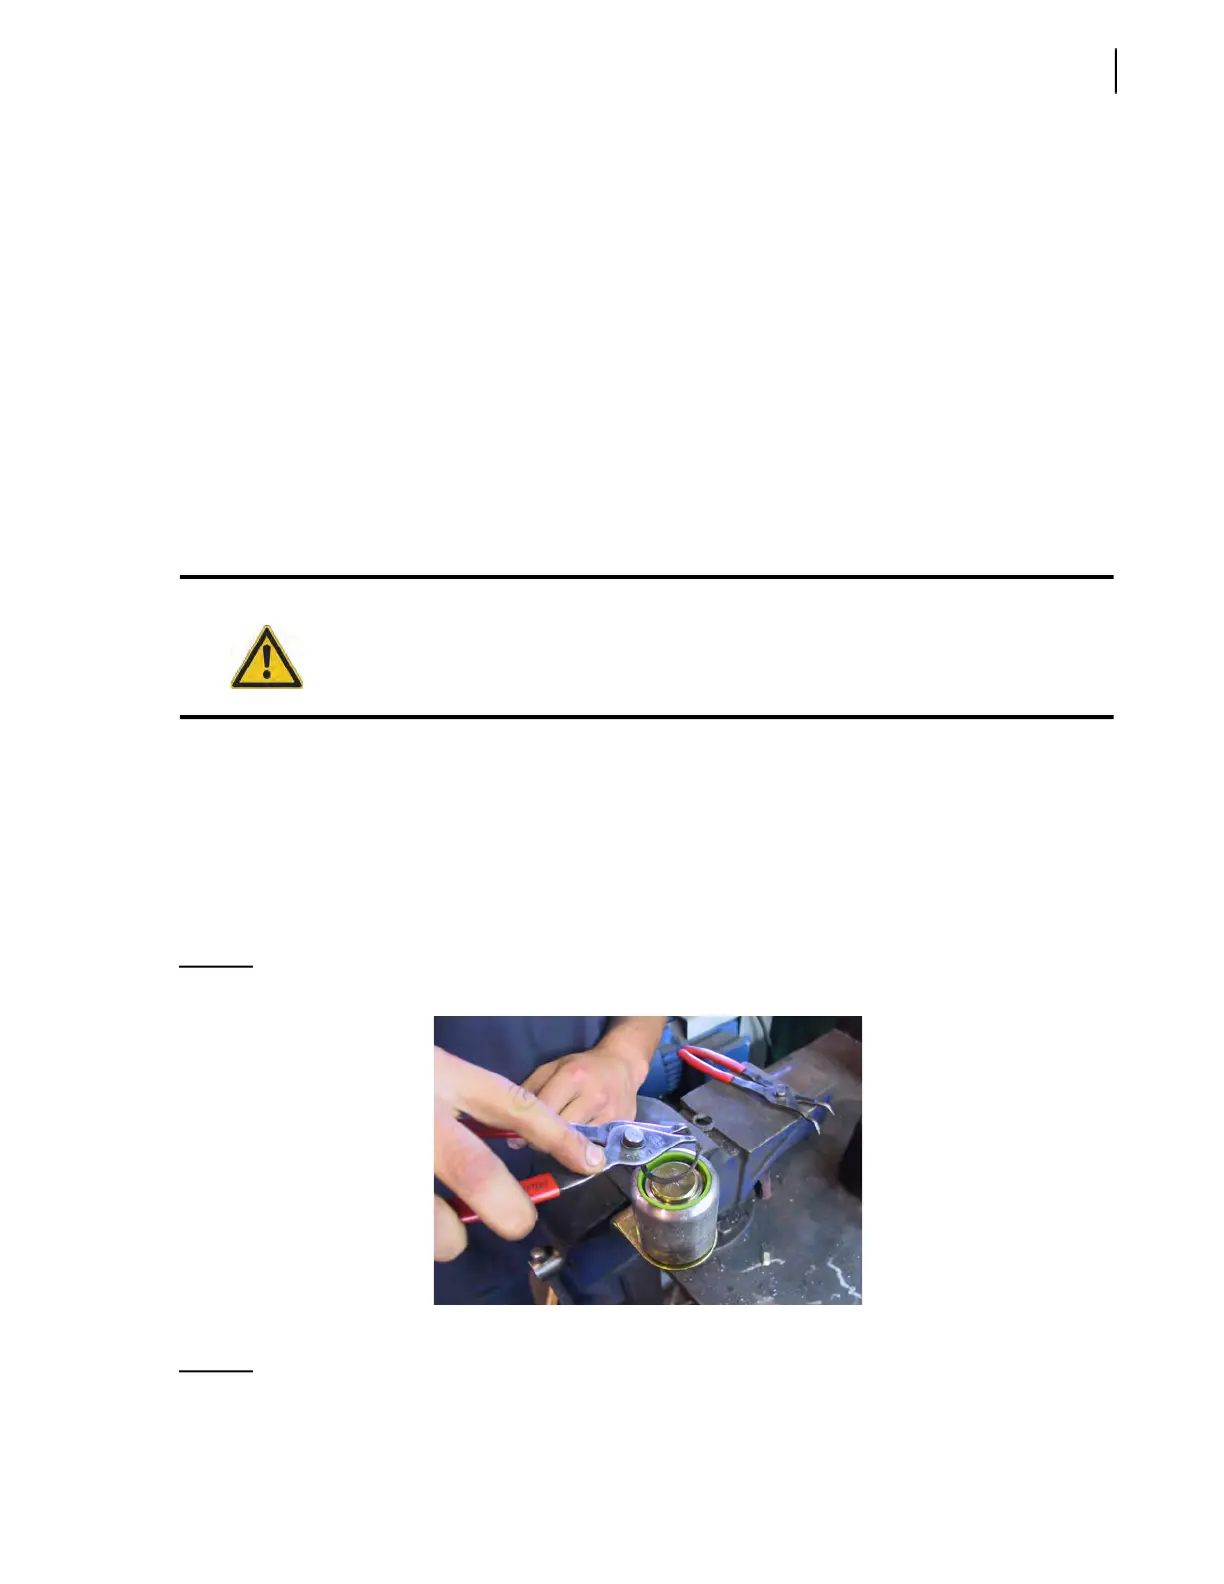
1. Once the roller has been removed from the follower panel (see Packer Roller Assemblies on
page 41), remove the external snap ring.
Figure 3-31
Removing external snap ring
2. Remove the washer.
Figure 3-32
Removing washer
Caution
Make sure the shut-off valve on the suction line is fully open before starting the vehicle.
 Loading...