92 Hydraulic System
8. Remove the dump valve (if equipped).
NOTE: The dump valve is usually, but not necessarily, located atop the pump.
NOTE: Always reinstall the dump valve and its components (shims, block assembly) as they were
before uninstallation. Make sure you do not invert them.
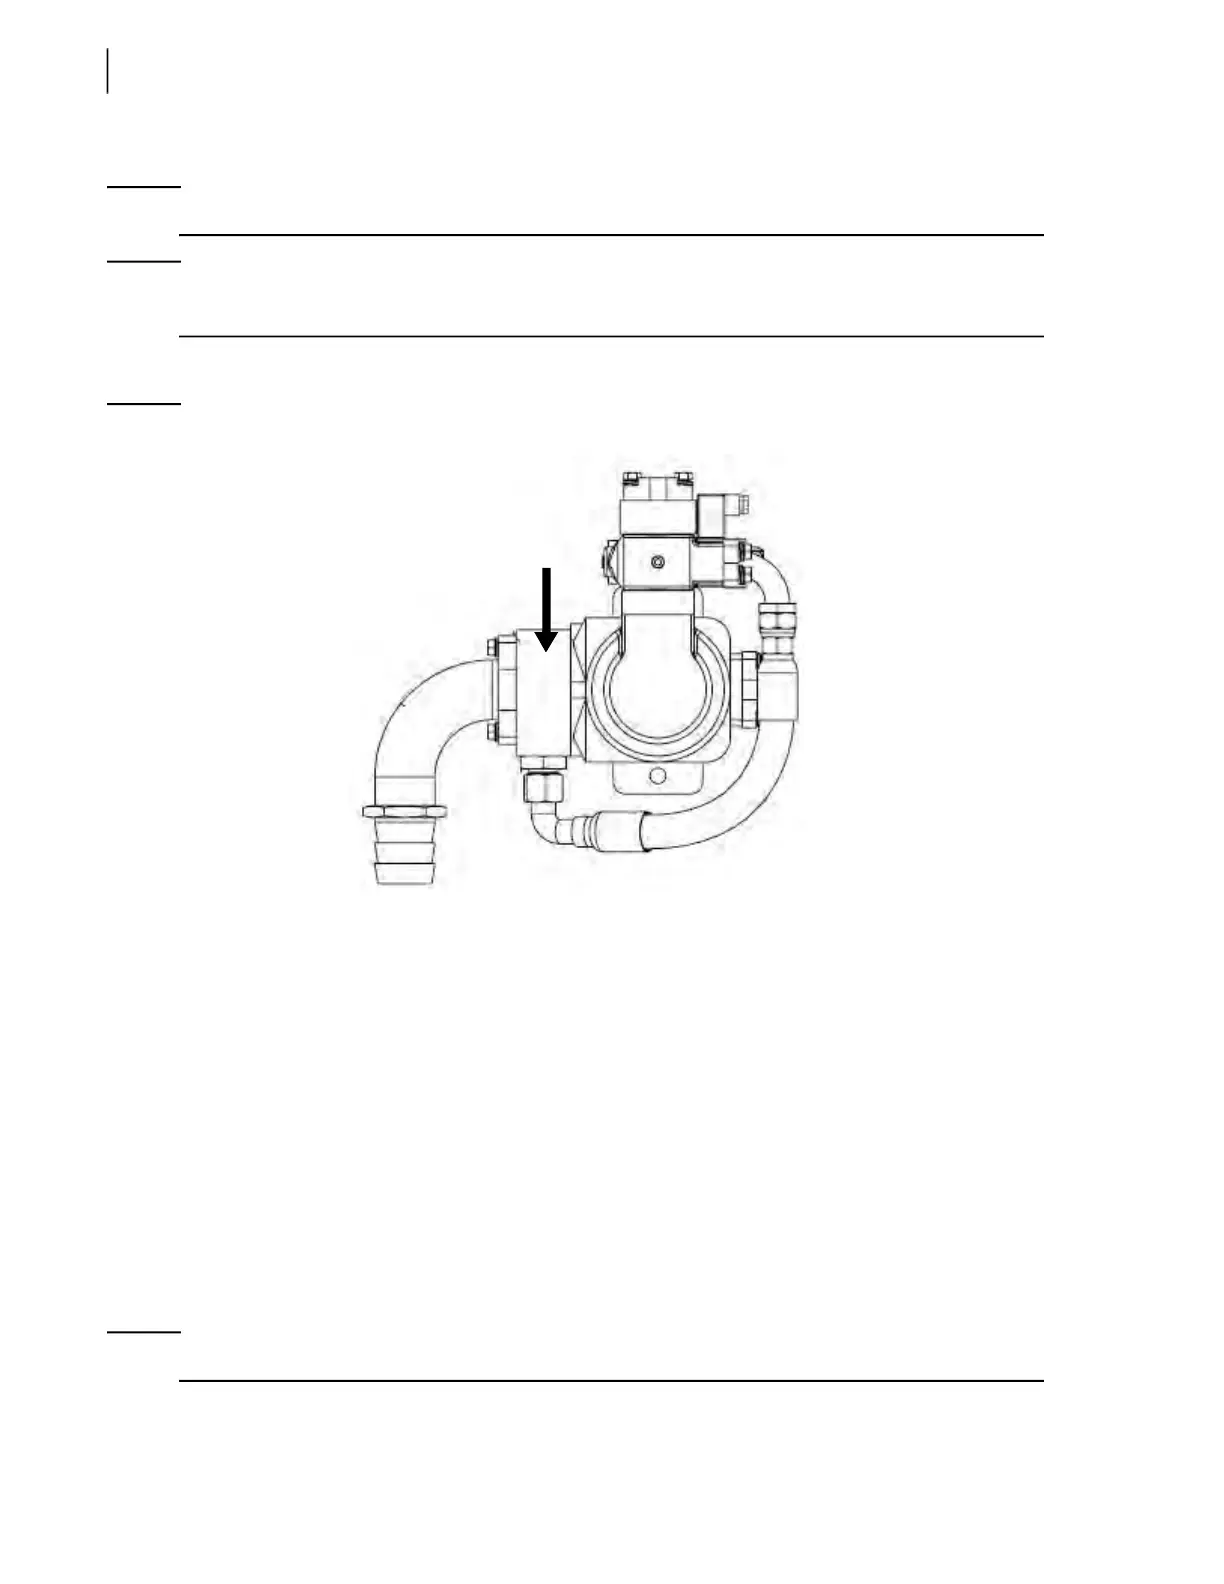
9. Remove the suction block (see Figure 5-7) and save it for the new pump.
Figure 5-7
Suction block
10. Disconnect the drive shaft by removing the 4 bolts that secure the shaft to the engine.
Some mechanics may rather want to disconnect the drive shaft from the pump.
The choice is up to the mechanics and is based on the type of chassis the vehicle is built on.
11. Attach the pump to a lifting device and remove both 5/8” bolts that hold the pump to the pump
support.
12. Remove the pump.
If need be, disconnect the drive shaft from the pump and save it for the replacement pump.
13. Install the new pump.
Before attempting to install the new pump, it is very important to check the port configuration on
that pump; the ports on the replacement pump must be positioned the same way as on the old
pump. If they are not, proceed with the indexing of the new pump.
The replacement pump must be oriented in such a way to facilitate reconnection to the hydraulic
system and attachment to the chassis frame.
NOTE: Both sections of the pump are indexable: the body section and the arm section.
To index the new pump, proceed this way:
 Loading...