3. INSTALLATION
13
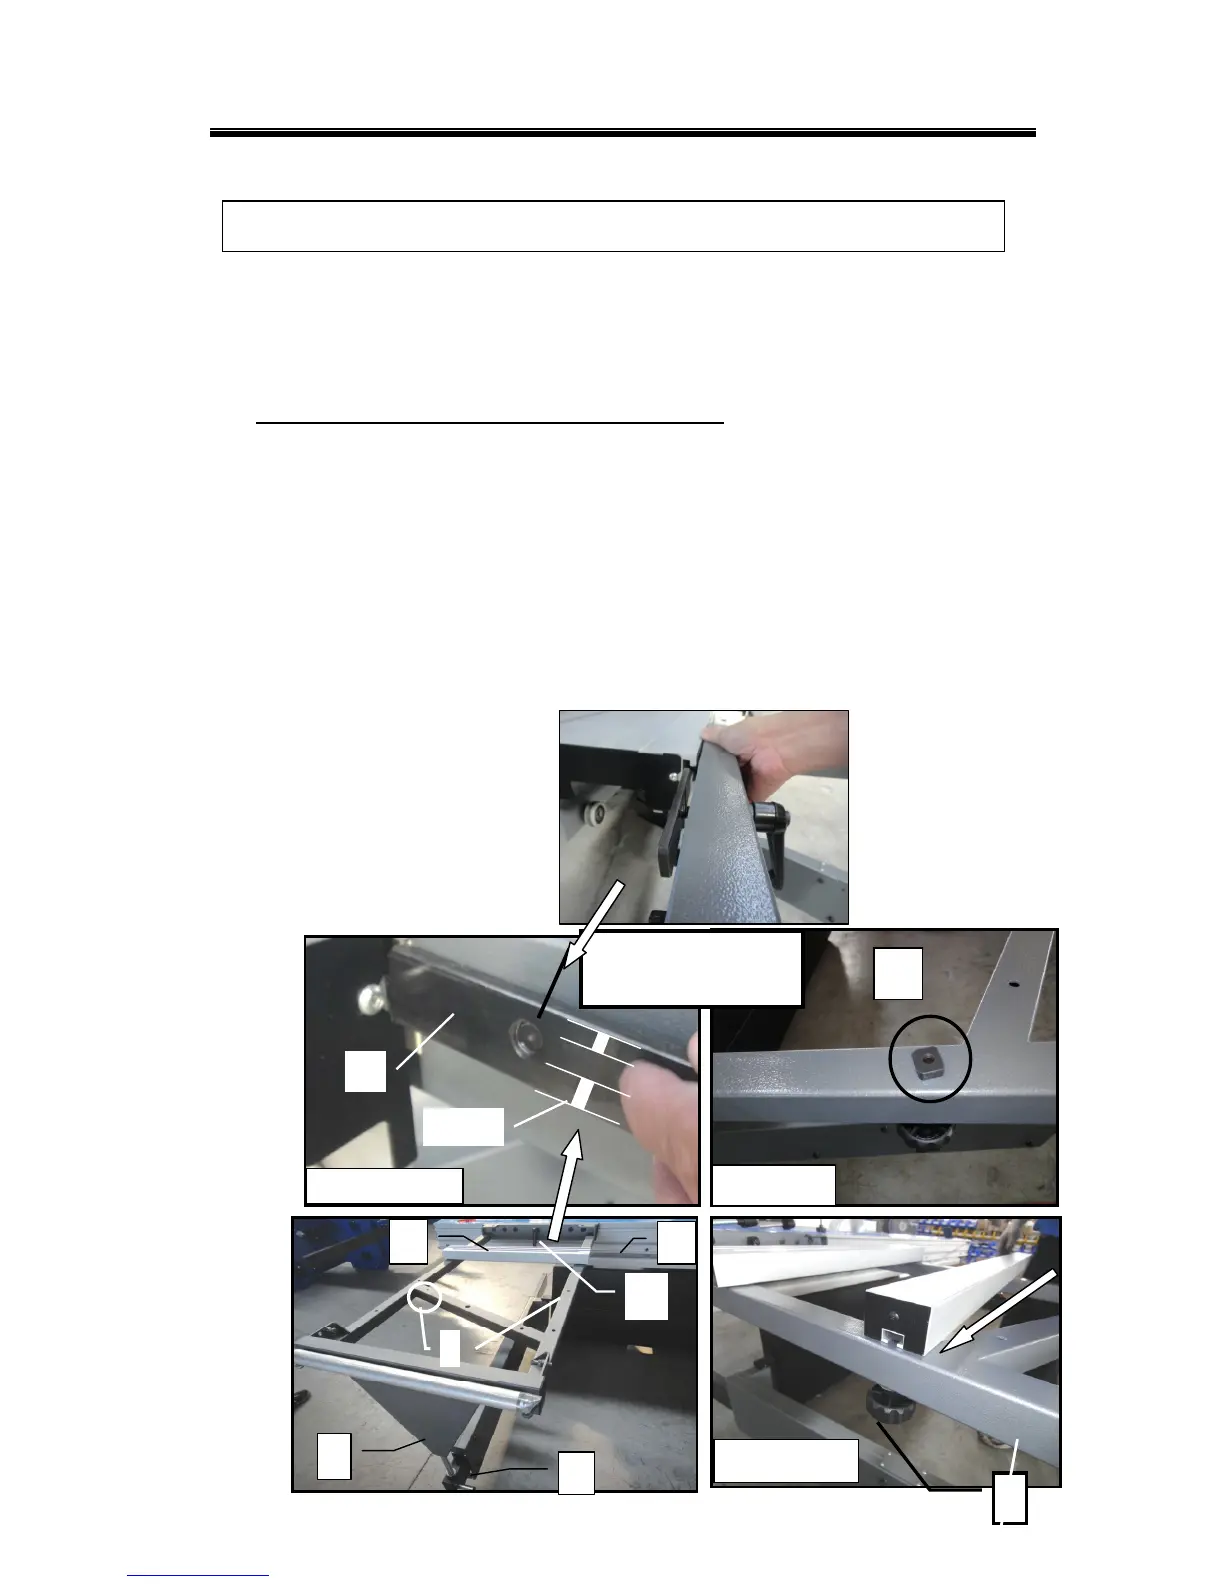
3-4. FITTING THE CROSSCUT FRAME & EXTENSION FENCE ASSEMBLY
I. Fitting the crosscut frame
2. Fit the crosscut frame by putting A (Fig. 3-4.1) into the end of swing arm B(Fig.
3-4.1). At the same time, fit frame C (Fig. 3-4.1) by insert fix plate F (Fig.3-3.1c) of
the crosscut frame to groove D (Fig. 3-4.1) of the sliding table.
Note: the fix plate F has to be placed as Fig. 3-4.1c
3. Make sure A (Fig. 3-4.1) is placed properly in the swing arm B (Fig. 3-4.1).
4. Tighten lever E(Fig. 3-4.1)
※ Notice: To move or take off the crosscut frame, withdraw lever E(Fig. 3-4.1)
II. Fitting the crosscut fence
1. Fit the T-nut R (Fig. 3-4.1a) into crosscut frame holes G (Fig. 3-4.1) then slide the
square support pipe in (see arrow of Fig. 3-4.1b).
2. Fit square pipe I (Fig. 3-4.2) to R (Fig. 3-4.1a) of crosscut frame. And tighten knob
J(Fig. 3-4.1b & 3-4.2) for fixing on crosscut frame.
All fitting operations in this section require approx. 2 people