3. INSTALLATION
14
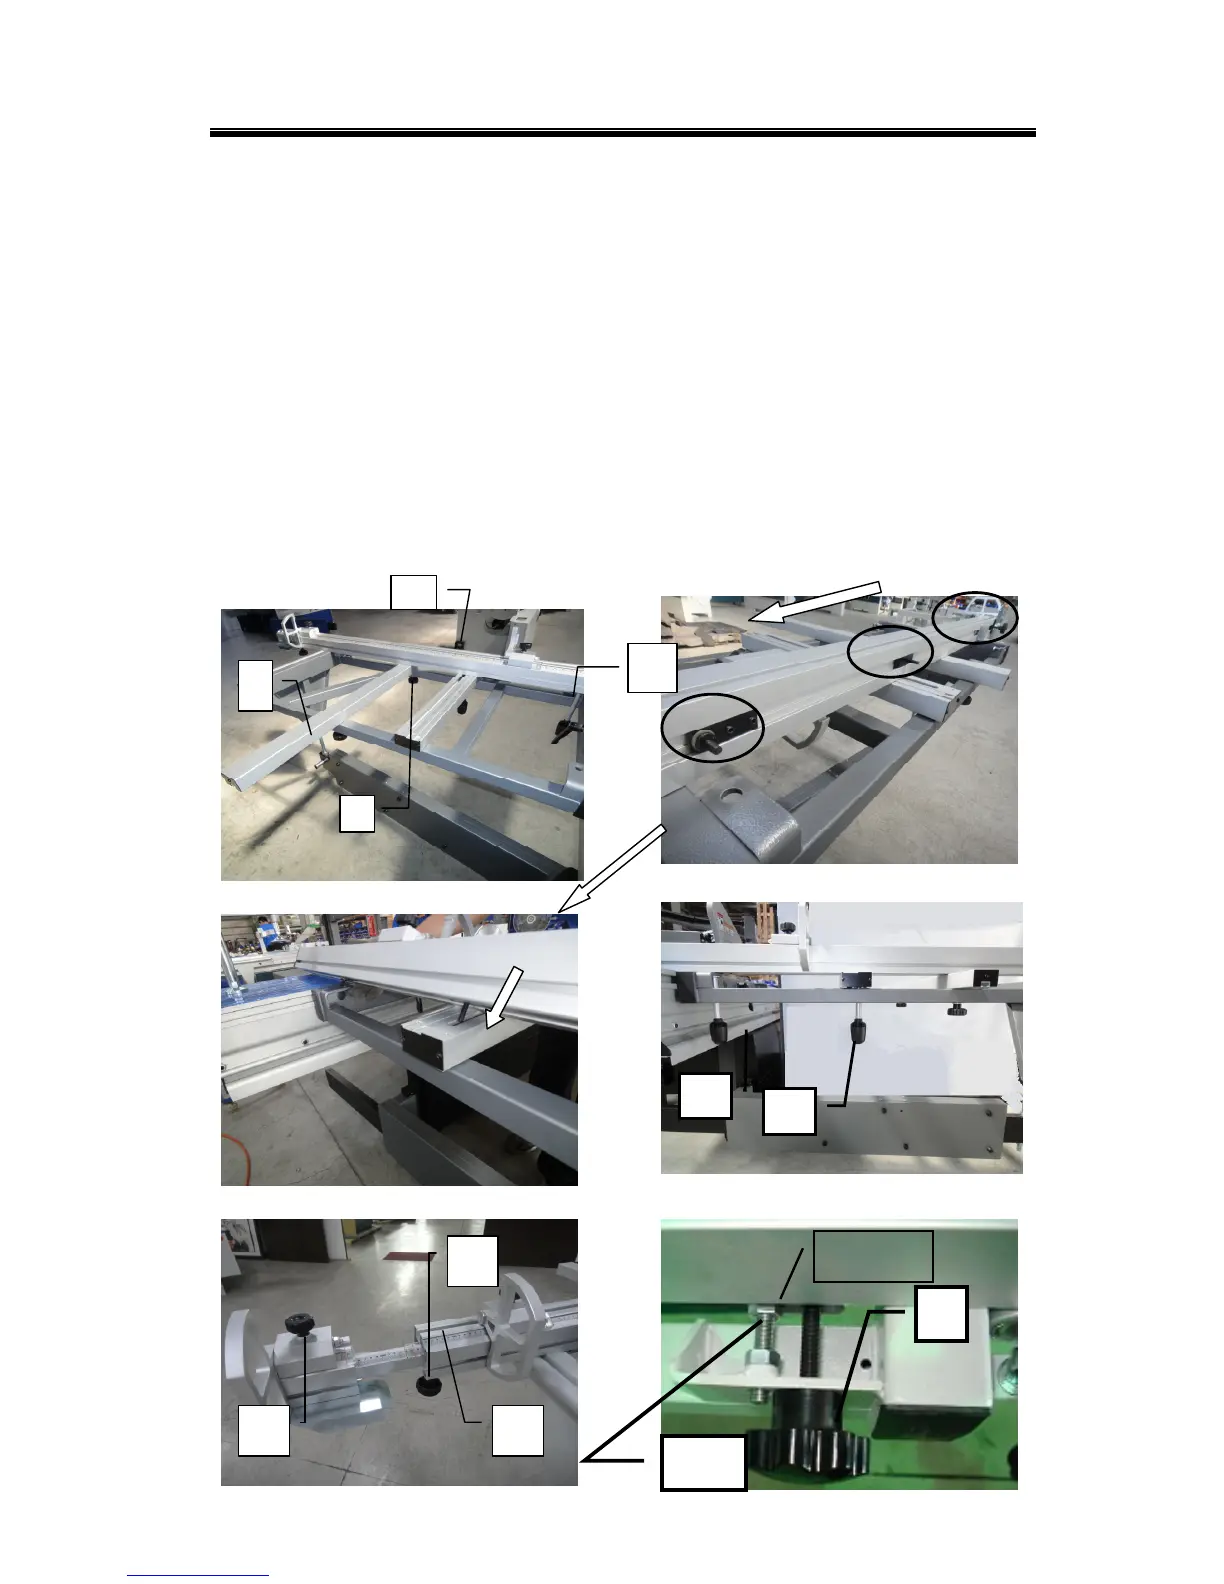
3. Slide the 4 sets of square pads by follow the arrow direction into the groove at
the bottom and lock 1 pad at the end (Fig. 3-4.2a)
4. Fit crosscut fence in the groove H (Fig. 3-4.2) and holes on crosscut frame (as Fig
3-4.2b)
5. Lock knob Y&Z(Fig. 3-4.c)for fixing
6. Turn nut L (Fig.3-4.3a) to make crosscut fence and sliding table exactly vertical.
Then lock knob M (Fig.3-4.3a) for fixing.
※ Notice: Please tie the knob Z (Fig.3-4.2a) to fix the fence. And adjust L (Fig. 3-4.3a)
&M (Fig. 3-4.3a) to make ext. fence be exactly vertical with sliding table.
III. Fitting the flip stop units
1. Un
locking knob N(Fig. 3-4.3) of the extension piece.
2. Slide the flip stop unit into groove O (Fig. 3-4.3). Then tight P (Fig. 3-4.3) to fix.
.
Figure3-4.