28
www.lannerinc.com
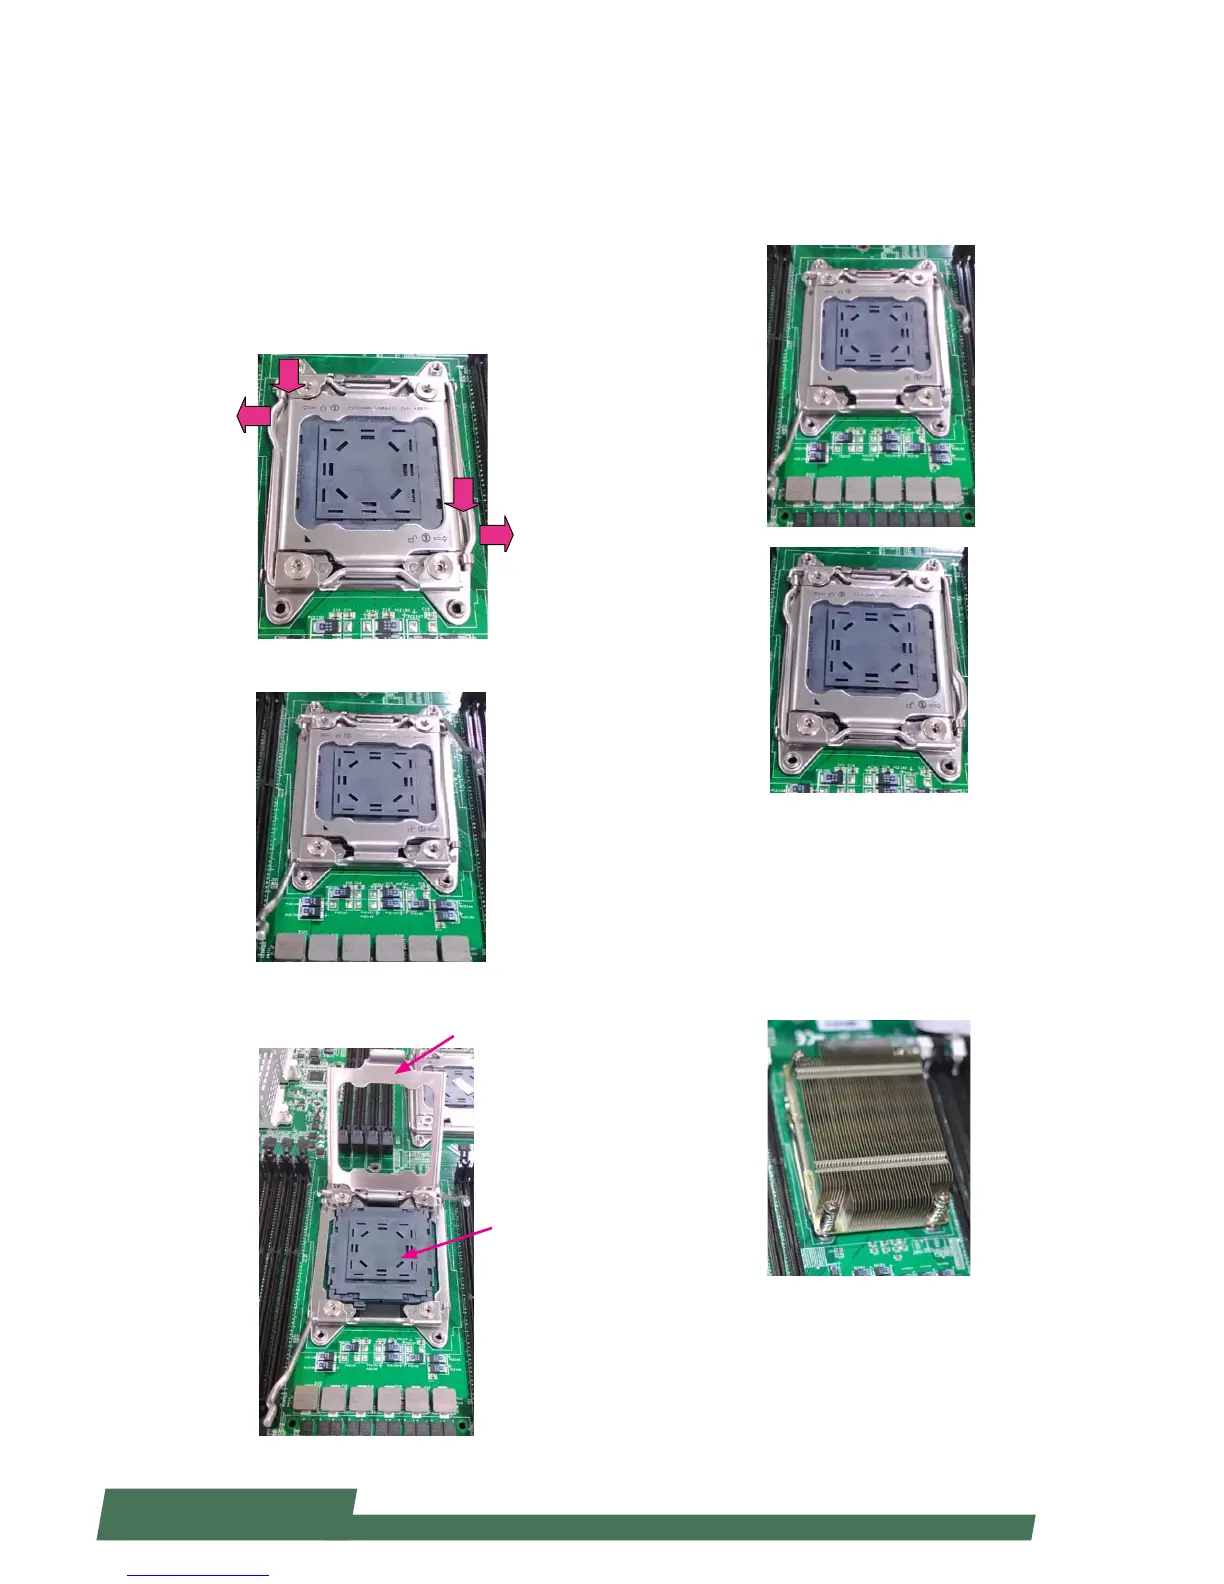
Installing CPU and the Heat Sink
Follow the procedures below for installing a CPU
1. Locate the CPU socket(s)
2. Press the left load lever down, move it out of the
retention tab. Then, do the same to the right. There are
two levers for each CPU socket.
3. Lift the load levers.
4. Open the load plate and also the protective cap.
Press down
Press down
Load plate
Protective cap
5. Align the CPU and the notch on the socket. The CPU should
fit perfectly into the socket. Note that the CPU fits in the
socket in only one direction.
6. Put the protective cap onto the CPU. Close the load plate
and push the load lever to lock it back to the retention tab.
7. Put the heat sink on the installed CPU and match the
screws with the screw holes on the board. Fasten two screws
which are opposite to each other at a time and then the other
two. It is easier this way to avoid the force of spring.
Place the heat sink cover on top of the installed heat sink and
fasten it with screws on the chassis.