34
www.lannerinc.com
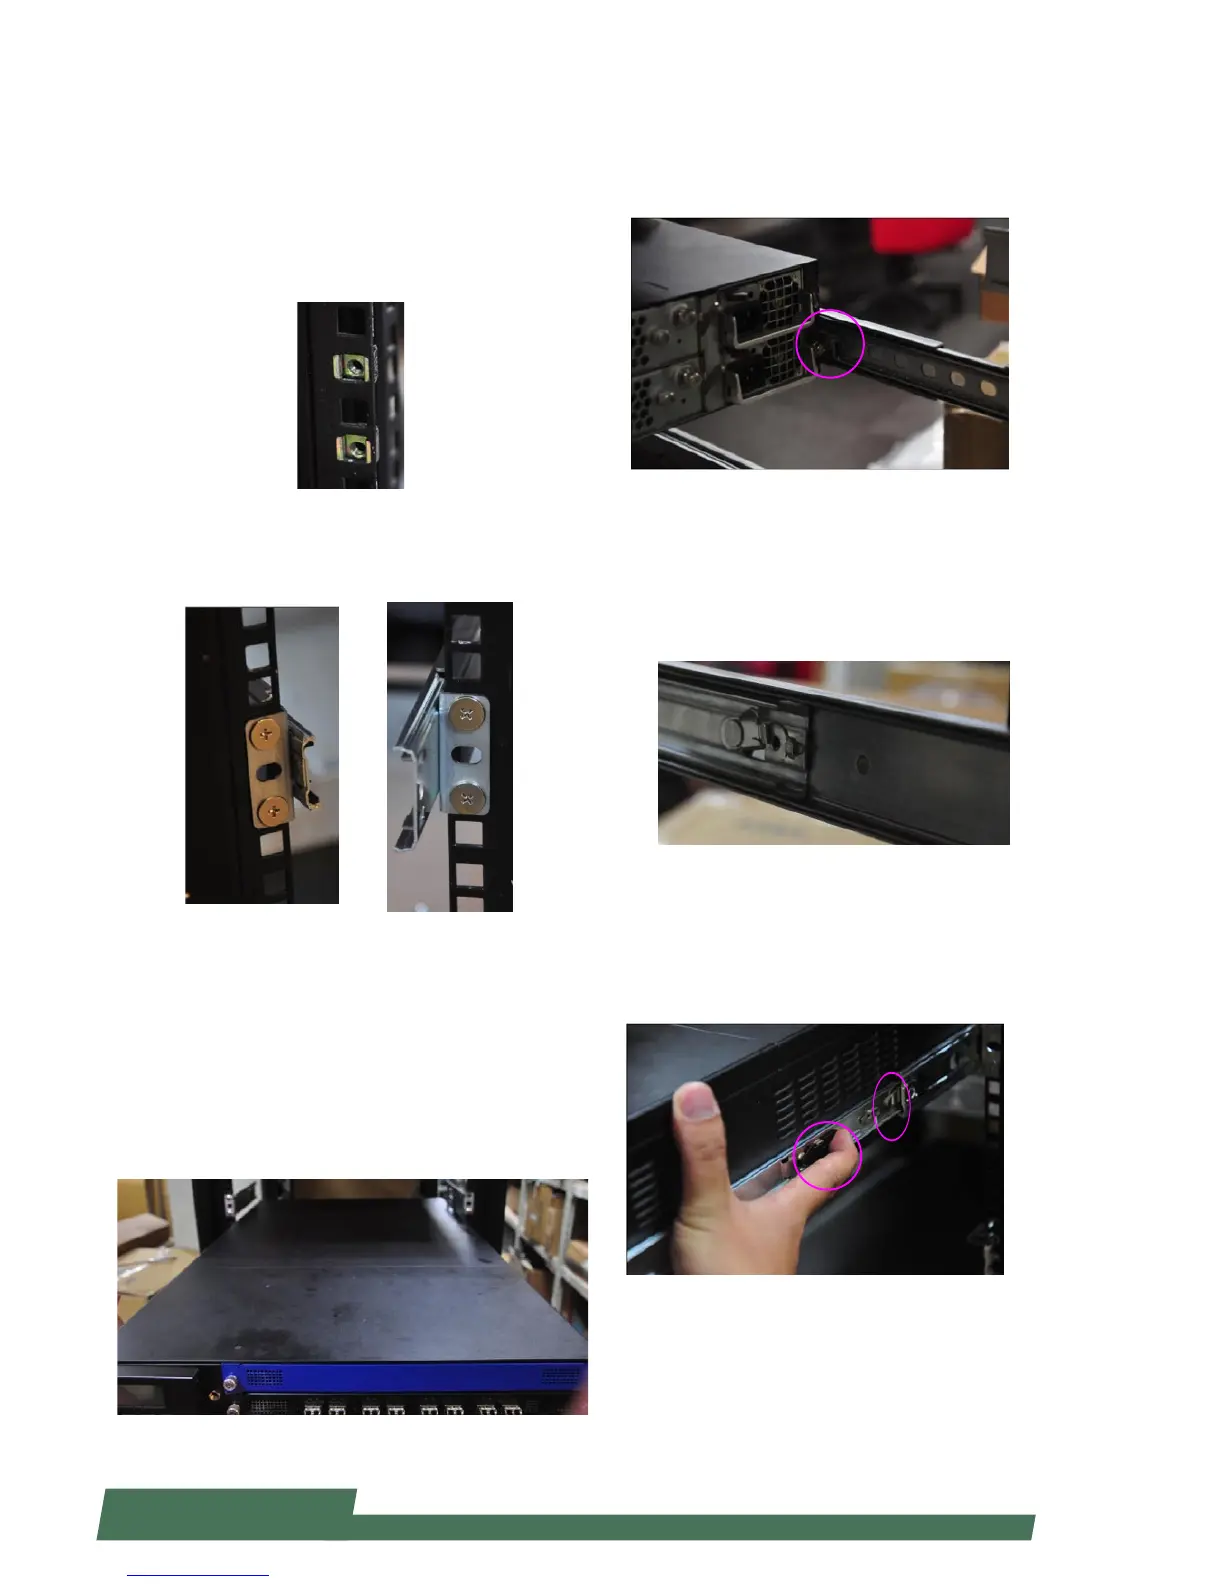
Installing Slide Rails Onto the Rack
1. Install 2 cage nuts for both left and right of the rack,
as well as front and rear of the rack. Remember to leave
the middle hole open. You shall install a total number
of 8 cage nuts: 4 on the front (2 for the left and 2 for
the right), and 4 on the rear (2 for the left and 2 for the
right).
2. Install the slide rails to each side of the racket as the
image below. Make sure the screws are firmly applied.
Installing HCP-72i1 Onto the Rack
1. Inser the network appiance with the front facing
you. Make sure the chassis-attahced inner brackets ac-
curately match the slide rails installed on the rack.
Notes: it is strongly recommended to conduct this ac-
tion with two or more persons.
2. Make sure the inner brackets on the chassis match the
slide rails on the rack.
3. Gently push HCP-72i1 through the rails.
4. The device may be locked during the mid way. Remem-
ber to adjust the rail lock so that you can continue to psuh
the appliance to the end of the rack.
5. To bring the appliance out of the rack, use the two locks
on the rail circled in the image below. When sliding the
device out, remember to do it slowly.
Notes: it is strongly recommended to conduct this action
with two or more persons.
 Loading...