PHOTOGRAPHY ▸ SHOOTING MODES
110
EXPOSURE BRACKETING
Many attractive objects are rich in contrast, which means they have
very bright and very dark areas. The image effect can be dramat-
ically different, depending on which of these areas you choose
to align your exposure with. The automatic bracketing function in
aperture priority mode allows you to produce several alternatives
with graduated exposure values and varying shutter speeds. You can
then select the picture you like best or use relevant picture editing
software to calculate an image with a particularly broad contrast
spectrum (HDR).
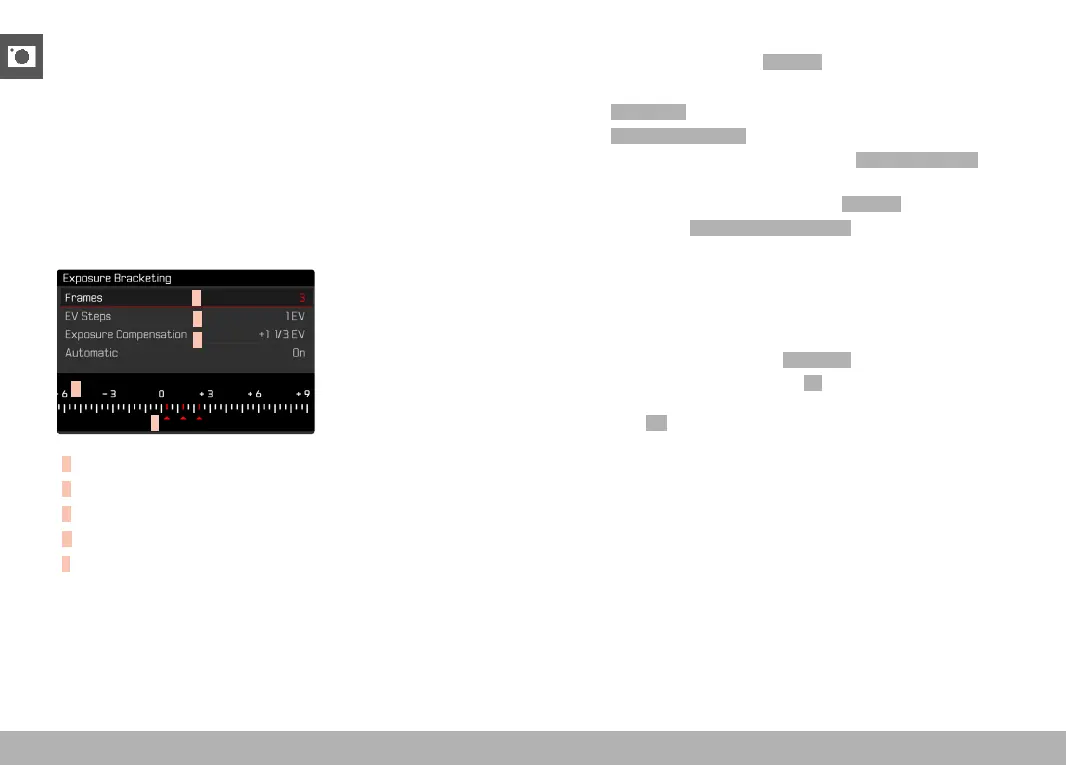
A
B
C
D
E
A
Number of frames
B
Exposure difference between shots
C
Exposure compensation
D
Light value scale
E
Exposure values of the images marked in red
(The scale will be offset by the relevant value if exposure
compensation is set concurrently.)
You can select the desired number of frames (3 or 5). The exposure
difference, which can be set via EV Steps, can be up to 3 EV.
▸ Select
Drive Mode in the main menu
▸ Select
Exposure Bracketing
▸ Select the desired number of frames under Number of Frames in
the submenu
▸ Select the desired exposure offset under
EV Steps in the submenu
▸ Select the desired
Exposure Compensation value in the submenu
• The marked exposure values change positions according to the
settings selected. In the case of exposure compensation, the
scale also shifts.
• The selected exposure compensation value will be applied to
the entire series of shots.
▸ Select the desired setting under
Automatic in the submenu
• With the factory setting in place (
On), the entire exposure se-
ries will run after the shutter button is pressed once; when the
setting is Off, each picture must be taken individually.
▸ Take one or several shots by pressing the shutter button


 To Next Page