Leidos Security Detection & Automation, Inc. – Proprietary Page 52 of 119
© 2020 Leidos. All rights reserved
11.6 Motor Brake Release
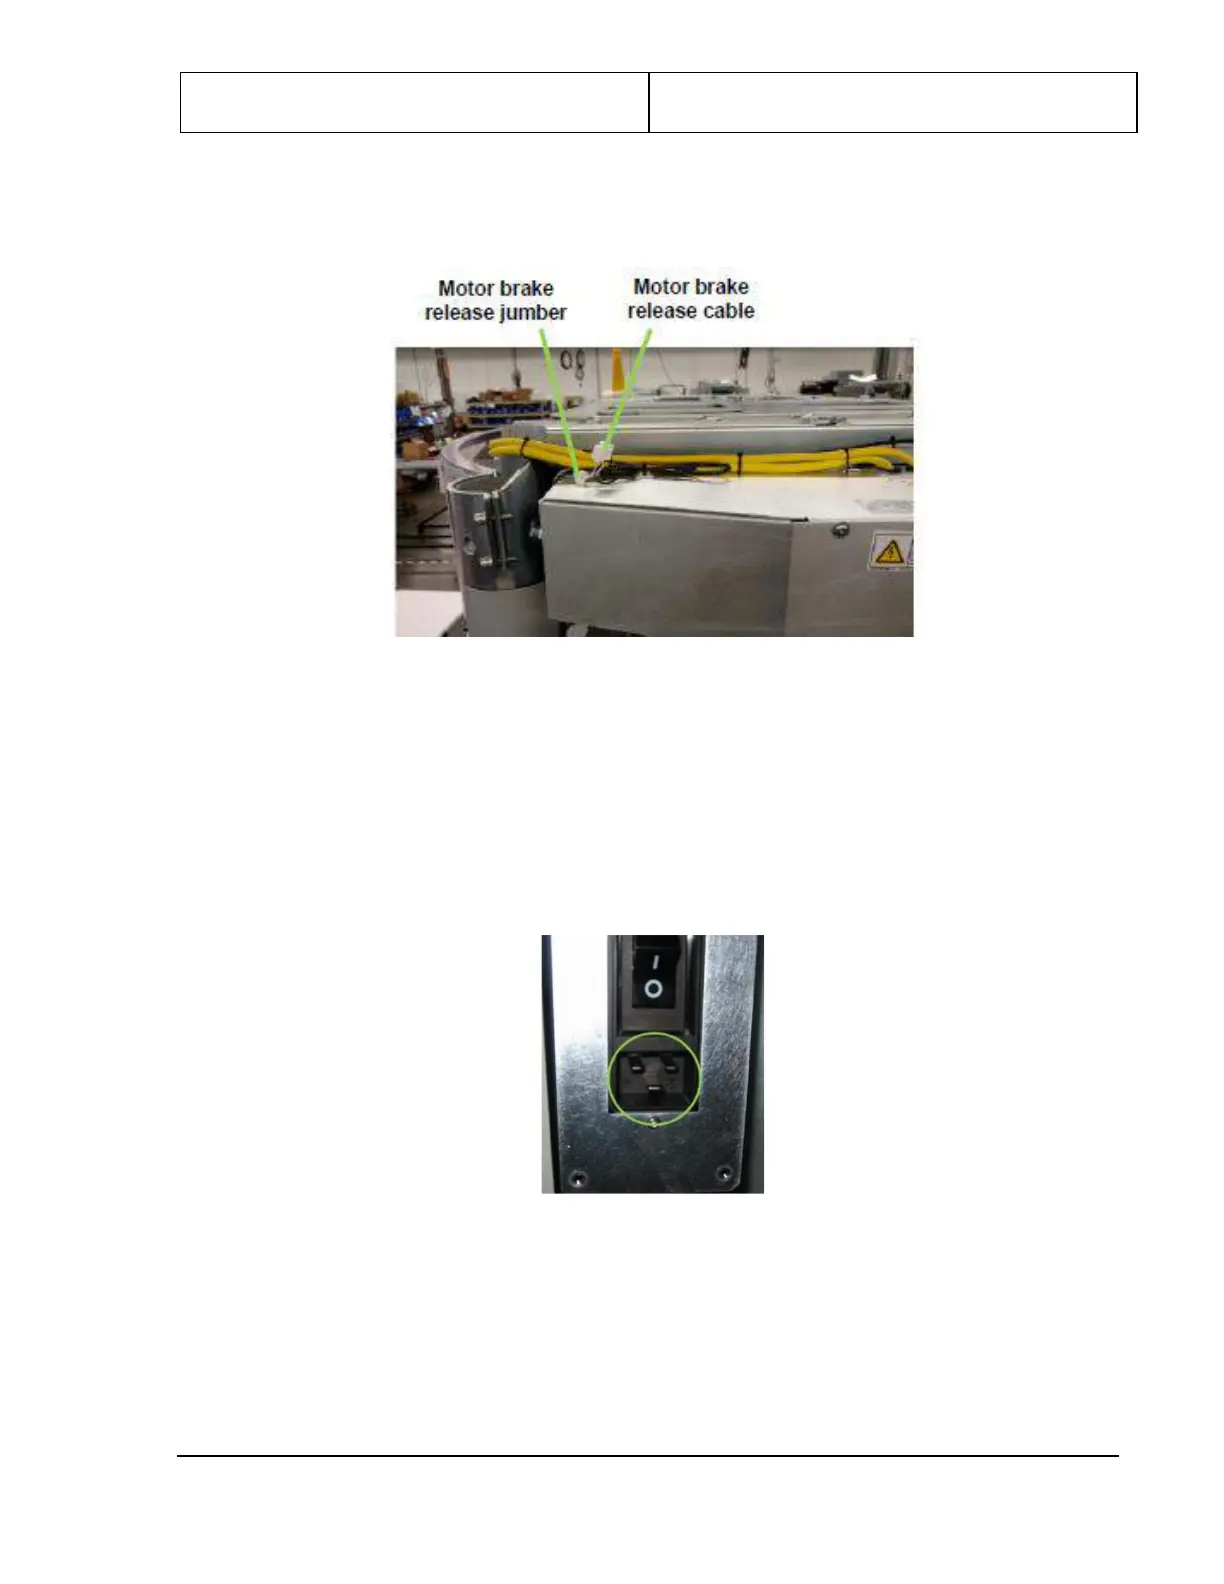
1. Connect the motor brake release jumper located on top of the electrical enclosure as shown in
Figure 50.
Figure 50: Motor Brake Release Cable and Detail Showing Jumper Connected
11.7 Power Cord
1. The power cord included with the scanner should be appropriate for the location and available power
source. There are several power cord length/plug options. Contact a Leidos Security Detection &
Automation representative if a different power cord is required.
2. Connect the end of the power cord to the power input box, which should be hanging along one side of
the scanner.
Figure 51: Power Input Box
3. Connect the other end of the power cord to a wall outlet or other specified power source.
4. Power on the scanner by pressing the portion of the scanner’s power switch labeled “I”, shown in the
following figure.