Leidos Security Detection & Automation, Inc. – Proprietary Page 84 of 119
This item is subject to the U.S. Export Administration Regulations (15 CFR 730-774) and authorized for export only for certain countries,
parties, end-users, and end-uses. It may not be exported, resold, transferred, or otherwise disposed of without approval under the EAR or as
otherwise authorized by U.S. law and regulations.
© 2020 Leidos. All rights reserved
12.0 Scanner Power-Up
12.1 Pre-Power-Up Checks
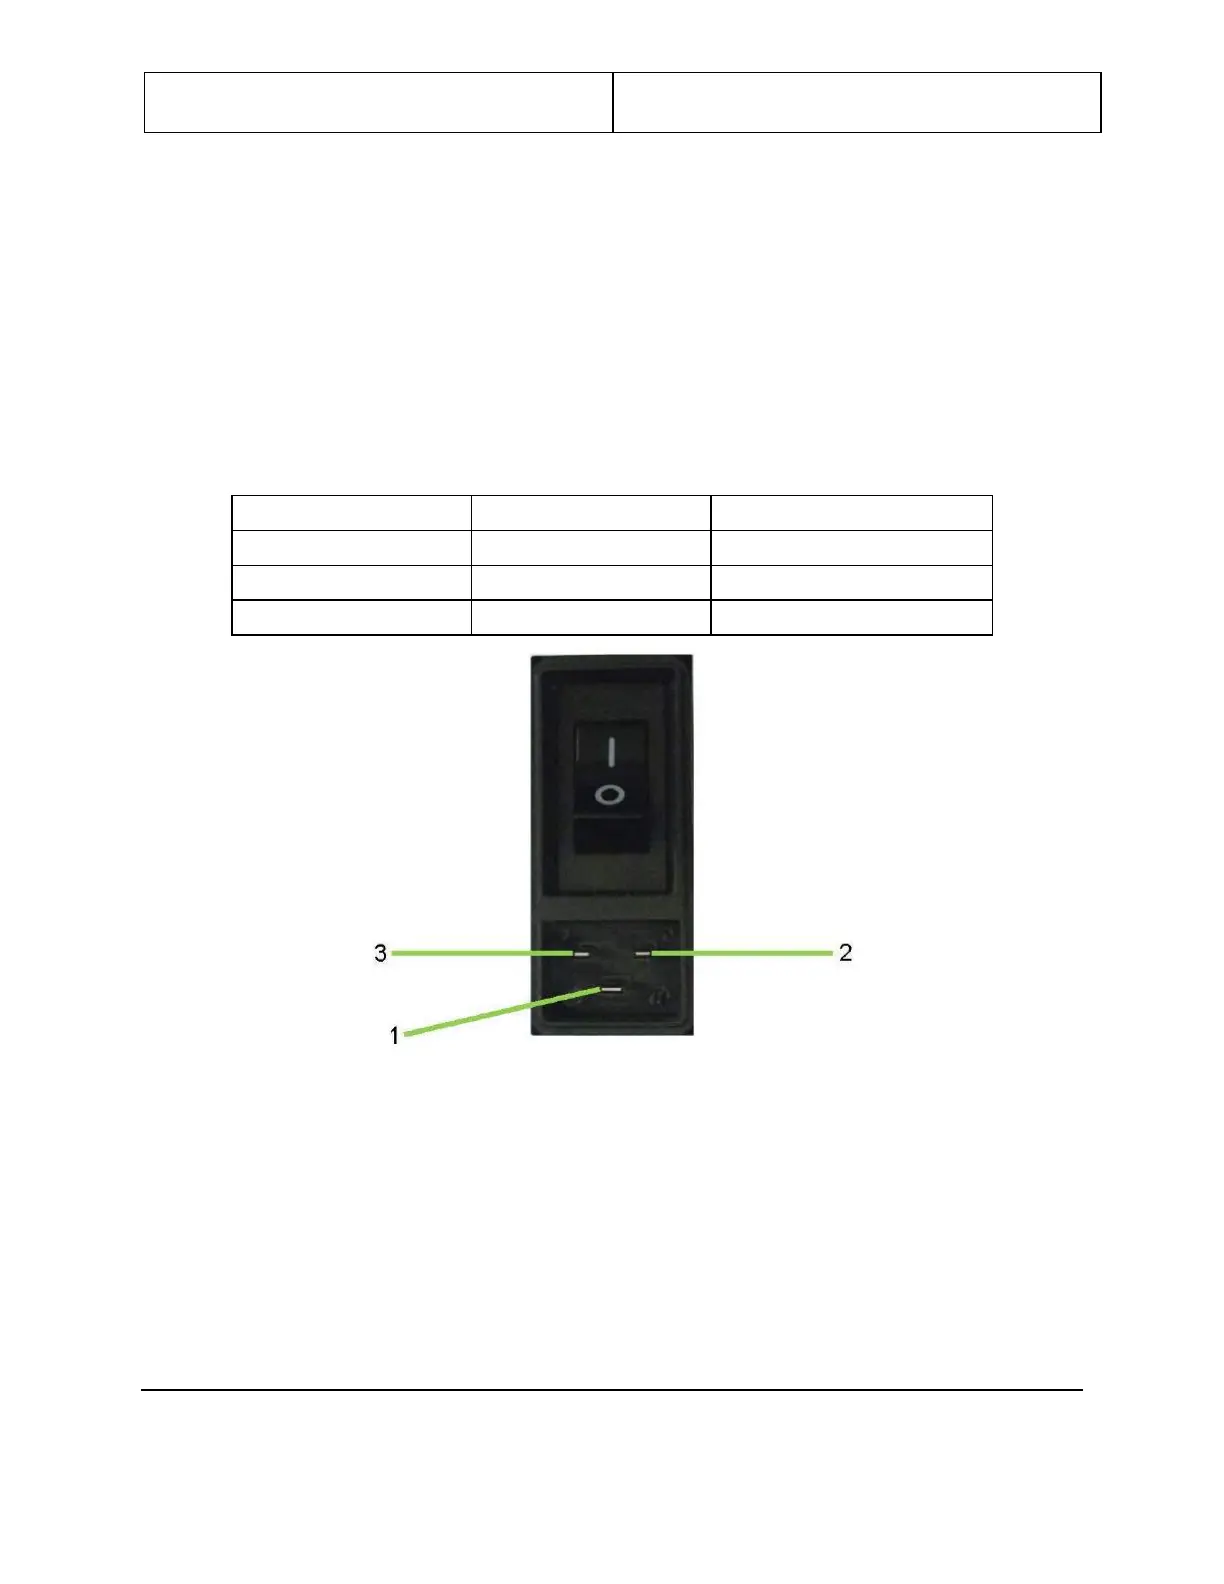
Remove the power cord from the power input receptacle, then turn the power switch to the on
position by pressing the portion of the power switch labeled “I”, as shown in the following figure.
Using a digital multimeter in ohm mode, check the resistance from each point listed in the following
table and indicated in the following figure.
Table 4: Resistance Measurement Points
Figure 94: Power Input Receptacle
Turn the power switch to the off position by pressing the portion of the power switch labeled “O”,
and then reattach the power cord to the power input receptacle.