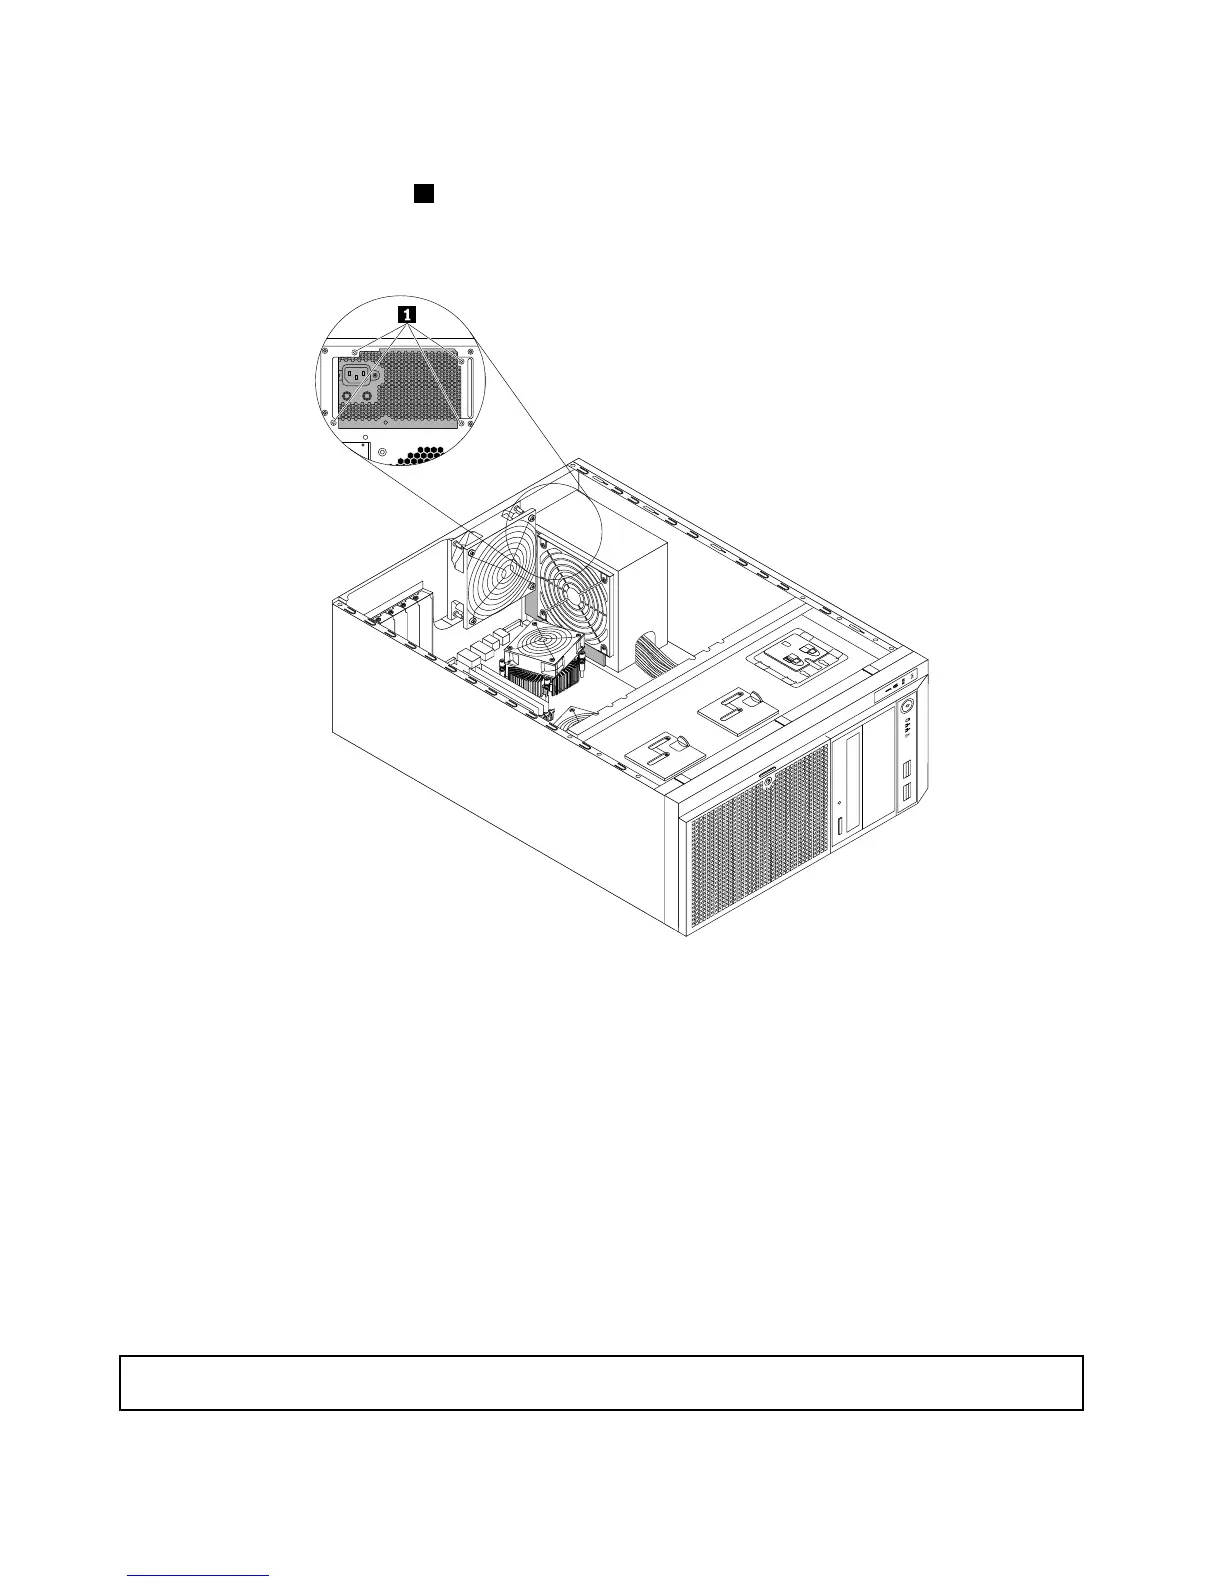
9.Installthenewpowersupplyassemblyintothechassissothatthefourscrewholesinthenewpower
supplyassemblyarealignedwiththecorrespondingholesmarkedwithAintherearofthechassis.
Then,installthefourscrews
1tosecurethenewpowersupplyassemblyinplace.
Note:UseonlyscrewsprovidedbyLenovo.
Figure112.Installingthenon-hot-swappowersupplyassembly
10.Refertoyournotetoconnectthenewpowersupplyassemblycablestothesystemboard,alldrives,
andorhot-swaphard-disk-drivebackplanes,dependingonthemodel.Then,properlyroutethecables
andsecurethecableswiththecableclipsandtiesinthechassis.
11.Reinstallthefrontsystemfans.See“Replacingthefrontsystemfan1”onpage183.
12.Ifyouareinstructedtoreturntheoldnon-hot-swappowersupplyassembly,followallpackaging
instructionsanduseanypackagingmaterialsthataresuppliedtoyouforshipping.
Whattodonext:
•Toworkwithanotherpieceofhardware,gototheappropriatesection.
•Tocompletethereplacement,goto“Completingthepartsreplacement”onpage200.
Replacingthehot-swaphard-disk-drivebackplane
Attention:Donotopenyourserverorattemptanyrepairbeforereadingandunderstanding“Safetyinformation”
onpageiii
and“Guidelines”onpage83.
172ThinkServerTD340UserGuideandHardwareMaintenanceManual