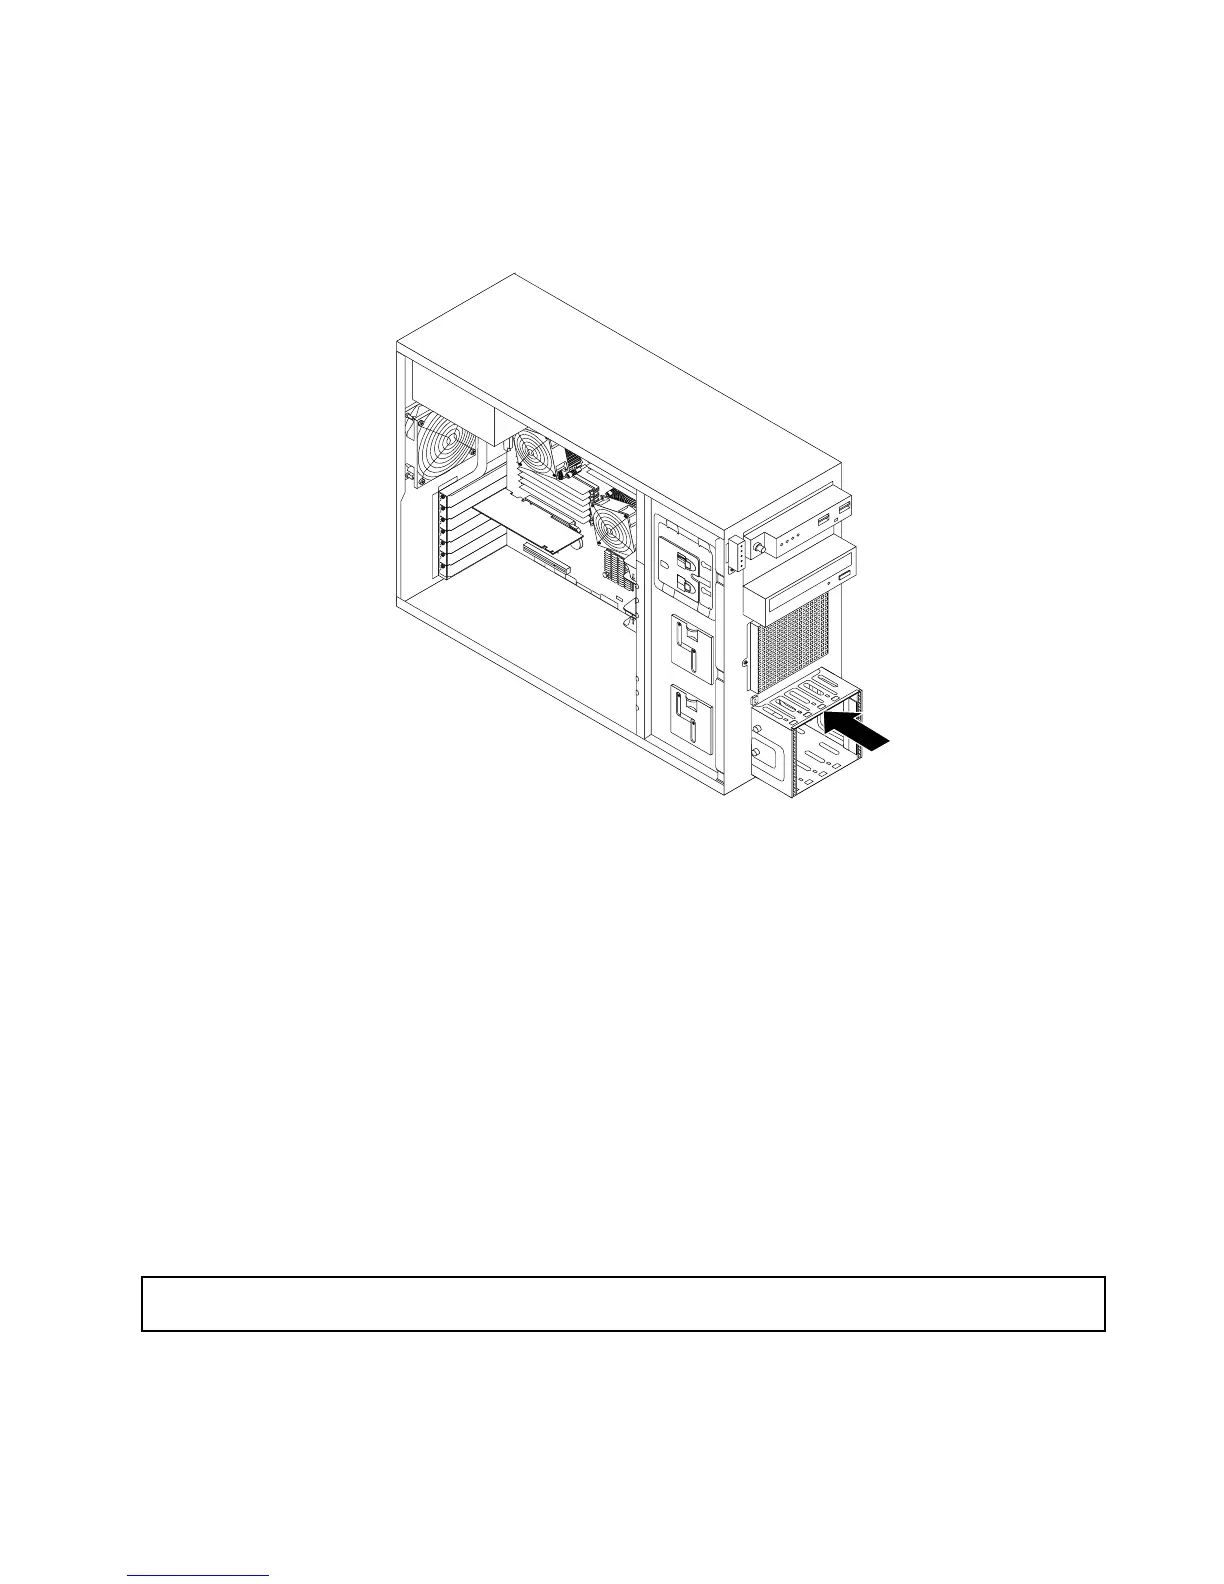
12.Slidethehard-disk-drivecageintothechassisfromthefrontuntilitsnapsintoposition.
Note:Thefollowingillustrationshowsthe3.5-inchhard-disk-drivecage.Forthe2.5-inchhard-disk-drive
cage,theinstallationprocedureisthesame.
Figure119.Installingthehard-disk-drivecage
13.Reinstallallthehot-swapharddiskdrivesanddummytrays(ifany)inthehard-disk-drivecage.See
“Installingorreplacingahot-swapharddiskdrive”onpage130.
14.Refertoyournotetoreconnectthecablestothebackplane.
15.Reinstallthefrontsystemfan1.See“Replacingthefrontsystemfan1”onpage183.
16.Reinstallthefrontbezel.See“Removingandreinstallingthefrontbezel”onpage87.
17.Ifyouareinstructedtoreturntheoldbackplane,followallpackaginginstructionsanduseanypackaging
materialsthataresuppliedtoyouforshipping.
Whattodonext:
•Toworkwithanotherpieceofhardware,gototheappropriatesection.
•Tocompletethereplacement,goto“Completingthepartsreplacement”onpage200
.
Replacingthepowerdistributionboardandcageassembly
Attention:Donotopenyourserverorattemptanyrepairbeforereadingandunderstanding“Safetyinformation”
onpageiiiand“Guidelines”onpage83.
Thistopicprovidesinstructionsonhowtoreplacethepowerdistributionboardandcageassembly.This
topicappliesonlytoservermodelsthatcomewithhot-swapredundantpowersupplies.
Chapter6.Installing,removing,orreplacinghardware177