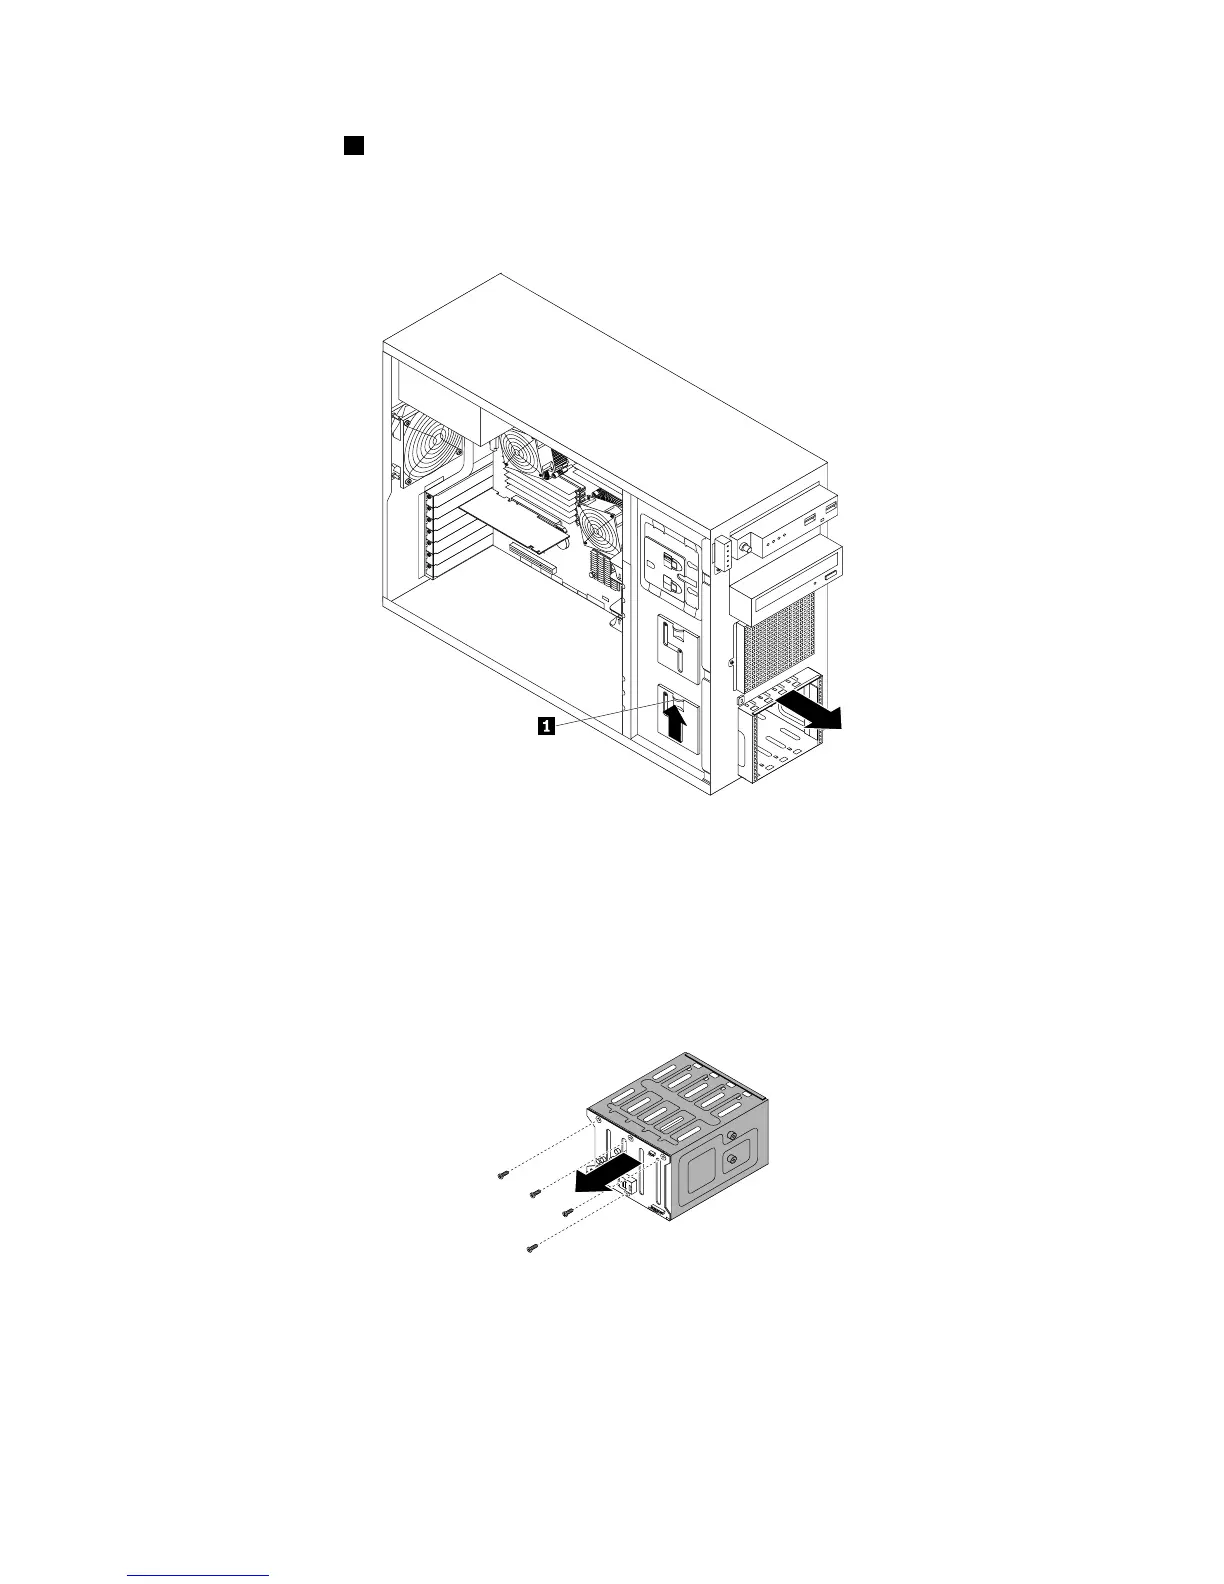
8.Liftthereleaselatch1andslidethehard-disk-drivecageoutofthefrontofthechassis.
Note:Thefollowingillustrationshowsthe3.5-inchhard-disk-drivecage.Forthe2.5-inchhard-disk-drive
cage,theremovalprocedureisthesame.
Figure113.Removingthehard-disk-drivecage
9.Dependingonwhetheryourserverhas2.5-inchhot-swaphard-disk-drivecageswithbackplanesor
3.5-inchhot-swaphard-disk-drivecageswithbackplanes,dooneofthefollowing:
•Forthe3.5-inchhot-swaphard-disk-drivebackplane,removethefourscrewsthatsecurethe
backplane,andthenremovethebackplanefromthehard-disk-drivecage.
Figure114.Removingthe3.5-inchhot-swaphard-disk-drivebackplane
174ThinkServerTD340UserGuideandHardwareMaintenanceManual