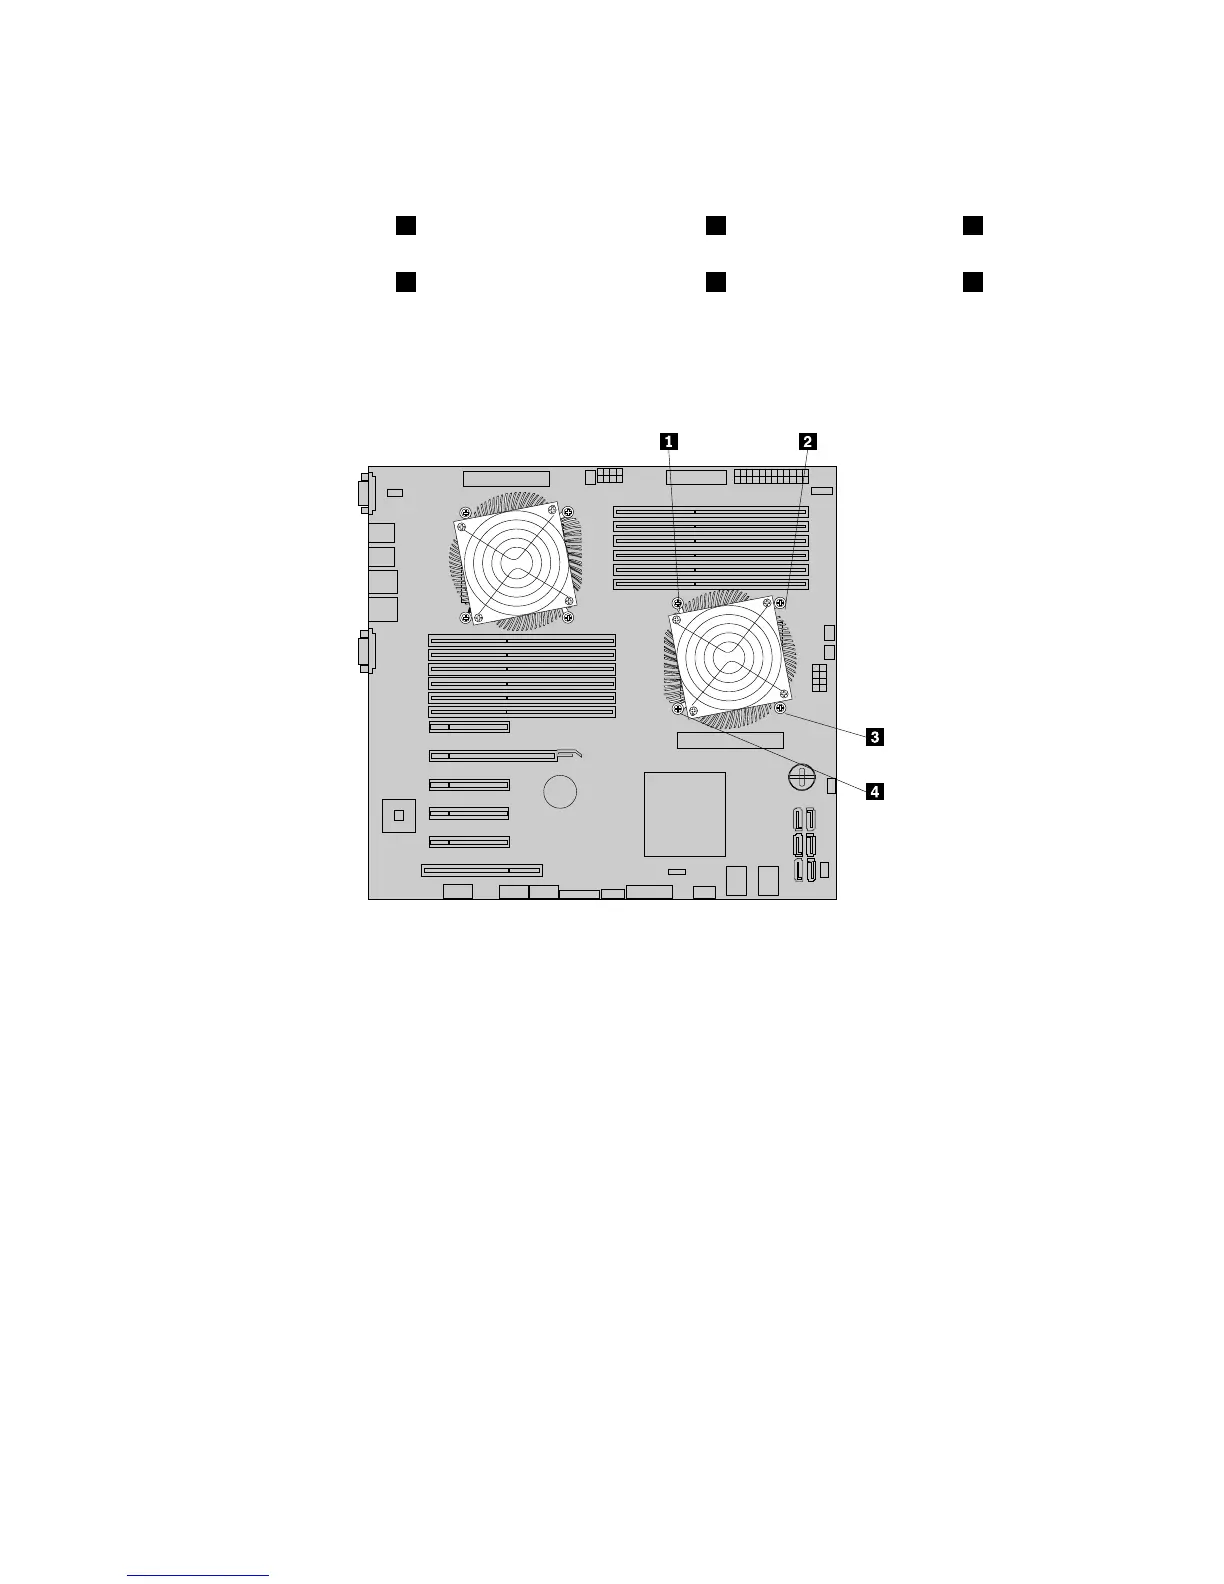
6.Removethefourscrewsthatsecuretheheatsinkandfanassembly1tothesystemboard.Itis
recommendedthatyoucarefullyremovethefourscrewsfromthesystemboardusingthefollowing
methodtoavoidanypossibledamagetothesystemboard.
a.Partiallyremovescrew1,thencompletelyremovescrew3,andthenreturntoscrew1and
completelyremoveit.
b.Partiallyremovescrew2,thencompletelyremovescrew4,andthenreturntoscrew2and
completelyremoveit.
Note:Thefourscrewsareintegratedpartsoftheheatsinkandfanassembly1.Donottrytoremove
thefourscrewsfromtheheatsinkandfanassembly1.
Figure128.Removingthescrewsthatsecuretheheatsinkandfanassembly1
7.Gentlytwisttheheatsinkandfanassembly1tofreeitfromthemicroprocessor1,andthenlifttheheat
sinkandfanassembly1offthesystemboard.
8.Layasidetheoldheatsinkandfanassembly1.Touchthestatic-protectivepackagethatcontainsthe
newheatsinkandfanassembly1toanyunpaintedsurfaceontheoutsideoftheserver.Then,remove
thenewheatsinkandfanassembly1fromthepackage.
Notes:
•Whenhandlingtheheatsinkandfanassembly1,donottouchthethermalgreaseonthebottomofit.
•Beforeinstallingthenewheatsinkandfanassembly1,usethecleaningpadthatcomeswiththe
newheatsinkandfanassembly1towipethethermalgreasefromthetopofthemicroprocessor1.
Disposeofthecleaningpadafterallofthethermalgreaseisremovedfromthemicroprocessor1.
9.Placethenewheatsinkandfanassembly1onthesystemboardsothatthefourscrewsonthenew
heatsinkandfanassembly1arealignedwiththecorrespondingmountingstudsonthesystemboard.
Notetheorientationofthenewheatsinkandfanassembly1andensurethatyouproperlyplace
itsothatyoucaneasilyconnecttheheatsinkandfanassembly1cabletothemicroprocessor1fan
connectoronthesystemboard.See“Systemboardcomponents”onpage48
.
190ThinkServerTD340UserGuideandHardwareMaintenanceManual