8.RemovethetwoscrewsthatsecurethefrontaudioandUSBassemblyandremovethefailingfront
audioandUSBassemblyfromthebracket.
9.InstallanewfrontaudioandUSBassemblyintothebracketandinstalltwoscrewstosecurethe
frontaudioandUSBassemblytothebracket.
10.InstallthefrontaudioandUSBassemblybracketintothechassisandalignthescrewholeinthe
bracketwiththecorrespondingholeinthechassis.
11.Installthescrewtosecurethebrackettothechassis.
12.ReconnectthefrontaudioandUSBassemblycablestothefrontaudioconnectorandthefrontUSB
connectoronthesystemboard.See“Partsonthesystemboard”onpage34.
13.Reinstallthefrontbezel.See“Removingandreinstallingthefrontbezel”onpage90.
Whattodonext:
•Toworkwithanotherpieceofhardware,gototheappropriatesection.
•Tocompletetheinstallationorreplacement,goto“Completingthepartsreplacement”onpage166.
Replacingthesystemfan
Attention:DonotopenyourcomputerorattemptanyrepairbeforereadingandunderstandingtheChapter
1“Readthisfirst:Importantsafetyinformation”onpage1.
Toreplacethesystemfan,dothefollowing:
1.Removeallmediafromthedrivesandturnoffallattacheddevicesandthecomputer.Then,disconnect
allpowercordsfromelectricaloutletsanddisconnectallcablesthatareconnectedtothecomputer.
2.Removethecomputercover.See“Removingthecomputercover”onpage90.
3.Removethefrontbezel.See“Removingandreinstallingthefrontbezel”onpage90.
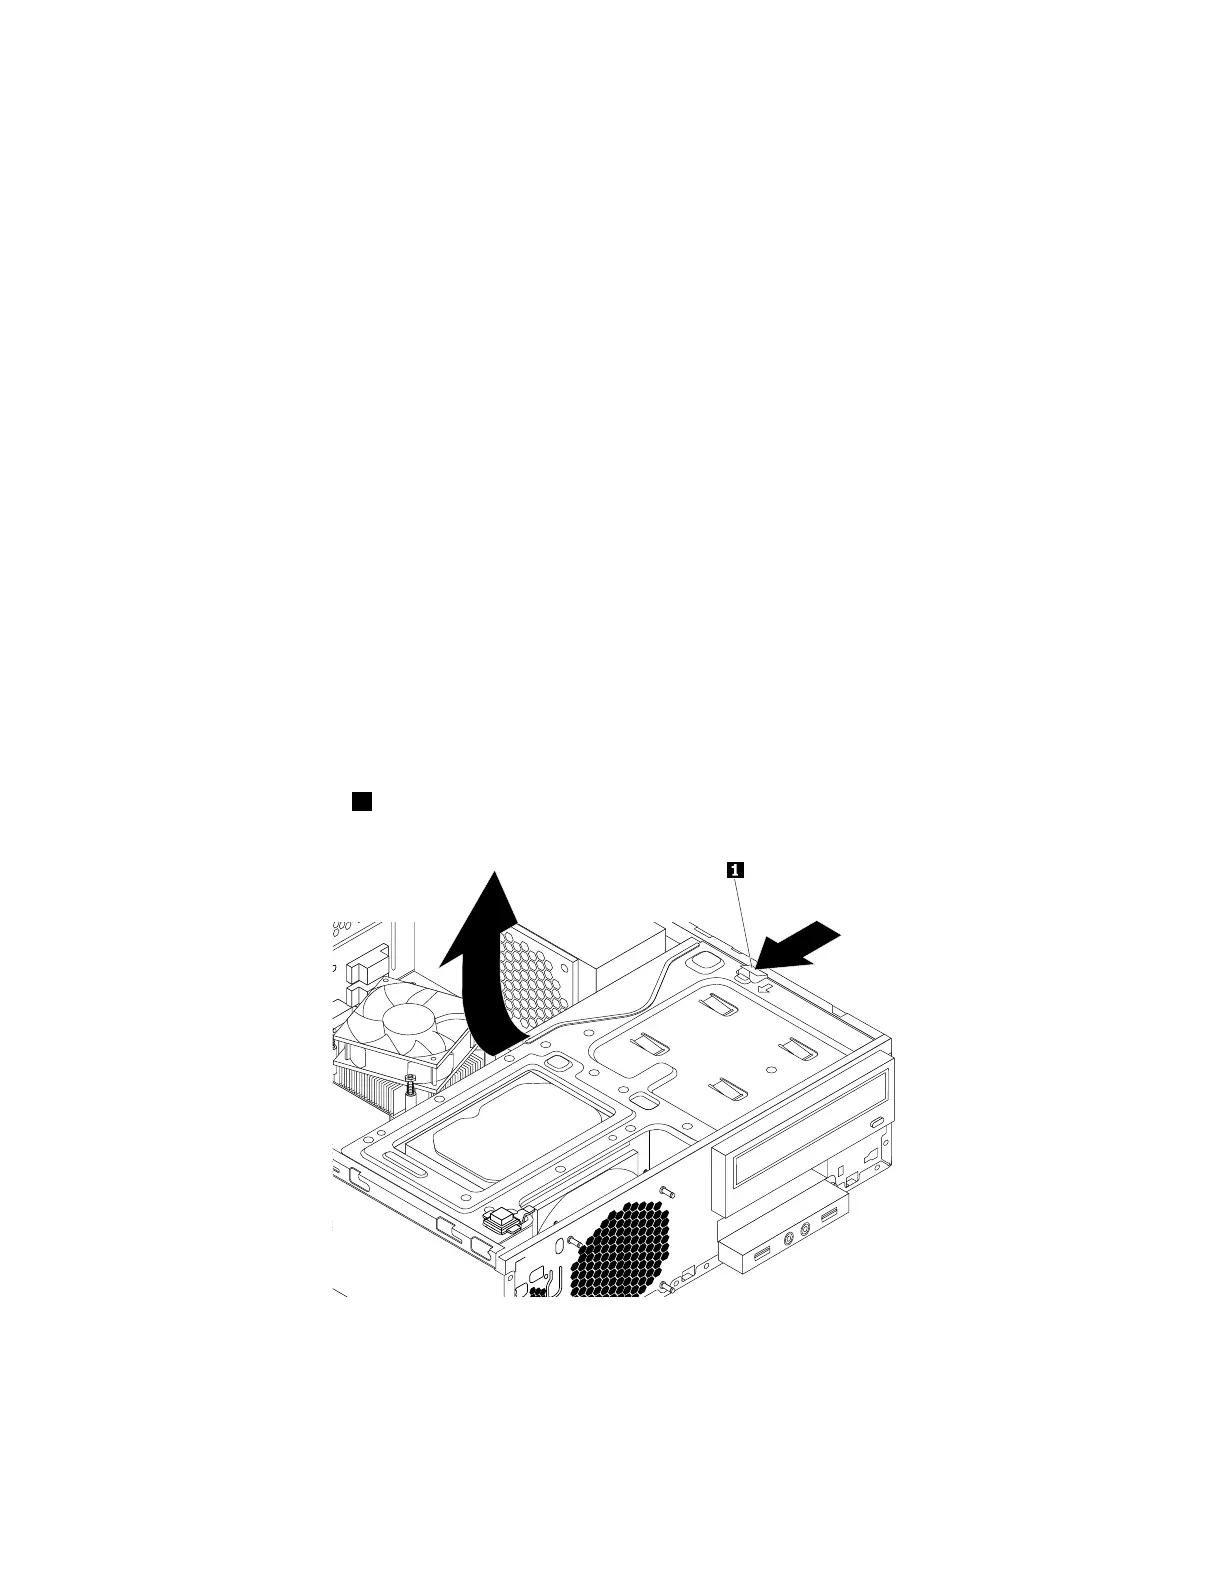
4.Pressthereleasetab1asshownandpivotthedrivebayassemblyupward.
Figure85.Pivotingthedrivebayassemblyupward
5.Disconnectthesystemfancablefromthepowerfanconnectoronthesystemboard.See“Partsonthe
systemboard”onpage34.
134ThinkStationP310HardwareMaintenanceManual