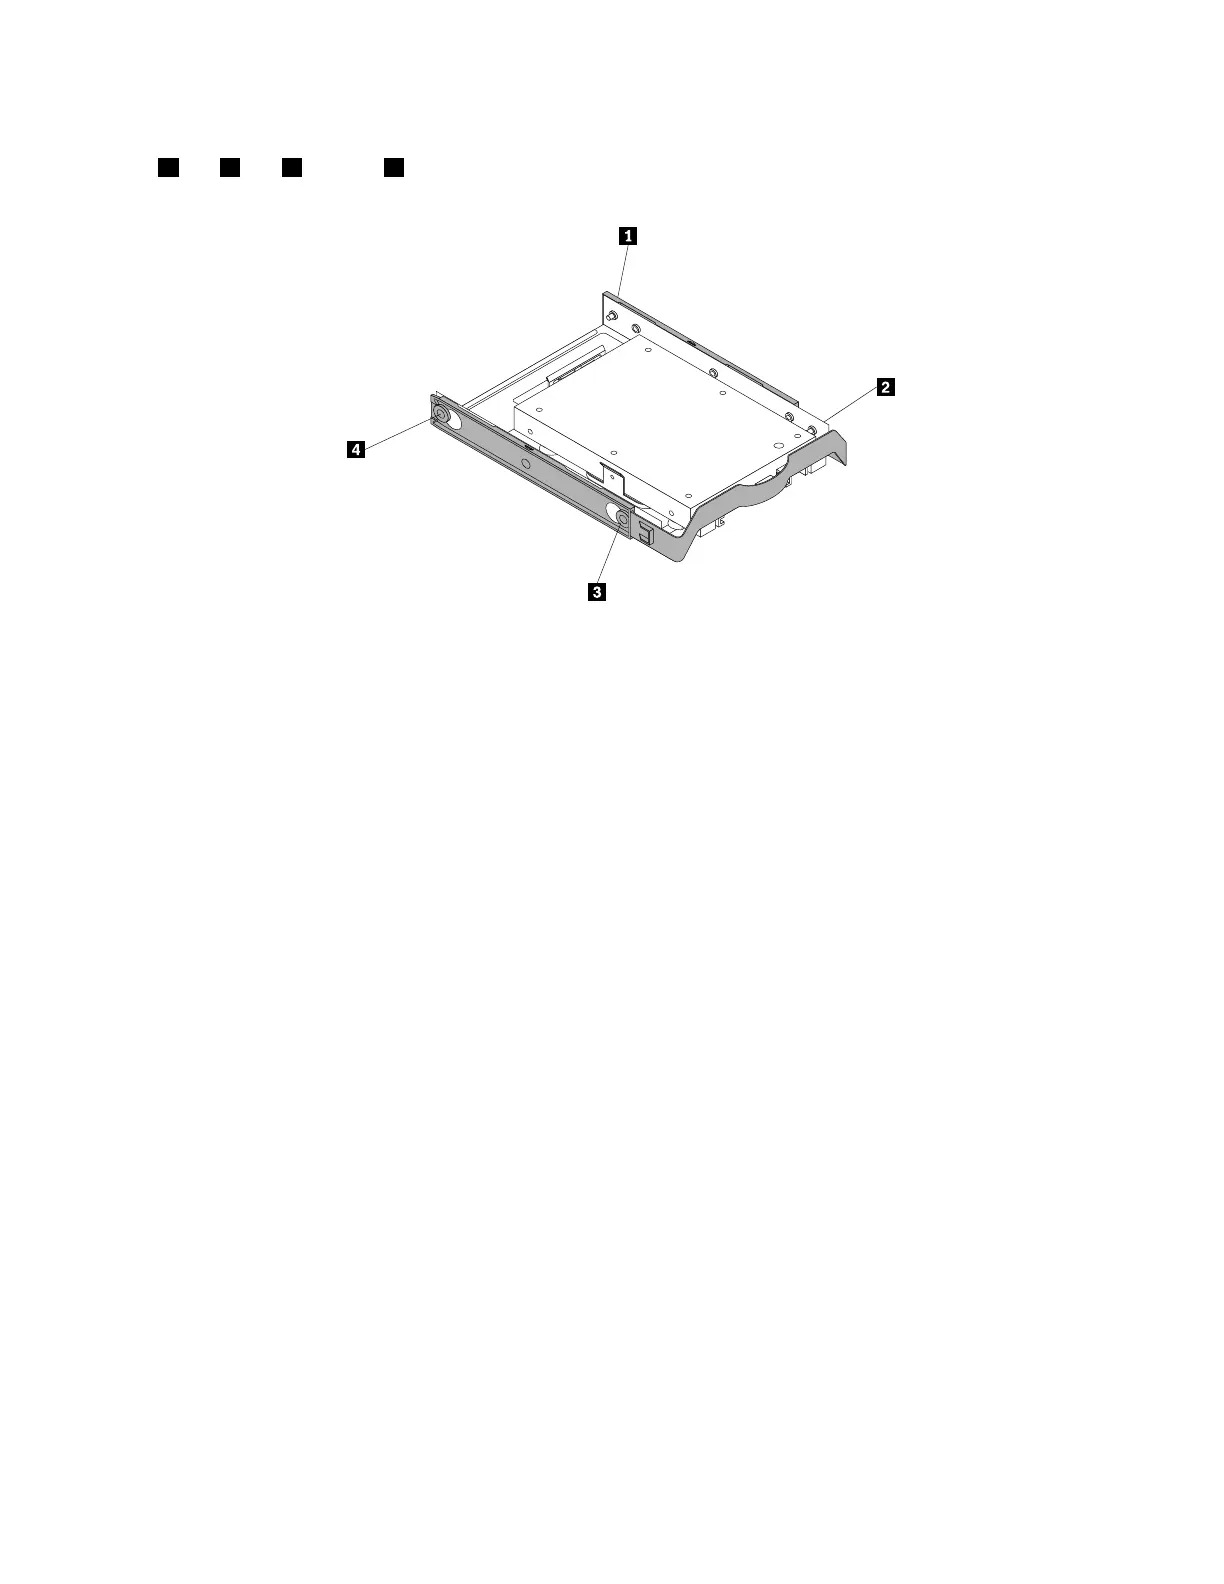
9.Toinstallthestorageconverterintothe3.5-inchhard-disk-drivebracket,flexthebracketandalignpin
1,pin2,pin3,andpin4onthebracketwiththecorrespondingholesinthestorageconverter.
Figure82.Installingthestorageconverterwiththenewsolid-statedriveintothehard-disk-drivebracket
10.Installthestorageconverterwiththebracketintothehard-disk-drivebay.See“Replacingtheprimary
harddiskdrive”onpage150or“Replacingthesecondaryharddiskdrive”onpage152.
11.Connectthesignalcableandthepowercabletothesolid-statedrive.
Whattodonext:
•Toworkwithanotherpieceofhardware,gototheappropriatesection.
•Tocompletetheinstallationorreplacement,goto“Completingthepartsreplacement”onpage166.
ReplacingthefrontaudioandUSBassembly
Attention:DonotopenyourcomputerorattemptanyrepairbeforereadingandunderstandingtheChapter
1“Readthisfirst:Importantsafetyinformation”onpage1.
ToreplacethefrontaudioandUSBassembly,dothefollowing:
1.Removeallmediafromthedrivesandturnoffallattacheddevicesandthecomputer.Then,disconnect
allpowercordsfromelectricaloutletsanddisconnectallcablesthatareconnectedtothecomputer.
2.Removethecomputercover.See“Removingthecomputercover”onpage90.
3.Removethefrontbezel.See“Removingandreinstallingthefrontbezel”onpage90.
4.LocatethefrontaudioandUSBassembly.See“Computercomponents”onpage31.
132ThinkStationP310HardwareMaintenanceManual