Page 31
You should also:
4. Demonstrate arming and disarming.
5. Demonstrate home control.
6. Demonstrate setup and programming.
7. Show him/her how to program the dial out numbers.
8. Deliver the Owner's Manual.
9. If the customer has subscribed to a central monitoring service, this should be explained to him/her.
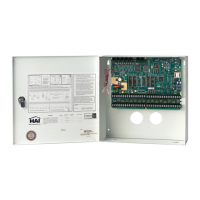
IN CASE OF TROUBLE
CONSOLES
If you experience trouble that seems to be with a console, try disconnecting the console and running the console self
test as described under CONSOLE HOOKUPS in this manual. If the console does not run the self-test properly, it
should be returned to LEVITON by Leviton for repair.
"NO CONTROLLER DATA" or erratic operation of the LCD display could be a result of: A and B terminals connected
backwards, poorly, or 2 or more consoles have the same address.
CONSOLE SELF TEST
Use the self test mode to verify the proper operation of the console.
1. Disconnect the console from the controller. Connect +12 and GND terminals to a 12-volt source. The console
beeper will beep twice per second, the LCD backlight and the keypad key will be lit, and the LCD will display "NO
CONTROLLER DATA".
2. Simultaneously press and hold the 7 and the down arrow () keys for approximately 3 seconds. The beeper will
beep 5 times, the LCD backlight and keypad backlight will turn off, and the display will clear. The LED at the top
right corner of the console will start to cycle through its different colors (red, green, yellow, then turns off). At the
end of each cycle the beeper will beep once.
3. Press any key. The LCD backlight and the keypad key backlight will turn on.
4. Press the keys in the following order and verify that the appropriate character fills the screen. 0 - 9, *, #, AWAY
(A), NIGHT (B), DAY (C), OFF (D), (filled blocks), and (blanks).
If this is successful, the console is good. Simultaneously press and hold the 7 and down arrow () keys to exit the
self test mode or disconnect power.
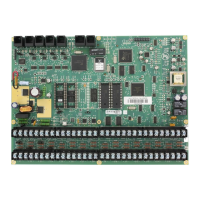
CONTROLLER
Check the AC ON (bottom) LED. If it is not lit, check for 24VAC at the transformer connections.
Check the STATUS (top) LED on the controller board. It should be blinking once per second, indicating the proper
operation of the microprocessor and memory. If not, try powering the system down by disconnect the power
transformer and battery, then reconnect both. The status light should begin blinking.
If the AC ON LED is on and the STATUS light is still not blinking, check the AUX +12 V with a DC voltmeter. It should
be 13.7 volts. If not, make sure that there isn't too much load on the system. Disconnect all loads. If the STATUS
LED still won't blink, there is a problem with the controller board and it must be returned for repair.