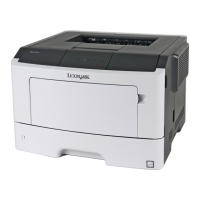
7 Remove the two screws (C) securing the control panel assembly.
C
8 Route all cables off the printer to completely remove the control panel assembly.
UICC removal
1 Remove the right cover. See “Right cover removal” on page 160.
2 Remove the nameplate. See “Nameplate removal” on page 174.
3 Remove the bezel. See “Bezel removal” on page 173.
4 Remove the control panel assembly. See “Control panel assembly removal” on page 174.
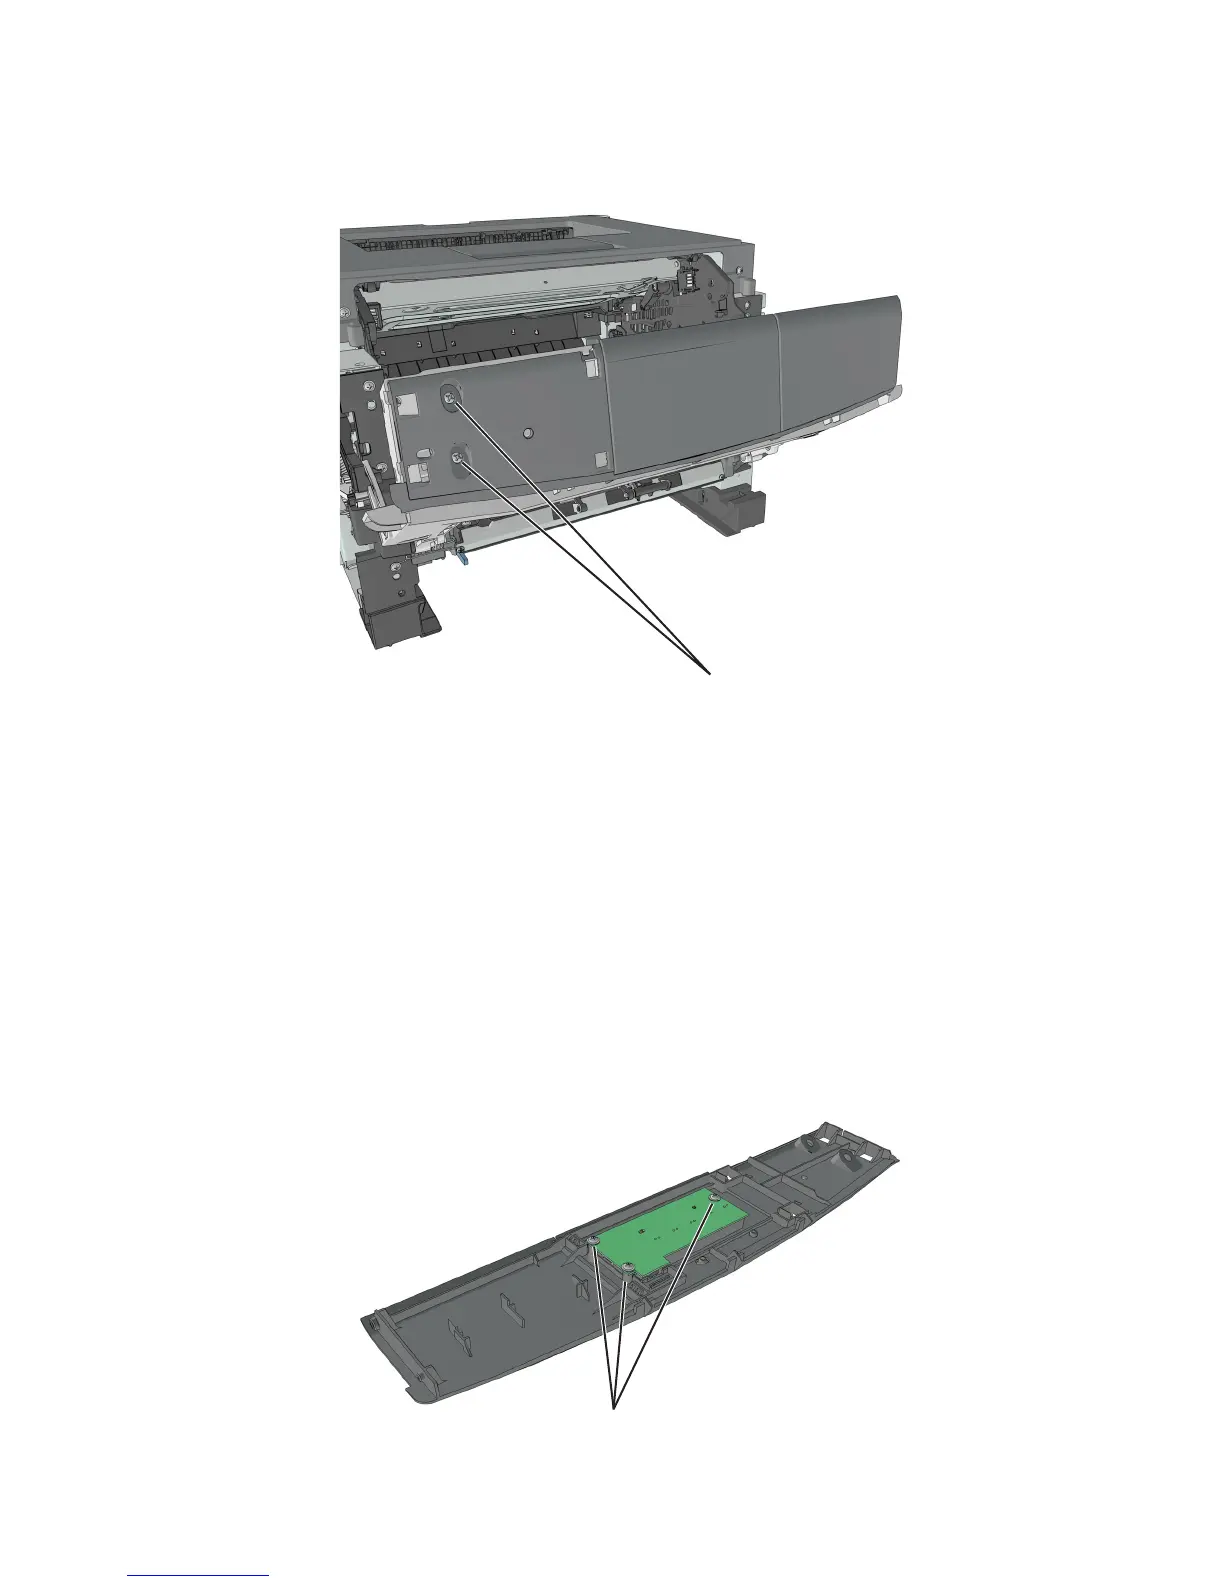
5 Remove the three screws (A), and then remove the UICC.
Note: The control panel buttons must remain with the control panel assembly.
A
4514-220, -230
Repair information
176