Once the wall profiles are fixed you can run the lift down again.
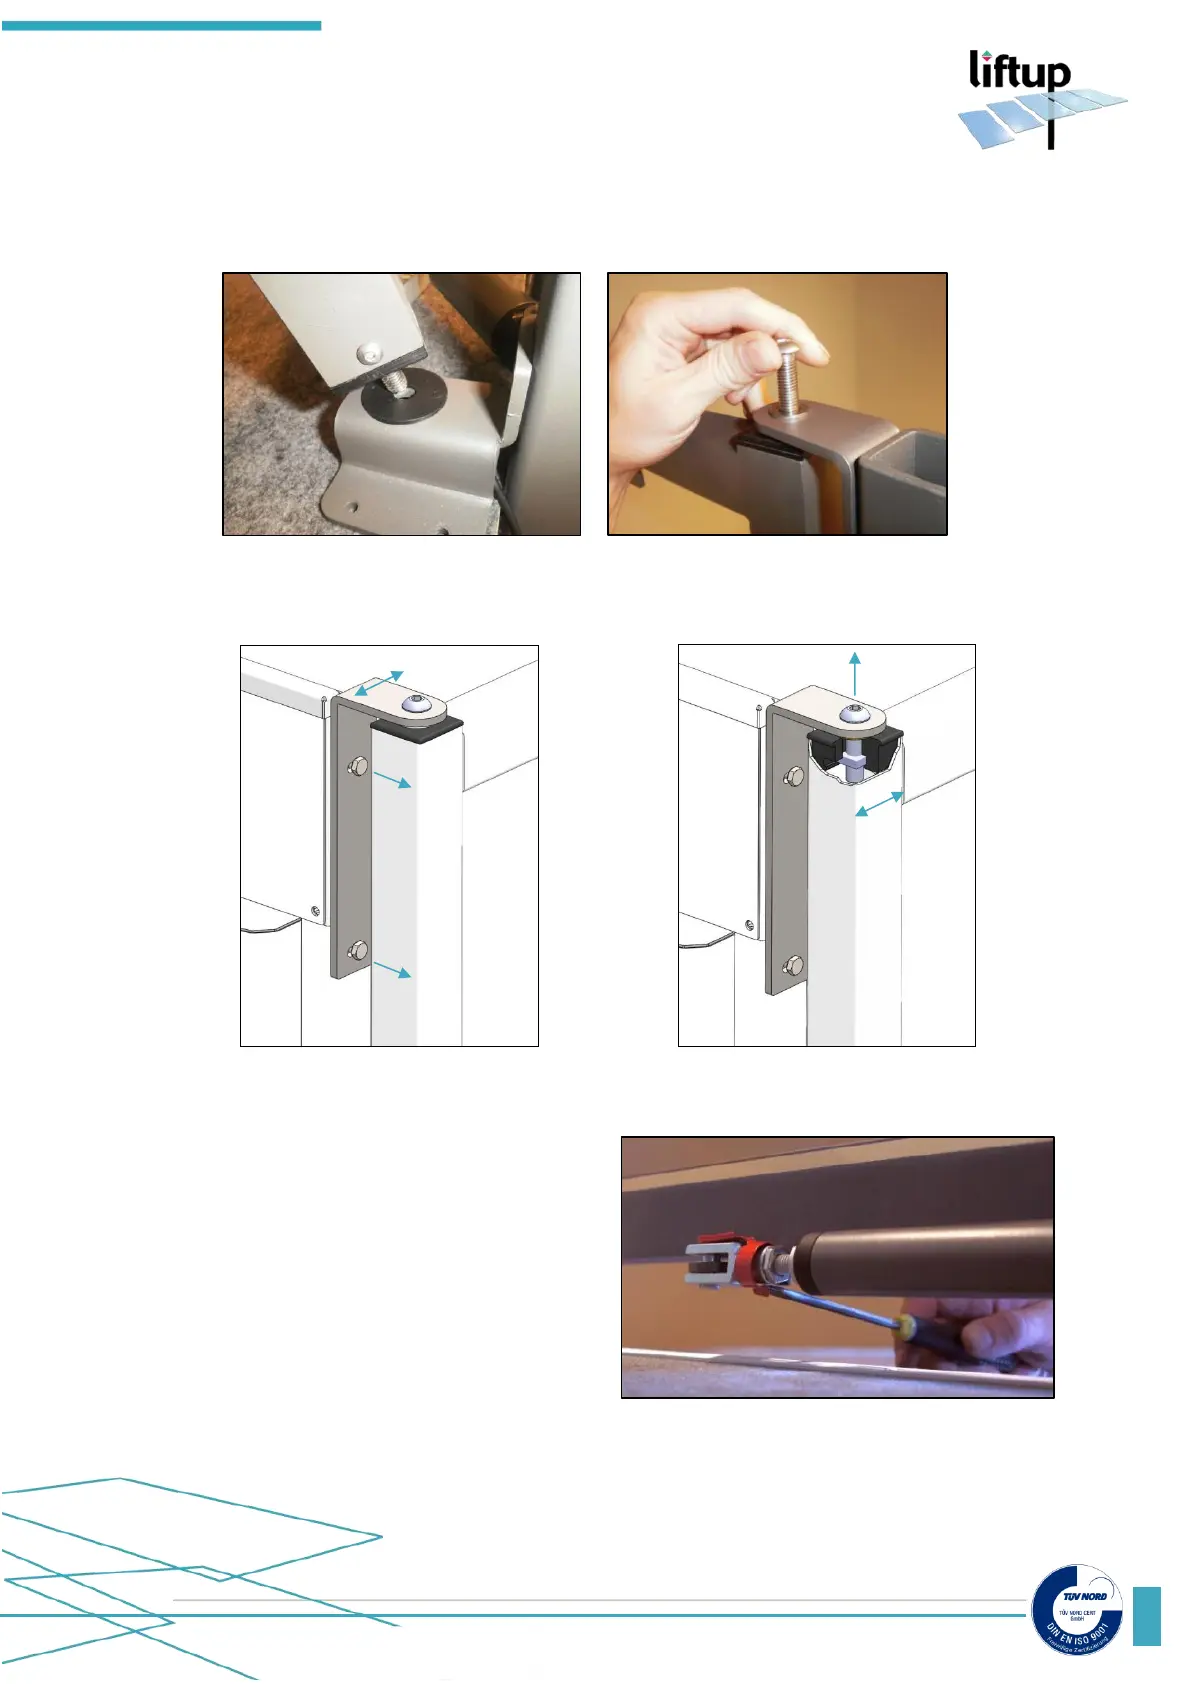
The door can now be fixed as shown below:
The door can be adjusted to fit the electronic switch on the other side of the door by means of
the two bolts holding the top bracket, or by loosening the Allen screw at the top of the bracket.
Connect the door to the actuator by using the supplied metal clip fitting.
The door can be adjusted in the closing direction
by loosening the nut. Then turn the head of the
actuator to the desired position and tighten the
nut.
It is of utmost importance that the door is
adjusted carefully so that it will activate the two
electronic contact pins correctly.