INSTALLATION & SERVICE MANUAL – EASYLIFT – UK VERS 1.5
Liftup A/S Hagensvej 21| DK-9530 Støvring | Denmark | T: +45 96 86 30 20 | M: support@liftup.dk | www.liftup.dk | CVR DK-1015 3964
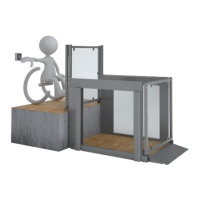
Before fixing the door to the door brackets, the brackets must me attached to the floor.
(The example below is with a door mounted on the left-hand side of the lift).
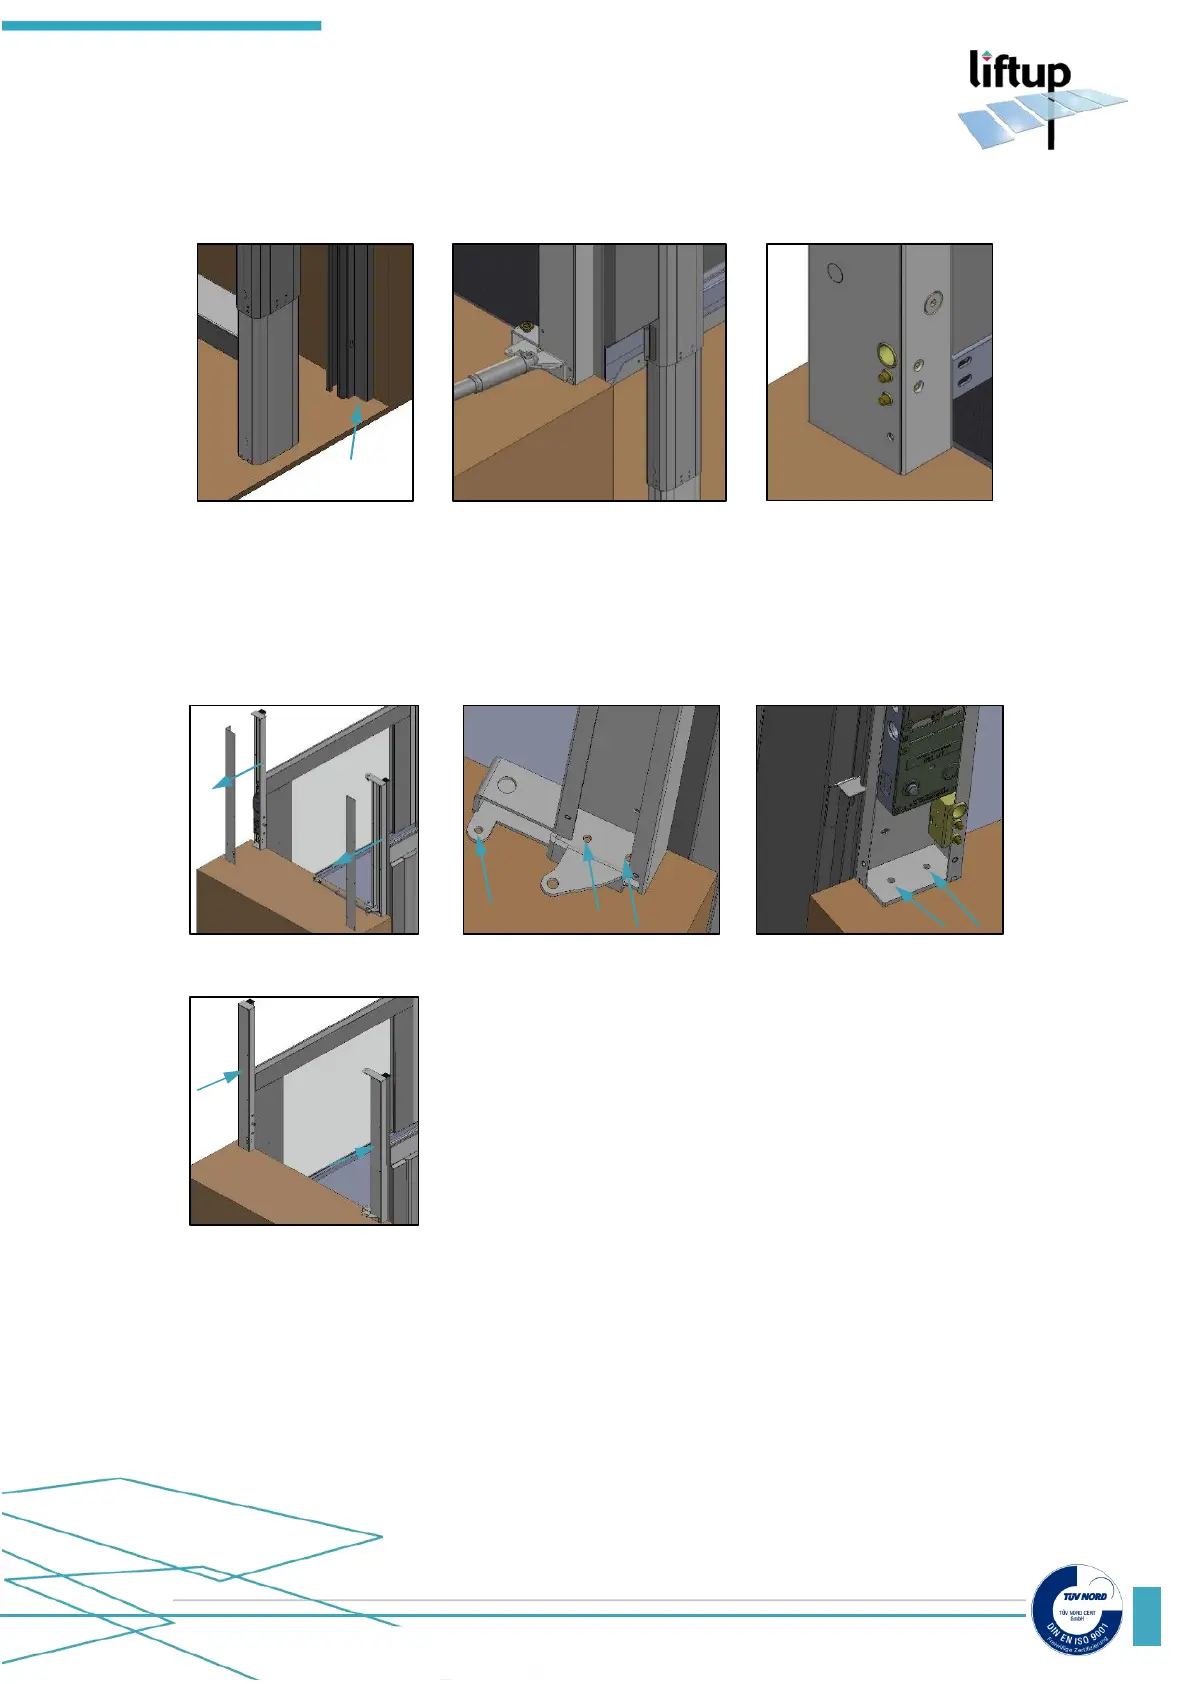
1. When both wall profiles are
attached they should have a
clearance of 10 mm between
floor and profile. (If not, you
need to cut the wall profile to
size).
2. The bracket for door actuator
is attached on the left-hand side
of the lift.
3. The door contact is attached
on the right-hand side of the
lift.
4. Dismount covers from door
posts.
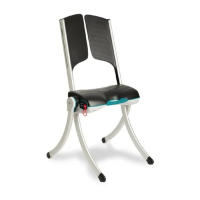
5. Bolt the door posts to the floor: Use the appropriate fixing screw,
adapted to the floor material
6. Remount covers on door
posts.
The door can now be fixed as shown next.