INSTALLATION & SERVICE MANUAL – EASYLIFT – UK VERS 1.5
Liftup A/S Hagensvej 21| DK-9530 Støvring | Denmark | T: +45 96 86 30 20 | M: support@liftup.dk | www.liftup.dk | CVR DK-1015 3964
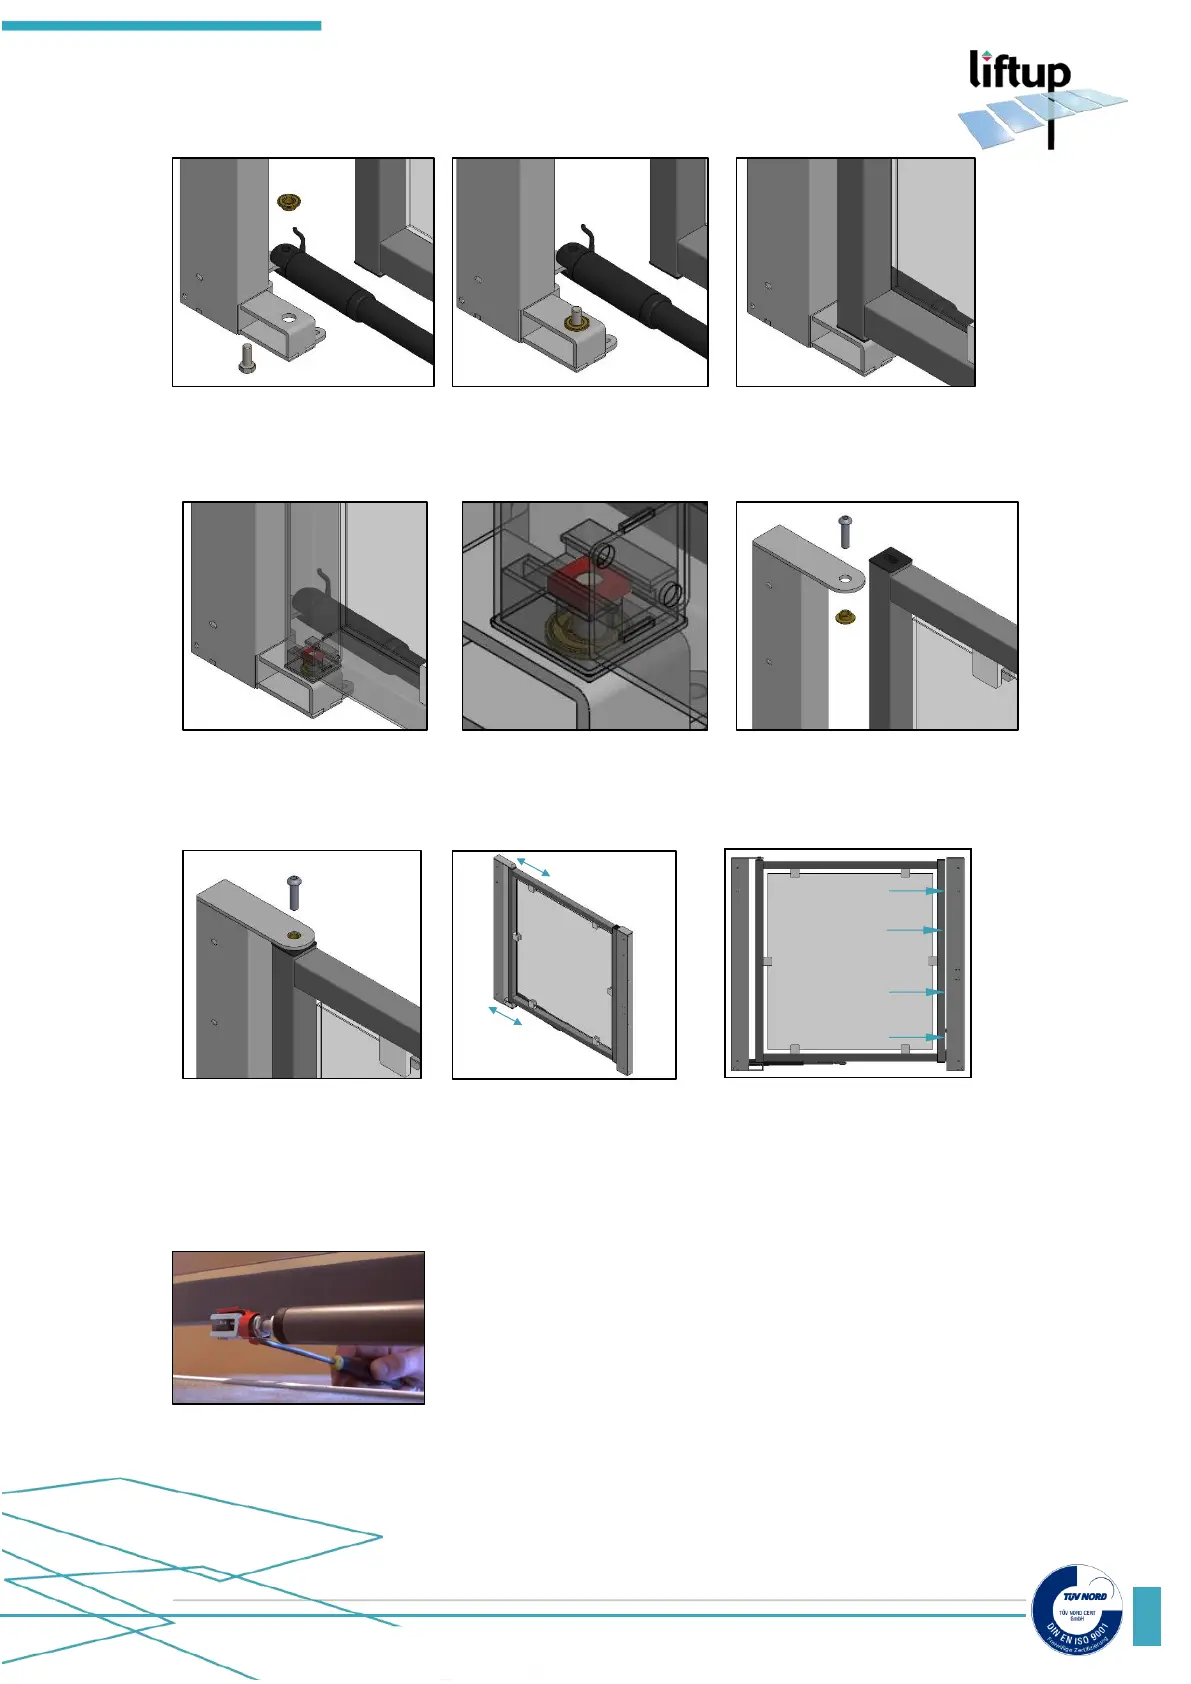
1. Insert hex bolt in hole on
door bracket.
2. Insert brass spacer on hex
bolt.
3. Place door on bracket.
4. Make sure the square washer (red marked) inside door frame
is placed directly over the hex bolt. Adjust washer with e.g. screw
driver before placing door on bracket. Tighten screw gently.
5. Insert brass spacer in hole on
door bracket and place door
under it on bracket.
6. Insert Allen screw in hole on
door bracket and tighten
gently.
7. Level door and align with door post before tightening hex bolt
and Allen screw.
8. Connect the door to the actuator by using the supplied metal
clip fitting.
The door can be adjusted in the closing direction by loosening the
nut. Then turn the head of the actuator to the desired position
and tighten the nut.
It is of utmost importance that the door is adjusted carefully so
that it will activate the two electronic contact pins correctly.