Starting up the system
24
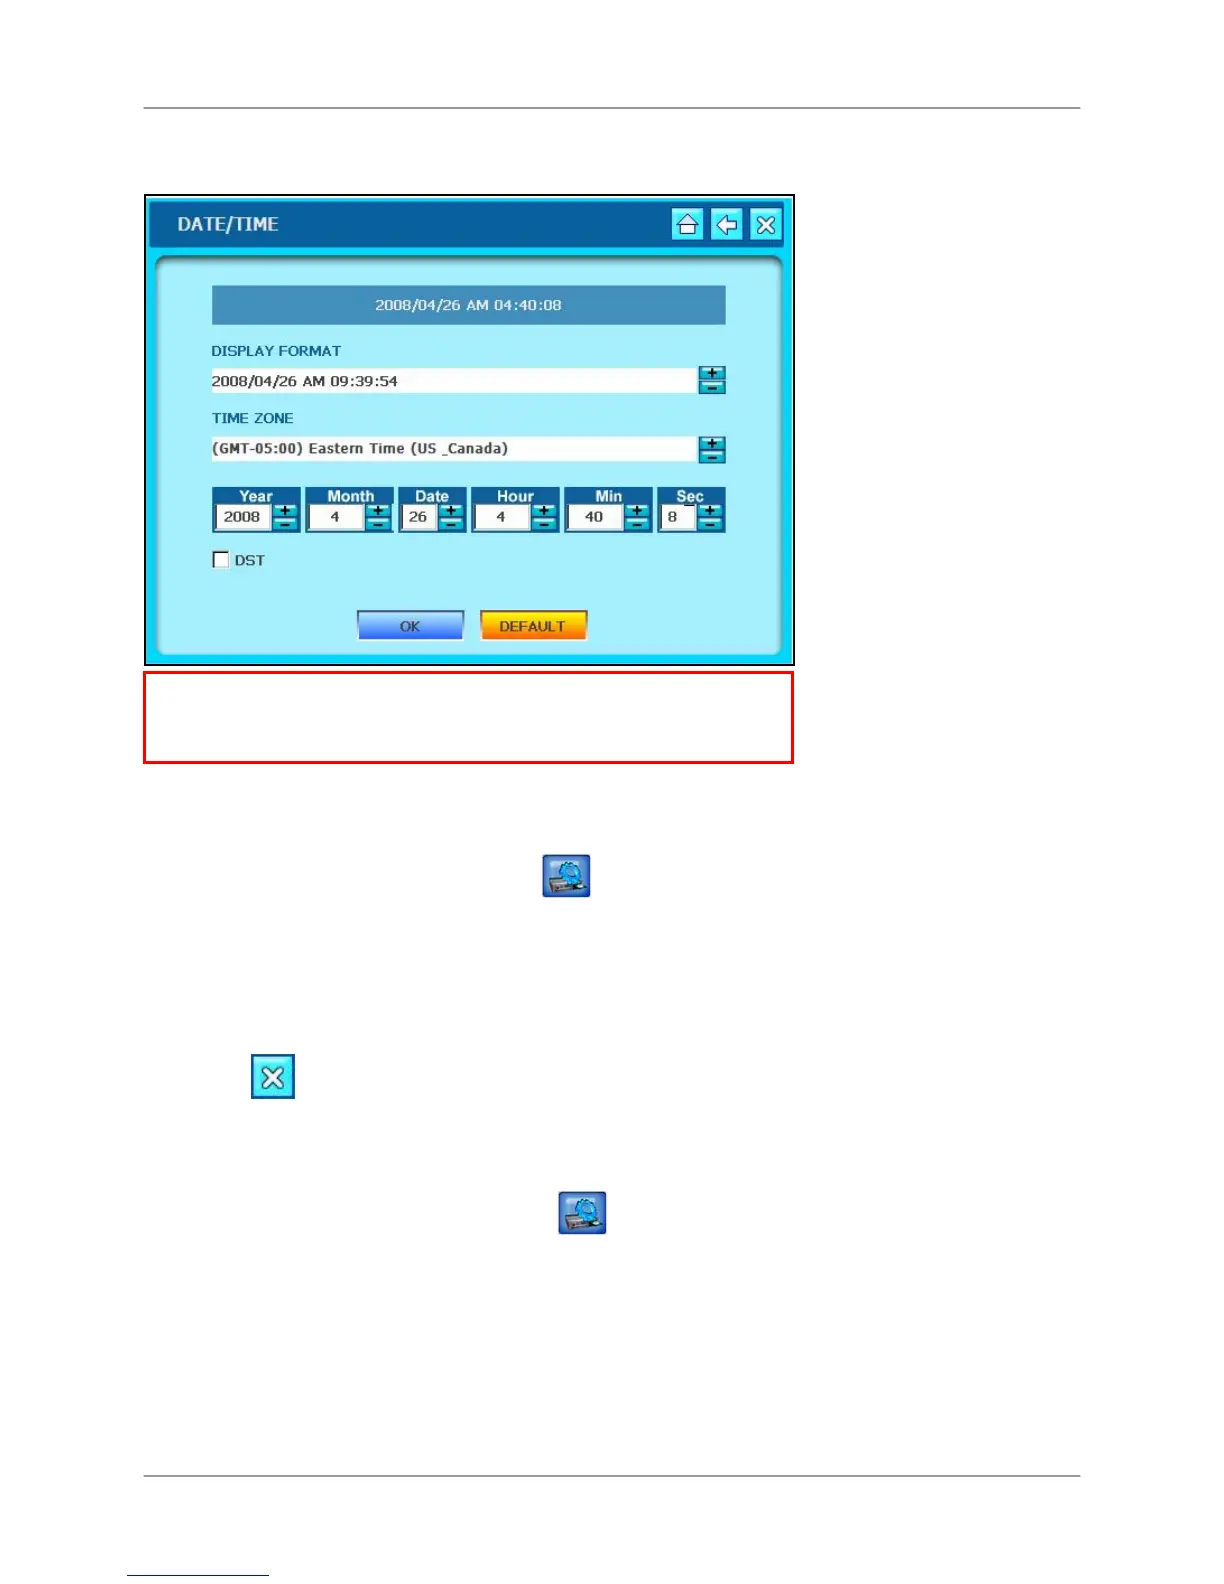
Setting the Date & Time
To set the date and time:
Mouse:
1. From the System Main Menu, click
.
2. From the Configuration menu click DATE/TIME.
3. Click +/- to change the DISPLAY FORMAT, TIME ZONE and Date and Time for the
system. Check the DST box to enable Daylight Savings Time.
4. Click OK to save your settings or click DEFAULT to restore factory defaults.
5. Click
to exit.
Remote control:
1. Press the MENU button and login to the system.
2. Using the Navigation Buttons, select
then select DATE/TIME. Use ◄►to cycle
between menu options. Use
▲▼to change individual settings.
3. Select the DISPLAY FORMAT, TIME ZONE and Date and Time for the system.
4. Check the DST box to set Daylight Savings Time.
5. Select OK to save your settings or select DEFAULT to restore factory defaults.
6. Press the ESC button to exit.
ATTENTION: You must set the date and time prior to setting a
recording schedule on the system. See Using the System: Record for
more details on setting a recording schedule.
 Loading...