EMERGENCY PROCEDURES
49
6. Pull off the wheel cover using the fingers of
two hands in adjacent slots in the cover. Use
the wheelbrace to slacken the wheel nuts half a
turn (anticlockwise).
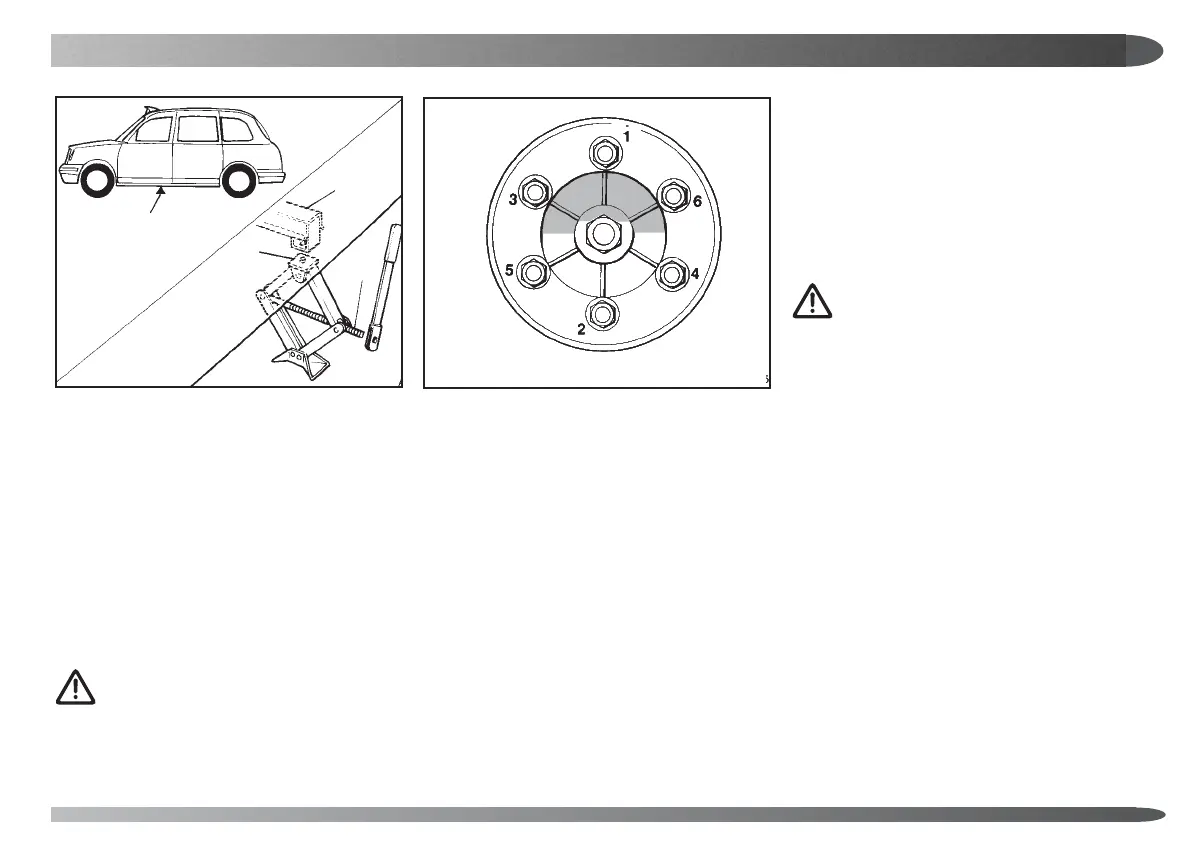
7. A jacking bracket (A) is located under each
side of the vehicle below, and to the rear of the
front door aperture. Locate the jack ratchet
handle (it is reversible) on the square end of the
jack screw (B) and raise the jack until it reaches
the underside of the jacking bracket. Ensure the
spigot (C) of the jack is located in the hole in the
jacking bracket, before further raising the jack
to raise the vehicle sufficiently to allow the fully
inflated replacement wheel to be fitted later.
WARNING: Ensure the jack is
positioned both vertically and at right
angles to the side of the body before
lifting the vehicle.
8. Remove the wheel nuts and lift off the
wheel.
9. Locate the replacement wheel on the wheel
studs and screw on all the wheel nuts so that
they correctly locate the wheel, then tighten
each wheel as much as possible. Reverse the
jack handle and partly lower the jack until it just
stops the wheel turning, then tighten the wheel
nuts with the wheel brace in the order
illustrated. Lower the jack, and fully tighten the
wheel nuts as much as possible, again in the
order illustrated. Replace the wheel cover,
ensuring it is positioned so that the tyre valve
can be reached for inflation.
10. Stow the displaced wheel in the luggage
compartment using the retaining bolt provided.
Replace the jack and ratchet handle,
wheelbrace and wheel chocks. Stand the step in
its locating brackets before securing it in
position with the rubber straps provided.
11. Turn off the hazard warning lights,
disengage the gears (manual transmission) and
resume your journey.
CAUTION: As soon as practical after
any wheel change, the wheel nuts
should be tightened at a garage using
a torque wrench set to 200 Nm (150 lb ft.)
A
B
C
A
WARE 56A
WARE 157