LUMIPro 2017
4
Quick Start Tutorial—Part IV
We have one more light to add before we shoot, and that’s a projector. Projectors have the unique ability to cast shadows as well as light up a model. We’ll use one here to give the scene a
little atmosphere using colors and shadows that you just can’t get with lights alone. One of the wearable items you passed to your model was a projector, but we’re going to rez one directly
from the HUD—just for practice—but they both function identically, which makes the wearable projectors great for use in no-rez sims.
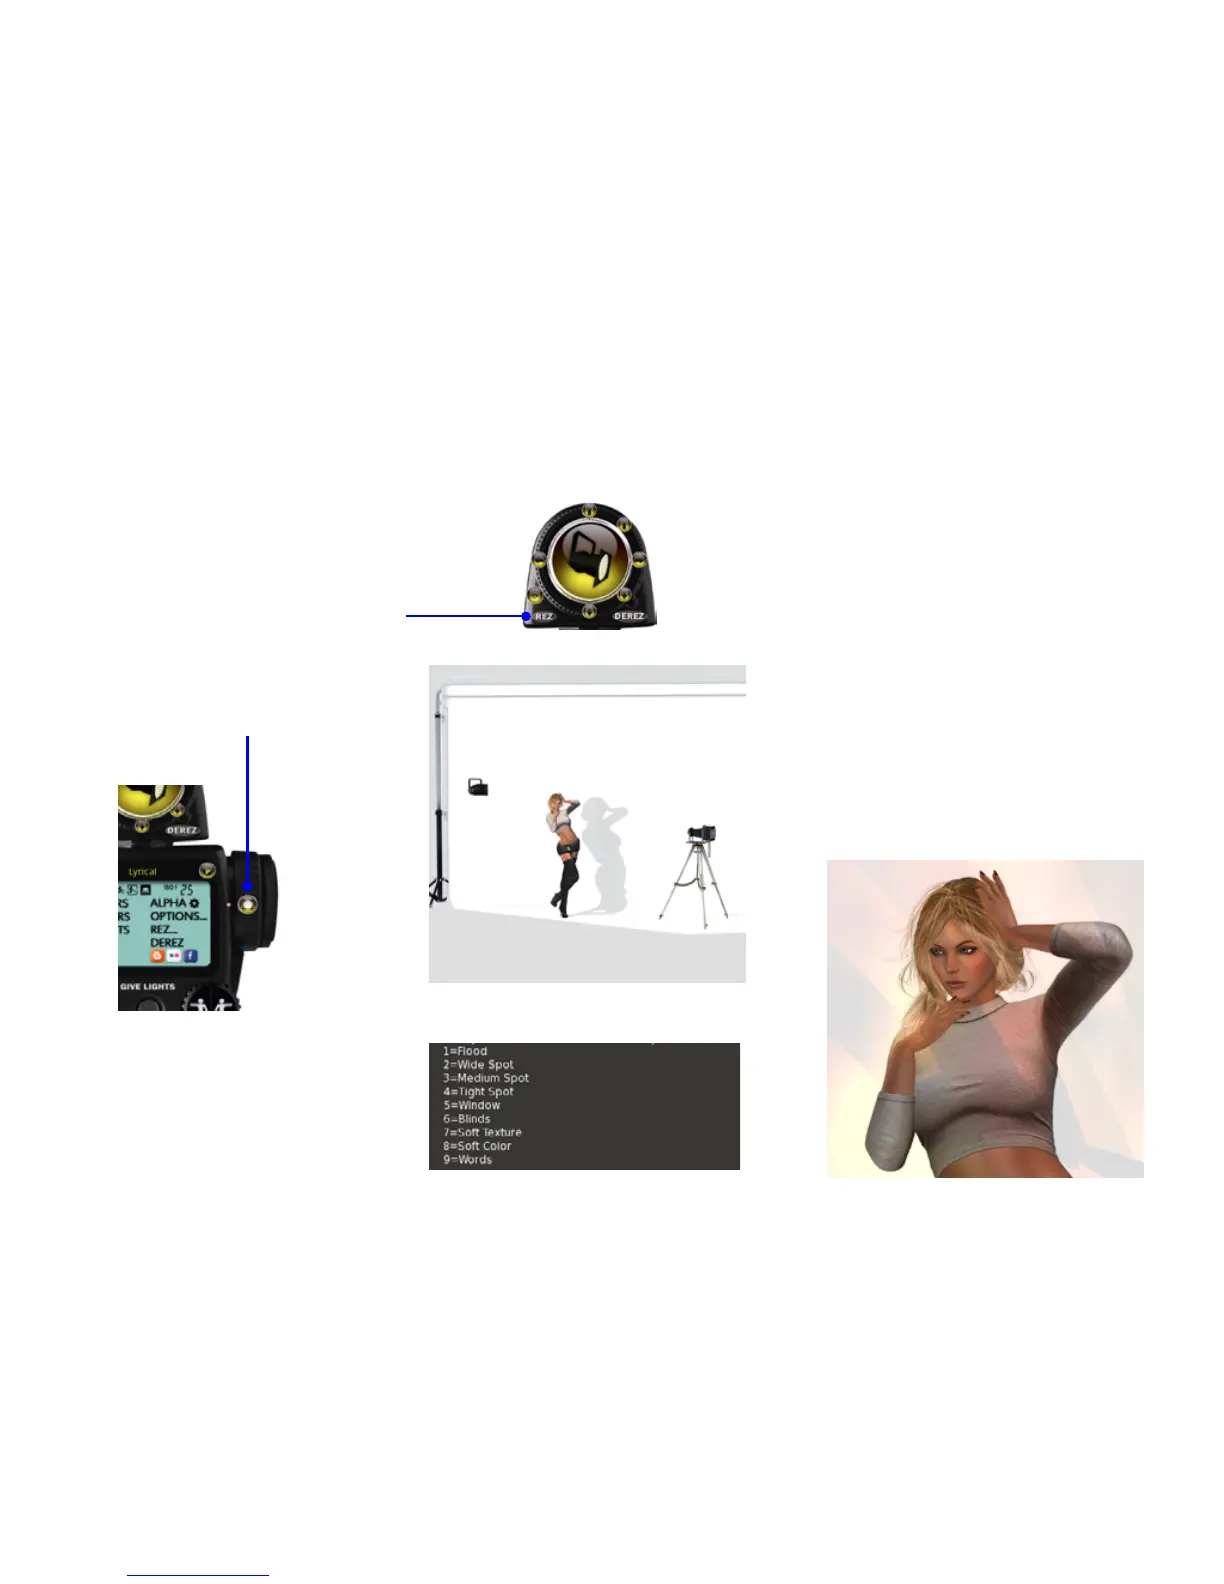
Step 15. Rez a Projector. is part’s easy: click the Rez
button on the Toolbox, and from the menu, click the
Projector button. is will rez a projector aimed at your
model, bright enough to temporarily blind avatars in the
next sim. Or as they call it on the runway, “a facelight.”
Step 16. Click the Projector Tools button to
the right of the LCD display. is will bring up
the Projector menu, which will be covered in
greater detail in the manual. For now, click the
button labeled “Bulb.”
Step 17. e Bulb setting gives you several options for
the texture applied to the Projector. Try them all, keep-
ing in mind that as textures, they will need a few seconds
to rez completely—depending on your computer and
connection. When you’re ready to proceed, click button
#8 (So Color). is will tone down the brightness, and
add a warm mosaic of color to your model.
Step 18. With your bulb setting selected, now we’ll add
a gobo (lightingese for “go between”) for some extra
shadow interest. Click the Back button, and from the
main menu, click the Gobo button. You’ll see a list of
dierent options. Like the bulb options, this will take a
few seconds to rez before you’ll see the results. Unlike
the bulb options, however, you cannot hide a gobo
when shooting: the projected light needs an opaque
prim to block the light and cast shadows. Check the
various gobos out, and when you’re ready, click button
#3, Art Deco.
Step 19. Adjust the position of the projector. Using
the Joystick, move the projector around your model,
either by clicking the arrow keys or clicking inside the
Joystick area, until you nd a position you like. When
you’re satised, continue on to Part V.