UNLOADING &
ASSEMBLY
ASSEMBLE
BAT
REEL
(continue~)
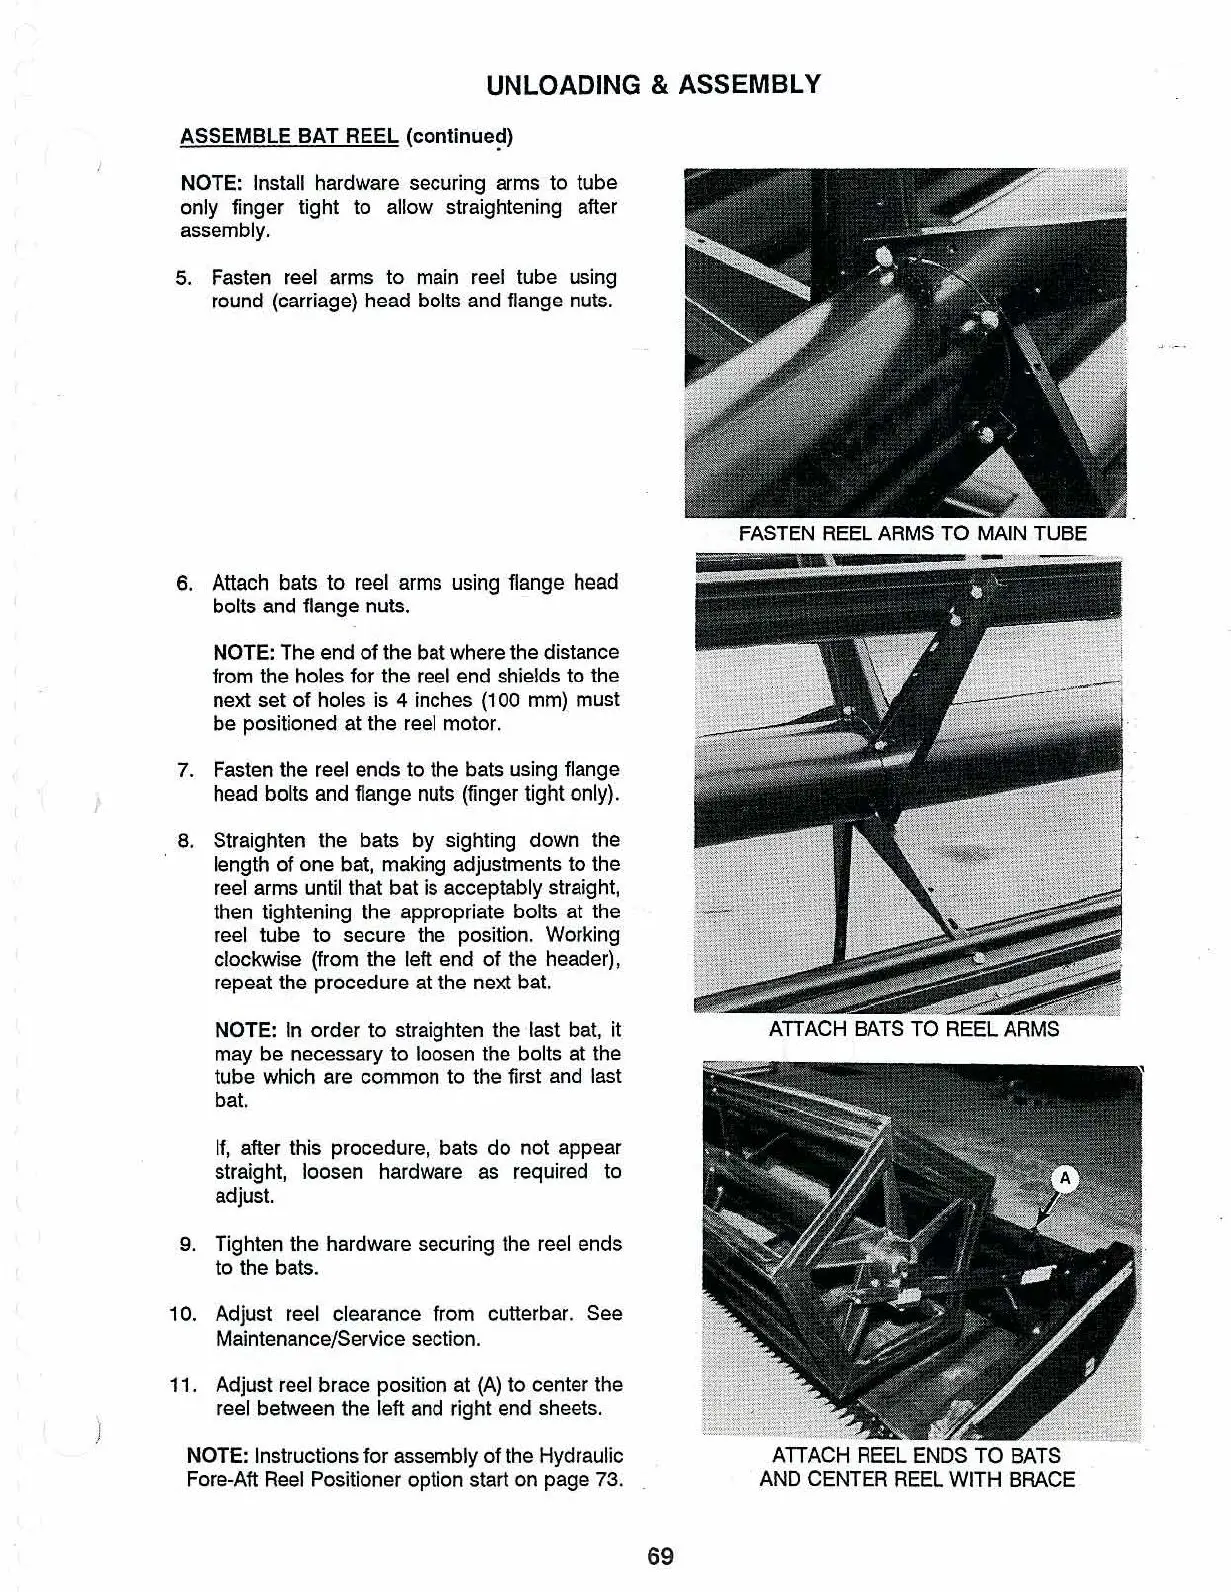
NOTE: Install hardware securing arms to tube
only finger tight to allow straightening after
assembly.
5.
Fasten reel arms to main reel tube using
round (carriage) head bolts and flange nuts.
FASTEN REEL ARMS
TO
MAIN TUBE
-
ATIACH
BATS TO REEL ARMS
ATIACH
REEL ENDS
TO
BATS
AND CENTER REEL WITH BRACE
9.
Tighten the hardware securing the reel ends
to the bats.
If,
after this procedure, bats
do
not appear
straight, loosen hardware
as
required to
adjust.
NOTE: Instructions
for
assembly
of
the Hydraulic
Fore-Aft Reel Positioner option start on page 73.
NOTE: The end
of
the bat where the distance
from the holes for the reel end shields to the
next set
of
holes is 4 inches (100 mm) must
be
positioned at the reel motor.
8.
Straighten the bats by sighting down the
length
of
one bat, making adjustments to the
reel arms until that bat is acceptably straight,
then tightening the appropriate bolts at the
reel
tube
to
secure the position. Working
clockwise (from the left end
of
the header),
repeat the
procedure
at
the next bat.
NOTE: In
order
to
straighten the last bat, it
may be necessary to loosen the bolts at the
tube which are common to the first and last
bat.
7. Fasten the reel ends to the bats using flange
head bolts and flange nuts (finger tight only).
6.
Attach
bats to
reel
arms
using
flange
head
bolts and flange nuts.
11. Adjust reel brace position at
(A)
to center the
reel between the left and right end sheets.
10. Adjust reel clearance from cutterbar. See
Maintenance/Service section.
69