9
ww
ee
ee
ww
rr
qq
qq
ww
tt
yy
Service manual for medifa 6000 mobile operating tables, version 2.0
4. Components column / top frame
Components column / top frame
To remove the column cladding on the operating table,
the height adjustment of the operating table is first
moved to the lowest position.
This can be done using the column keypad or the manual
switch.
Always switch off the operating table afterwards,
disconnect the mains plug from the socket and remove
the battery fuse from the base so that the base is zero-
voltage.
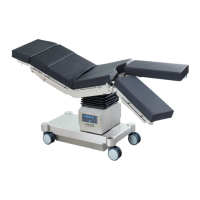
The next step is to remove the 12 screws on the upper
column cladding (see Fig. 4).
4 screws [2] are located on the top side, 4 more on the
bottom side [2] and 2 screws [3] both on the front and
the back. When the screws [2] are loosened, the bellows
retaining brackets [4] are released at the same time.
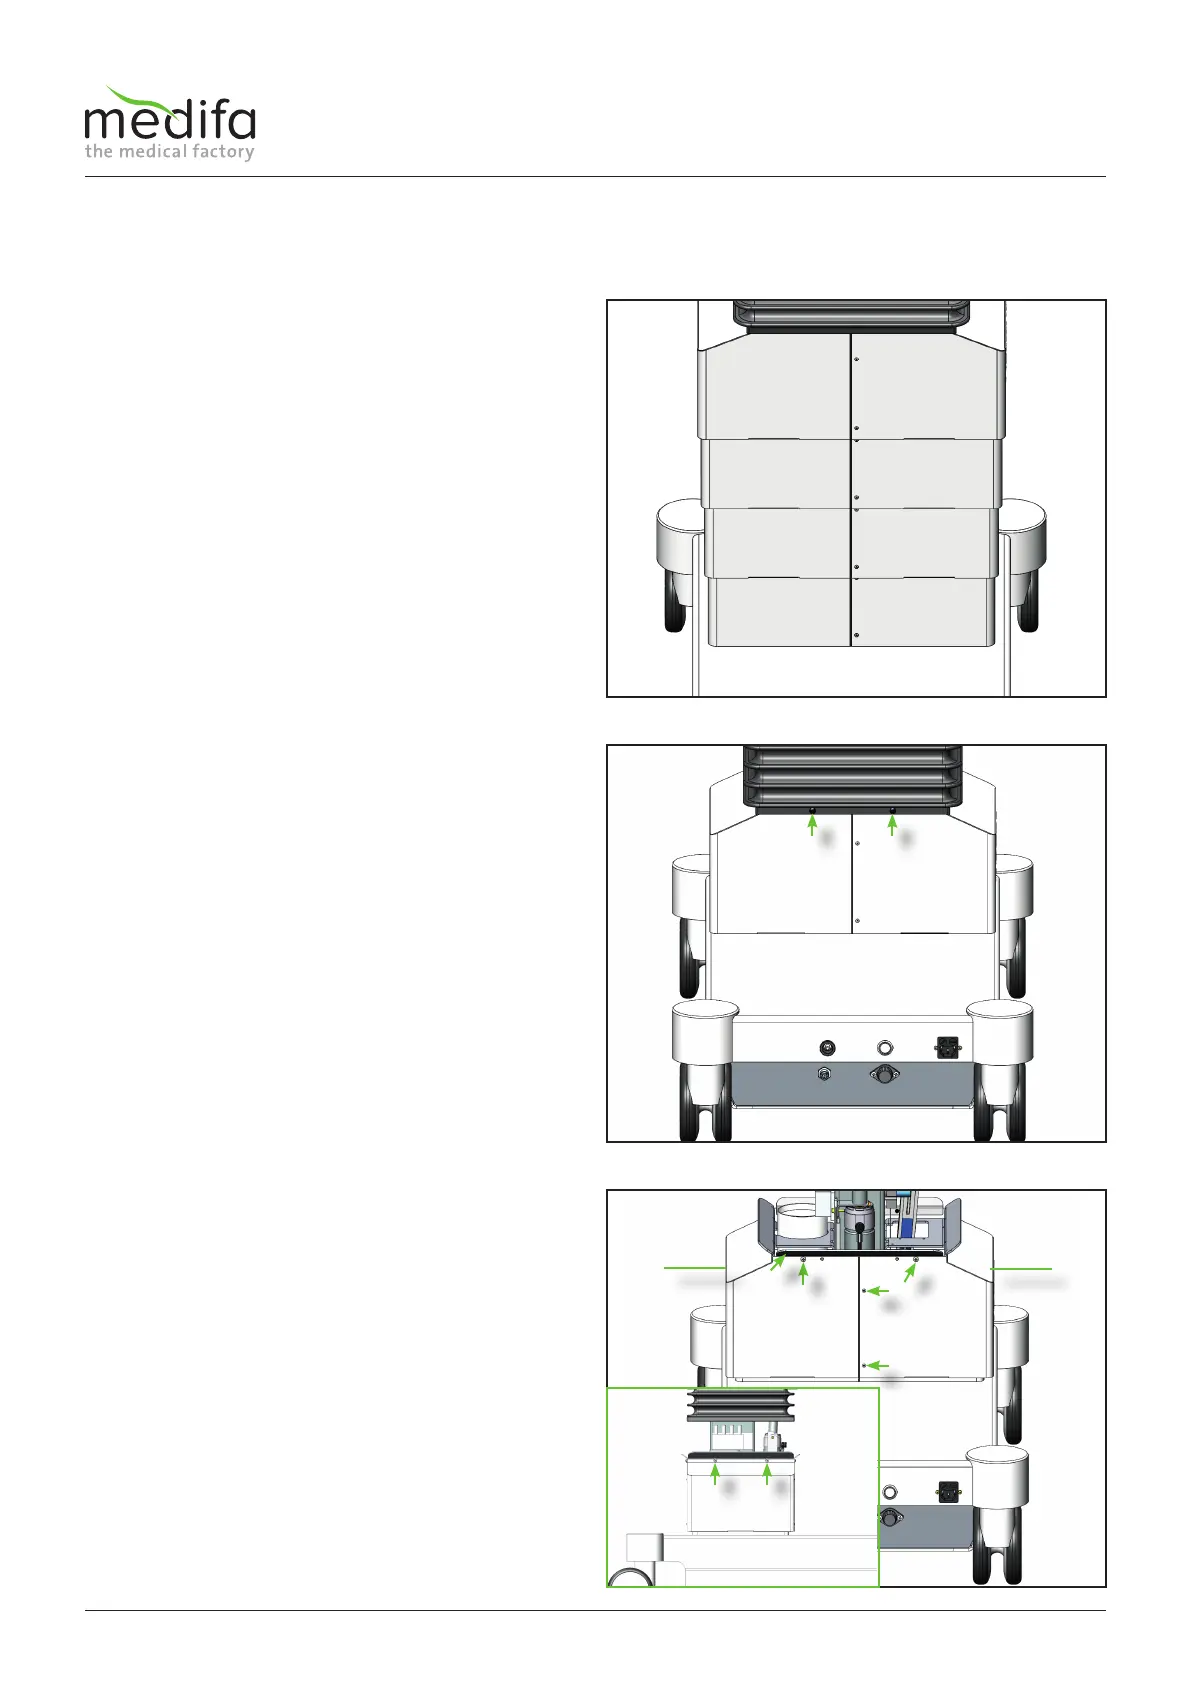
When all screws have been removed and the bellows
retaining brackets have been dismantled, the left-hand
upper cladding half [5] can now be removed. To dismantle
the right-hand top cladding half [6], the ribbon cable
must first be removed from the column keyboard board.
Figure 2
Figure 3
Figure 4
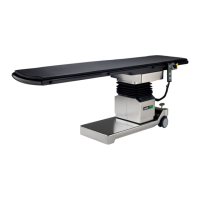
To remove the top cladding, the bellows must now be
detached.
To detach the bellows from the top cladding, first remove
four expanding rivets [1] all around. Use a small slotted
screwdriver or suitable flat-nose pliers to do this.
Then the bellows can be slipped over the bellows
retaining brackets.
4.1 Removal of column cladding including column keyboard board