Menu Mode
45 D53182 02/2024
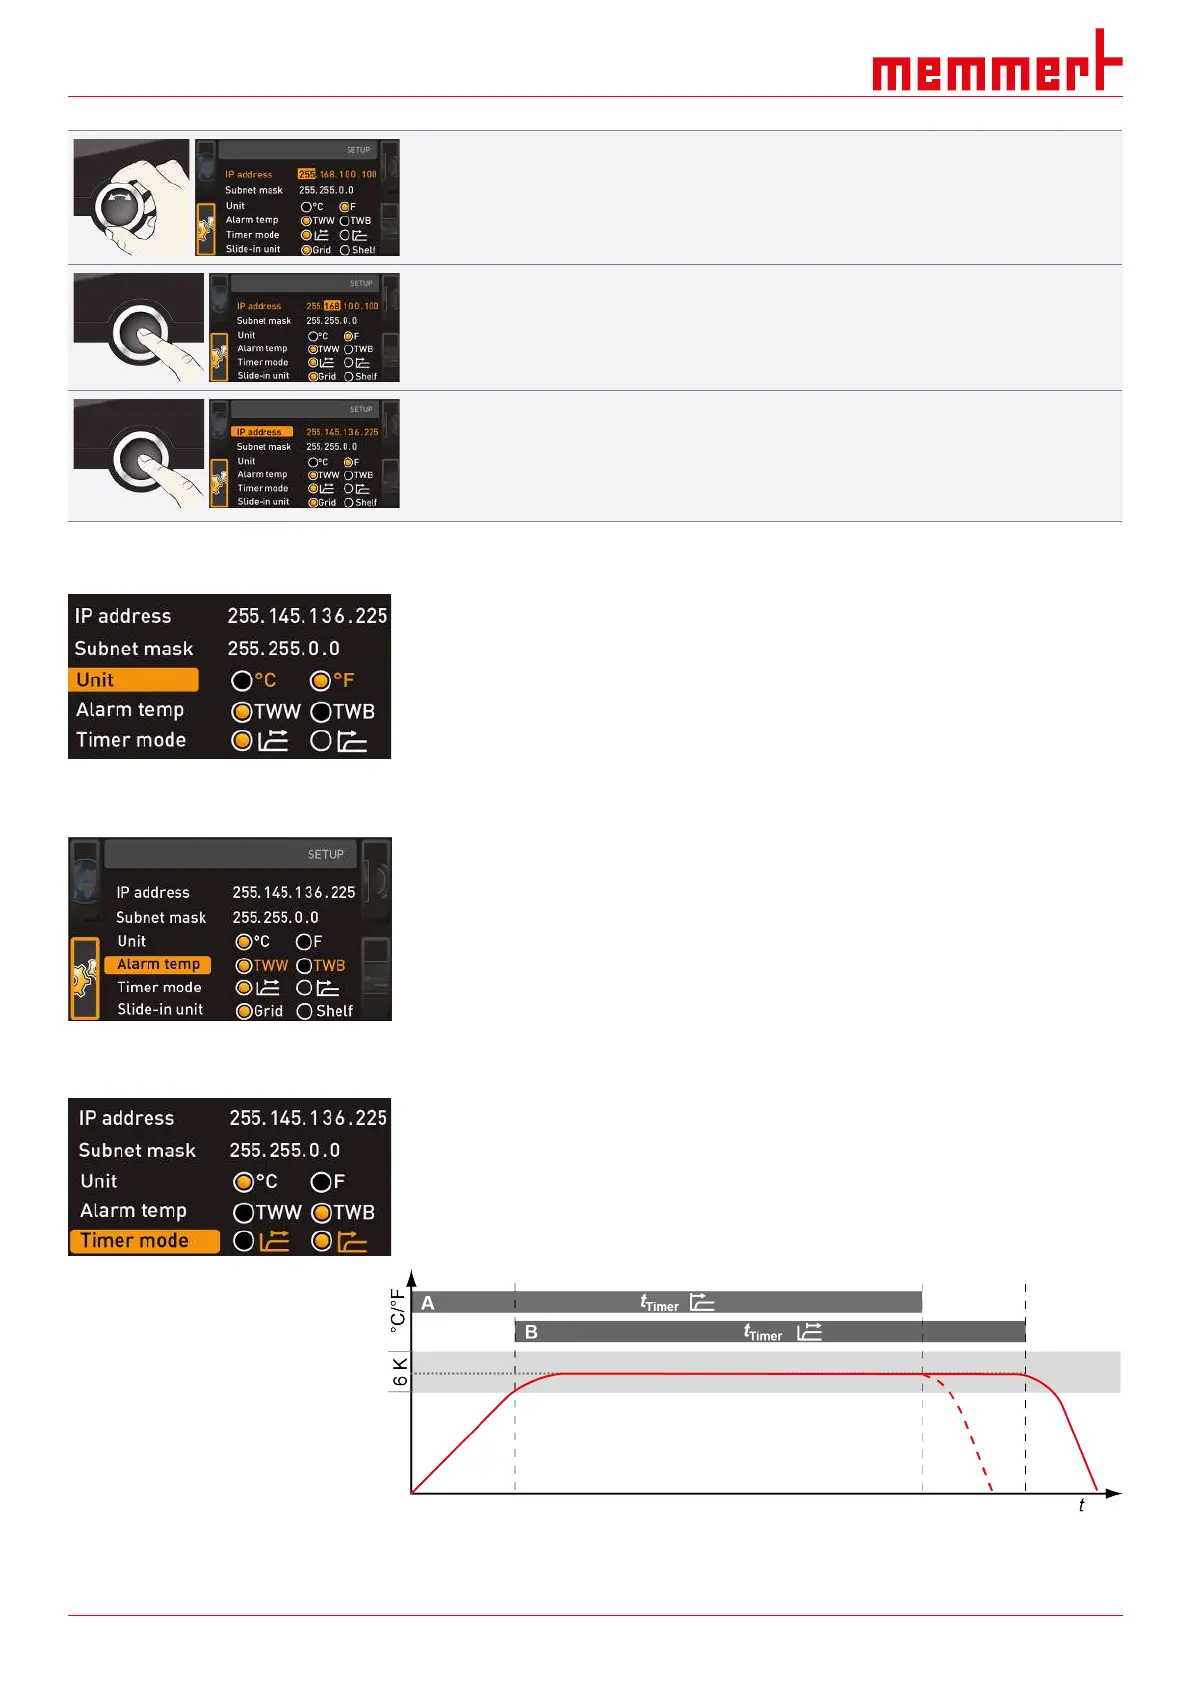
3. With the turn control, set the new number, e.g. 255.
4. Confirm the selection by pressing the confirmation key.
ð The next three digits of the IP address are automatically marked.
ð They can now also be set according to the description above.
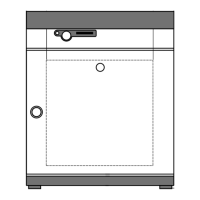
5. After setting the last three digits, confirm the new IP address by pressing the
confirmation key.
ð The overview is displayed once again.
ð The subnet mask can be set in the same way.
8.3.3 Unit
Here, you can choose whether the temperature is displayed in °C or °F.
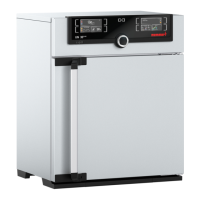
8.3.4 Temperature Monitoring
Here, you can choose which temperature protection class in accordance with
DIN12880:2007‑5 should be used (TWW or TWB, description from
}6.6Monitoring Function).
See also
2 Monitoring Function [}34]
2 Monitoring Function [}34]
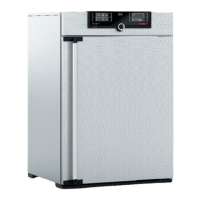
8.3.5 Timer Mode
Here, you can choose whether the digital backwards counter with target time setting (see
}6.5.2Digital Backwards Counter) should be setpoint-dependent or not – in other words,
whether the timer should not start until a tolerance band around the setpoint temperature
is reached Ⓑ or if it should start right after activation Ⓐ.