93
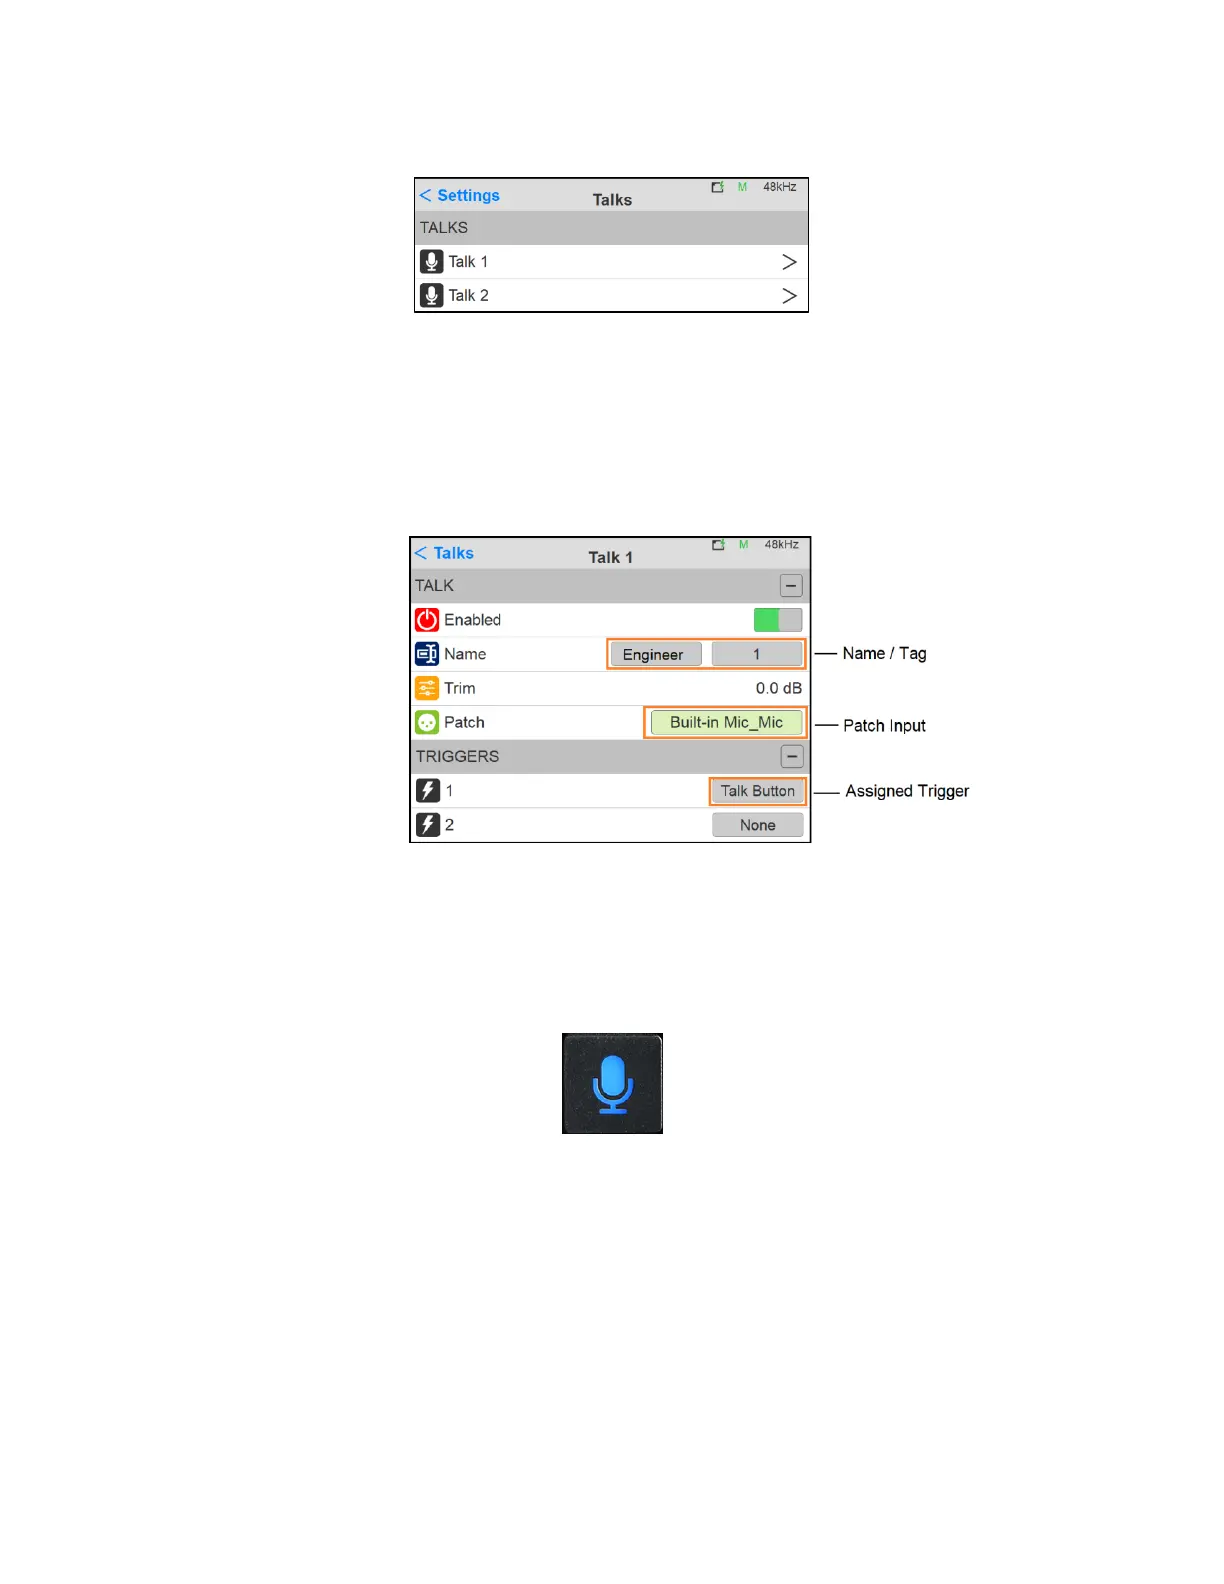
3. Enter the Talk 1 settings configuration
4. Within the Talk 1 settings, select a predefined name and tag to identify your Talkback.
5. Select the input source of the Talkback 1. This input can either be the built-in Anubis Talkback
microphone, or a microphone connected to one of the Anubis inputs or an input coming from
another RAVENNA/AES67 device available over your network.
6. Configure how the Talkback will be triggered and activated. The talkback can be triggered by
either the Anubis Talkback button or from a GPI (currently not available, under development) or
from the Web Access Monitoring page. In the example here we are configuring the Trigger of the
Talkback 1 to be the Anubis Talk Button
Figure 23 Talk button
7. Your Talkback 1 is now configured and can be injected into the Monitor set of your choice
(follow from step 9 Monitors configuration if using only 1 talkback). If you wish to use a second
Talkback go back to the Settings>Talks page and select the Talk 2
8. On the Talk 2 we have configured it to use the Microphone connected into Anubis XLR/Combo
input 1 located at the back of the Anubis and have it triggered from a GPI, which in the example
here would be a footswitch connected to the GPI input located at the back of the Anubis.