NDT-2000 User's Manual 67
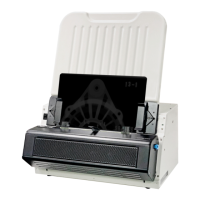
Scanning X-ray Films by Using the Multi-channel Film Feeder
(MFF)
1. Load the lms to be scanned into the tray of the MFF.
Make sure that the Light Shield has been pulled up.
2. Launch ScanWizard Industry (either as a stand-alone by clicking the program
icon on the desktop, or by using the “File-Import” or “Scan” command from
an application program).
3. Click the Scan Process Tool button and then choose “Multi-Channel Crop”
from the appearing drop-down menu.
4. Click the Overview button to perform a preliminary scan of the image, which
will appear in the Preview window.
5. Select your image output type as Gray Scale or Gray Scale (16-bit) from the
Type drop-down menu.
6. Select your desired image output resolution in the Resolution drop-down
menu. The recommended resolution is 300 dpi or above.
7. Select the Scan Frame tool ( ) from the Toolbar in the Preview window,
and choose the area to be scanned by dragging a rectangle around it. You
will see a ashing frame (marquee) around the selected area.
Please note that when using the MFF, you are allowed to adjust only the
height of the scan frame.
8. Select your desired image quality (3.5D, 4.0D, or 4.5D) from the Density
drop-menu for the current scan job, based on the needs/image quality
requirements of the inspection.
9. If necessary, select your desired scan mode (Standard Mode or Speed
Mode) from the Scan Mode drop-down menu to scan lm based on the
requirements.
10. Click the Scan button in the Preview window to scan all the lms loaded on
the tray of the MFF.
• If ScanWizard Industry is launched as a stand-alone program, a window
“Scan To: Save As” dialog box will appear. Click the Save button; then,
the scanned image can be saved into your selected folder or sent to your
selected application.
To view the scanned image, double click the “Industry Images” icon
on your desktop (default folder assigned by the software), or retrieve it
from your assigned folder.
• If ScanWizard Industry is launched as a Plug-In from an image-editing
program, the scanned image is delivered to your application, where the
image can be saved, viewed, or modied further.