Installing Tools
2-14
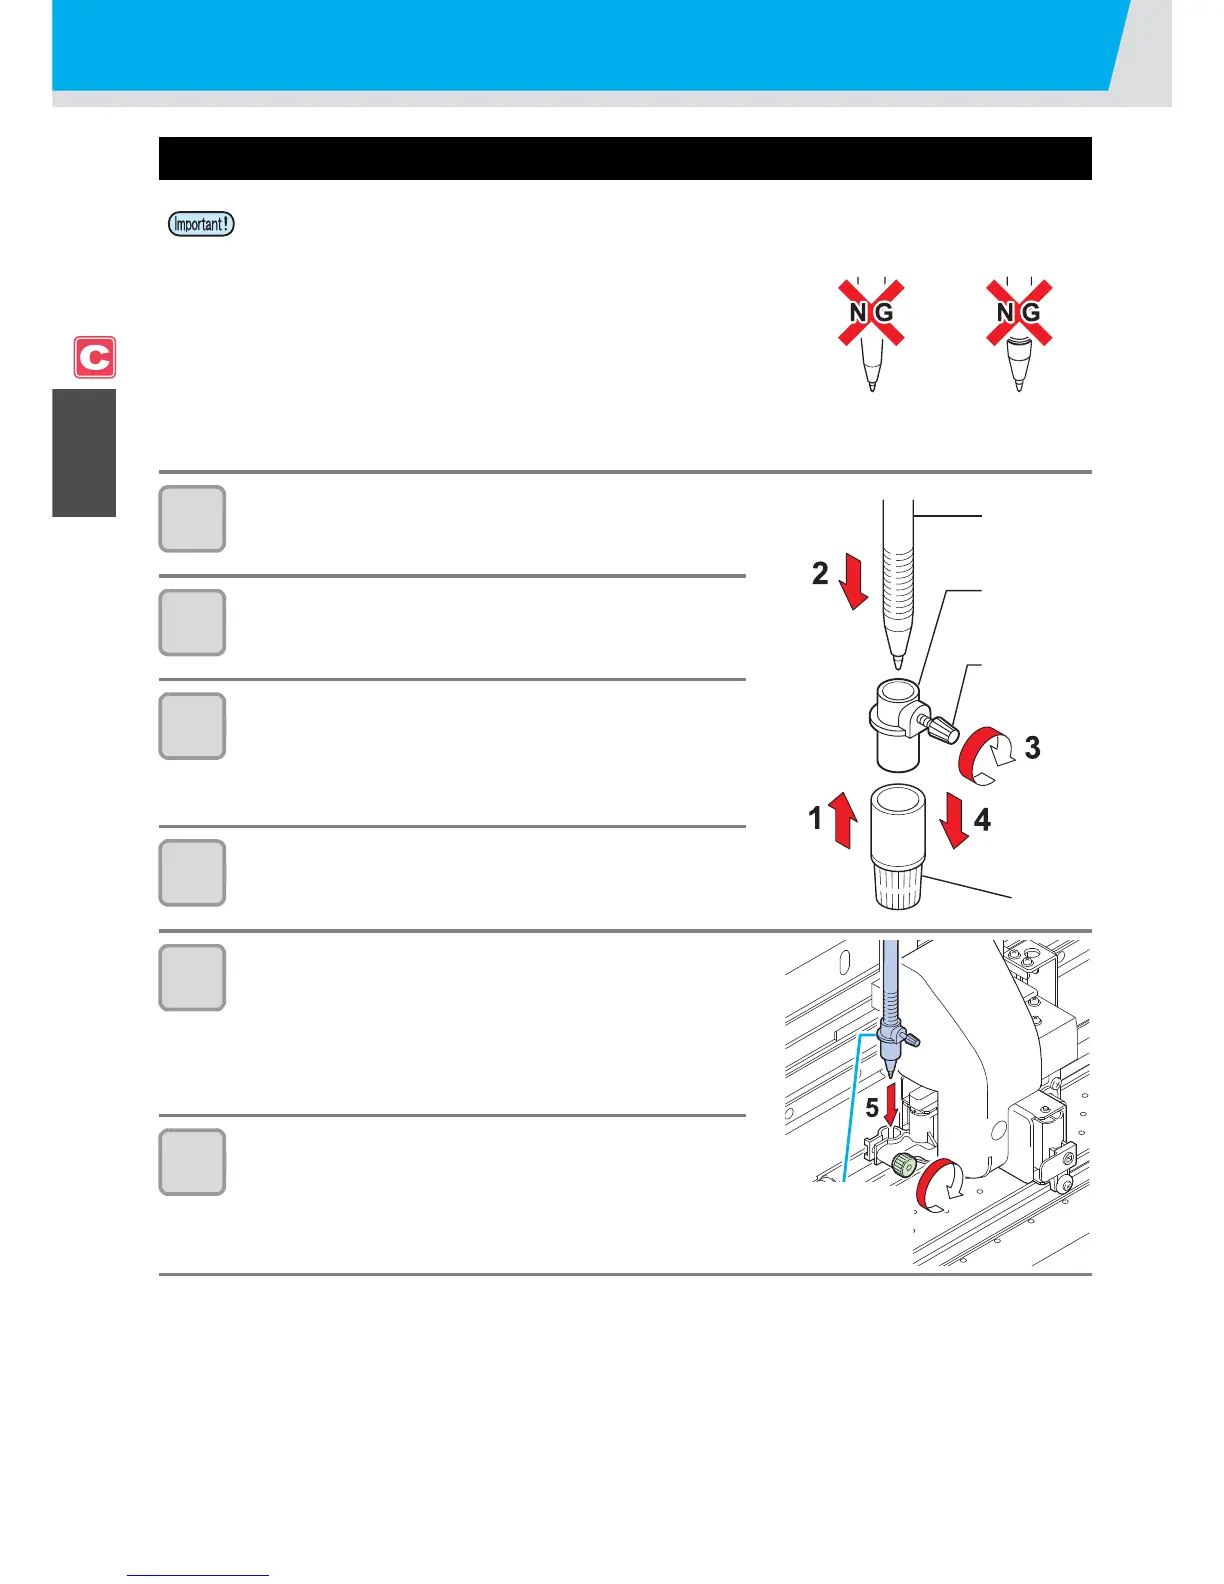
How to Attach a Ballpoint pen
1
Put the cap on the pen adaptor.
• The cap is used to adjust the height of the pen.
2
Insert a pen into the pen adaptor.
• Insert the pen until the point of the pen touches the cap.
3
Fix the point of the pen.
• Tighten the fixing screw clockwise.
• Be careful not to turn the fixing screw of the pen adaptor too tight.
Otherwise, the ballpoint pen may break.
4
Remove the cap.
5
Insert the pen adaptor to which the pen has been
attached into the tool holder.
• Press the brim of the pen adaptor on the tool holder.
• Set the pen adaptor so that the fixing screw does not touch
anything.
6
Fix the tool.
• Turn the knob of the tool holder clockwise
and fix the tool firmly.
• When you use a ballpoint pen sold on the market, use one with a diameter of 8 to 9 mm. Image quality
may change, depending on the pens to be used.
(Recommended ballpoint pen: K105-A and K105-GA (product No.) manufactured by Pentel Co., Ltd.)
• Ballpoint pens shown right may lean over and make contact with
the cover when they are held by the pen adaptor. (Pen whose pen
holder's diameter changes, depending on its parts/Pen that has
projections or steps on its pen holder)

 Loading...


