Chapter 2 Basic Operations
2-4
Loading Media
The machine is designed to use roll media.
For details on compatible media, see P.6-2
[Specifications].
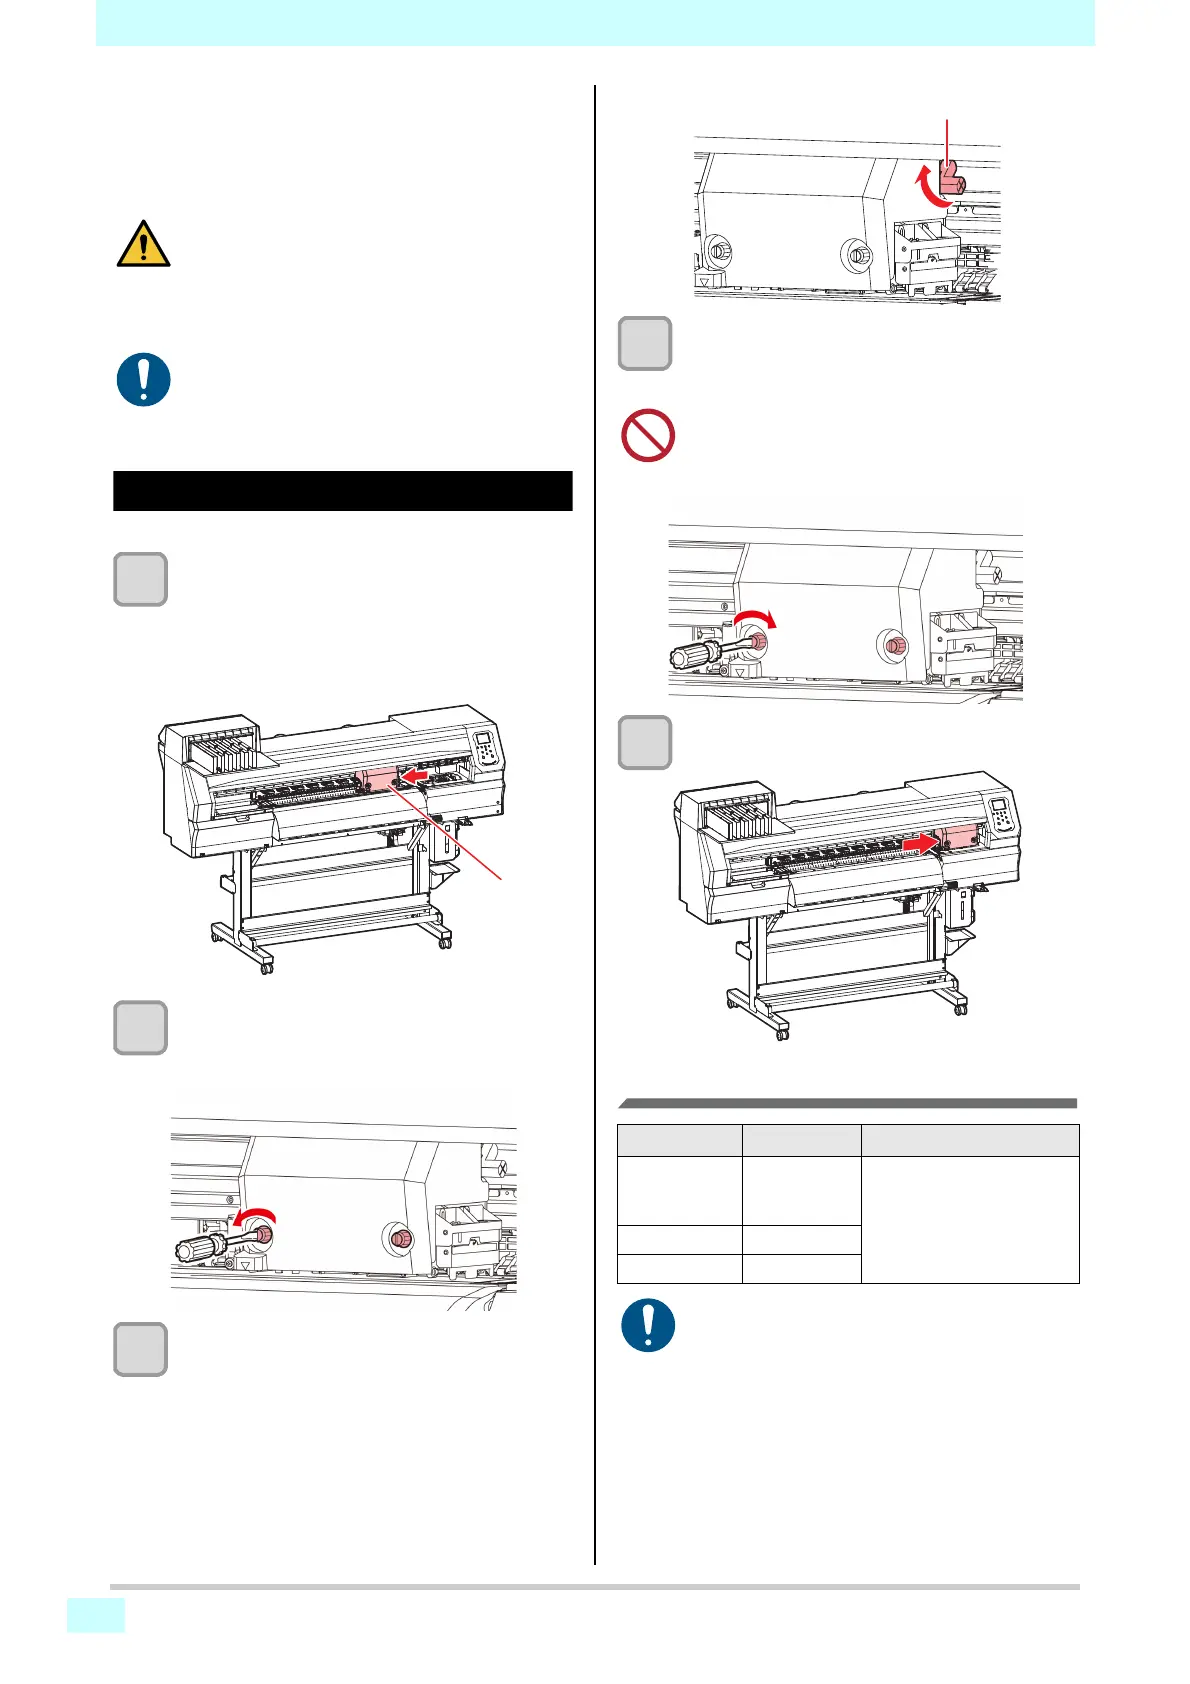
Adjusting head height
Adjust the head height to suit media thickness.
1
Move the carriage over the platen.
• When the machine is on:
Execute [ST.MAINTENANCE - CARRIAGE OUT]
(maintenance function).
• When the machine is off:
Move the carriage manually.
2
Loosen the screws on the front.
• Loosen the screws, rotating each by one turn
using a flathead screwdriver.
3
Adjust the height adjustment lever to suit
the media.
• Referring to P.2-4 [Adjustment lever and range],
adjust the position of the lever.
• Ensure that the height adjustment lever is set to
the upper or lower position. Setting it to an
intermediate height will cause printing errors.
4
Fix the carriage.
• Tighten the screws securely so that they do not
loosen.
5
Return the carriage to the station position.
Adjustment lever and range
• When loading roll media, be careful not to drop it
on your feet or other body parts. Failure to
observe these instructions may result in injury.
• At least two people must work together to load
roll media. Working alone may result in back
injury from the weight of rolls.
• Adjust the head height before loading media.
Adjusting the head height after loading media
may result in jamming, reduced print quality, or
head damage.
• When you have set the height adjustment lever
to the L or H range, do not press the height
adjustment lever down or up when tightening
the screws.
Range Head height Remarks
L range
(recommended)
2 mm
(position set as
shipped)
The base of the head
height can be raised by 1–
2 mm.
Contact a Mimaki sales
representative for details.
M range 2.5 mm
H range 3 mm
• Mist is more likely to be generated when the "M
range" or "H range" is used.