Chapter 4 Maintenance
4-16
3
Attach the exhaust box in its original
position.
• Engage the tabs at the rear of the exhaust box
onto the machine, and then push in the front side.
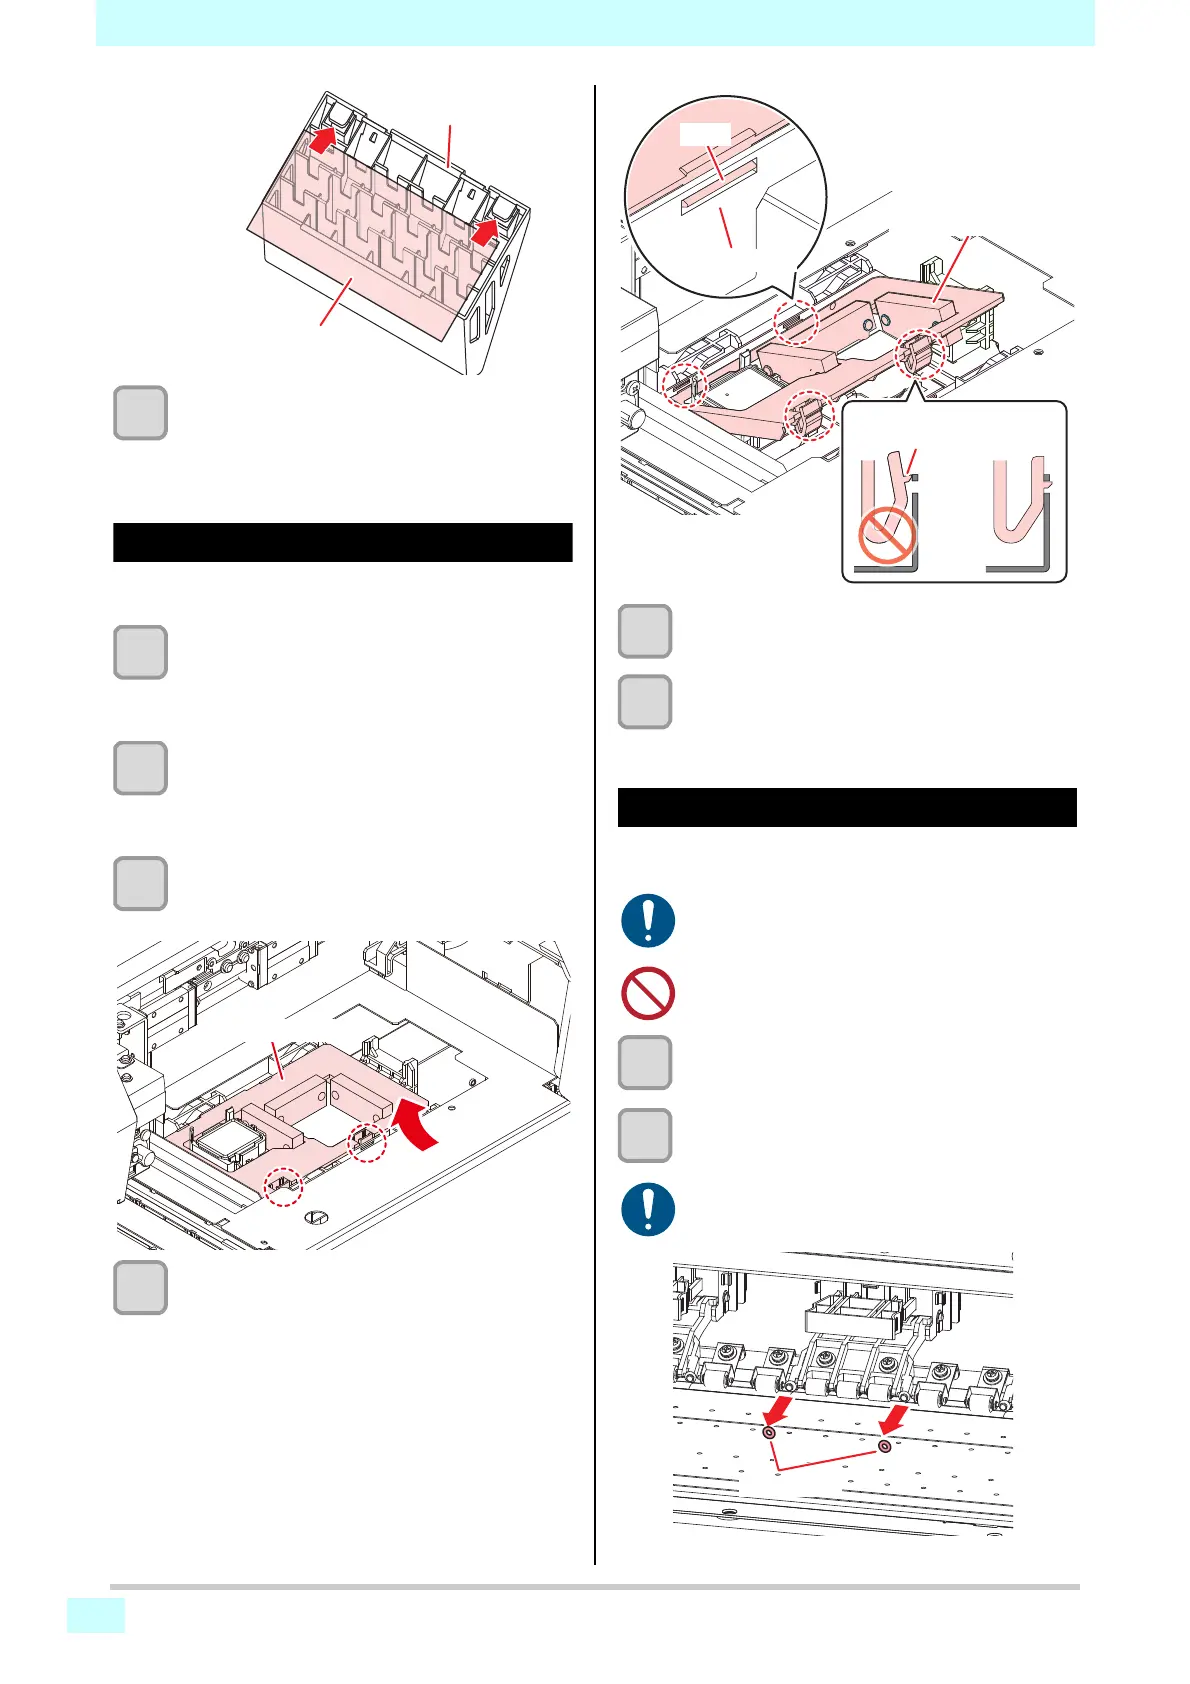
Replacing the CP pad set
If the CP pad set is very dirty or if ink drips onto the media,
replace with a new cap absorber.
1
With the screen in local mode, select
[MENU] > [MAINTENANCE], and then press
the [ENTER] key.
• The Maintenance menu is displayed.
2
Select [STATION MAINT.] > [CARRIAGE
OUT] > [STATION MAINT.], and then press
the [ENTER] key.
• The carriage moves over the platen.
3
Remove the CP pad set.
• Push up the two tabs at the front to remove the
cap absorber.
4
Attach the new CP pad set.
• Push the tabs of the CP pad set into the slits at
the rear of the C slider, then insert the tabs at the
front.
5
After replacement, manually return the
wiper to the rear.
6
Turning On the Power
• Check to confirm that the carriage returns to the
station.
Replacing pinch rollers
Replace the pinch roller with a new pinch roller if it is dirty
or severely worn out.
1
Raise the clamp lever.
2
Remove the O-rings holding the pinch
rollers.
Exhaust fan filter
Exhaust fan BOX
• Turn off the main power supply and unplug the
power cable before carrying out maintenance.
• Do not use maintenance liquids, or alcohol, etc.
• The O-rings are small. Be careful to avoid drop-
ping them into the product interior.
CP pad assembly
Tab
C slider
Press to engage the tabs