A5/A3™ Service Manual 046-001141-00 6 - 25
Repair and Disassembly Disassemble the Assemblies
7. Unscrew the four screws around the O2 flush assembly to remove the assembly from the
manifold.
FIGURE 6-45
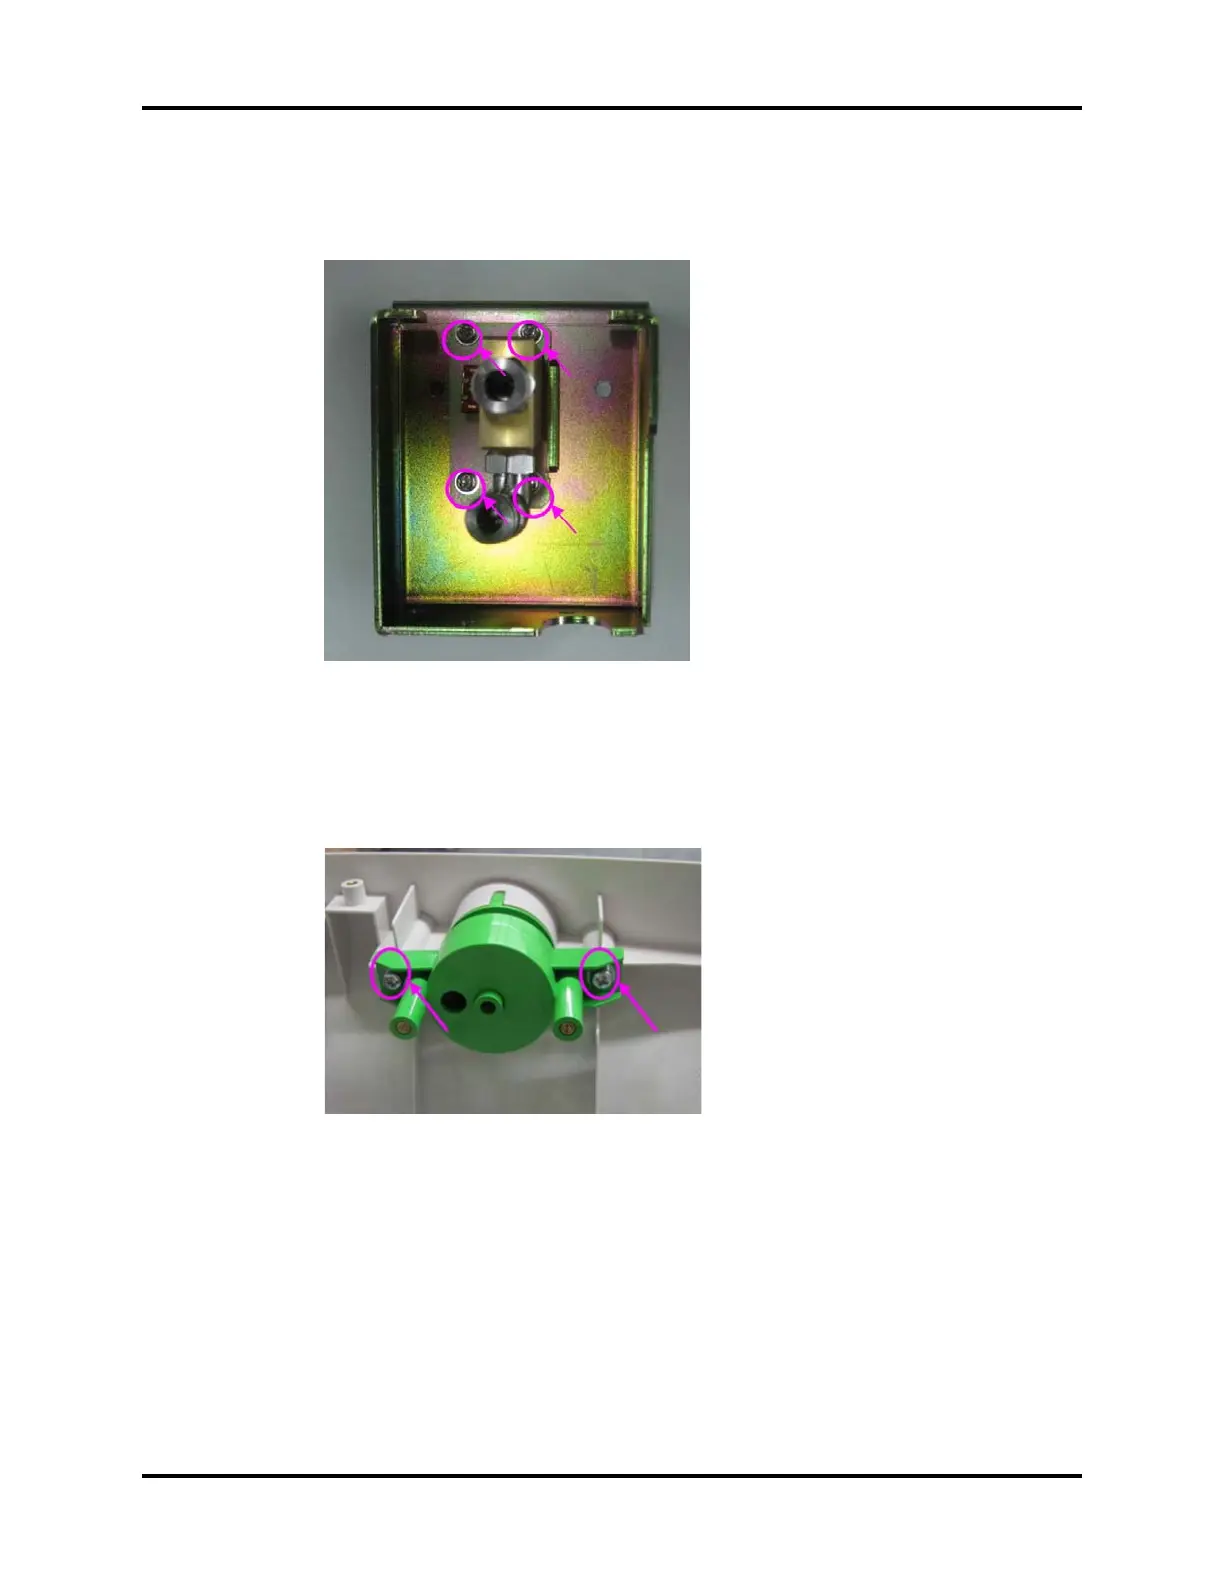
8. Unscrew the two screws around the O2 flush button to remove the button from the machine. If
neccessory, clean the O2 flush button with a soft, lint-free cloth. The recommended cleaning
agents are water and green soap tincture. Ensure thar the O2 flush button is completely dry
before reinstall it.
FIGURE 6-46
6.2.3.7 Remove the Touch Panel (A5 Only)
1. Remove the work surface cover plate.
2. Remove the metal cover plate.
3. Unplug the touch panel data cable.
4. Remove the six screws on the touch panel to remove the panel.